30
WARNING: Alkaline Baeries May explode or leak, and cause burn injury if
recharged, disposed of in fire, mixed with a different baery type, inserted
backwards or disassembled. Replace all baeries at the same me. Do not
carry baeries loose in your pocket or purse. Do not remove the baery
label.
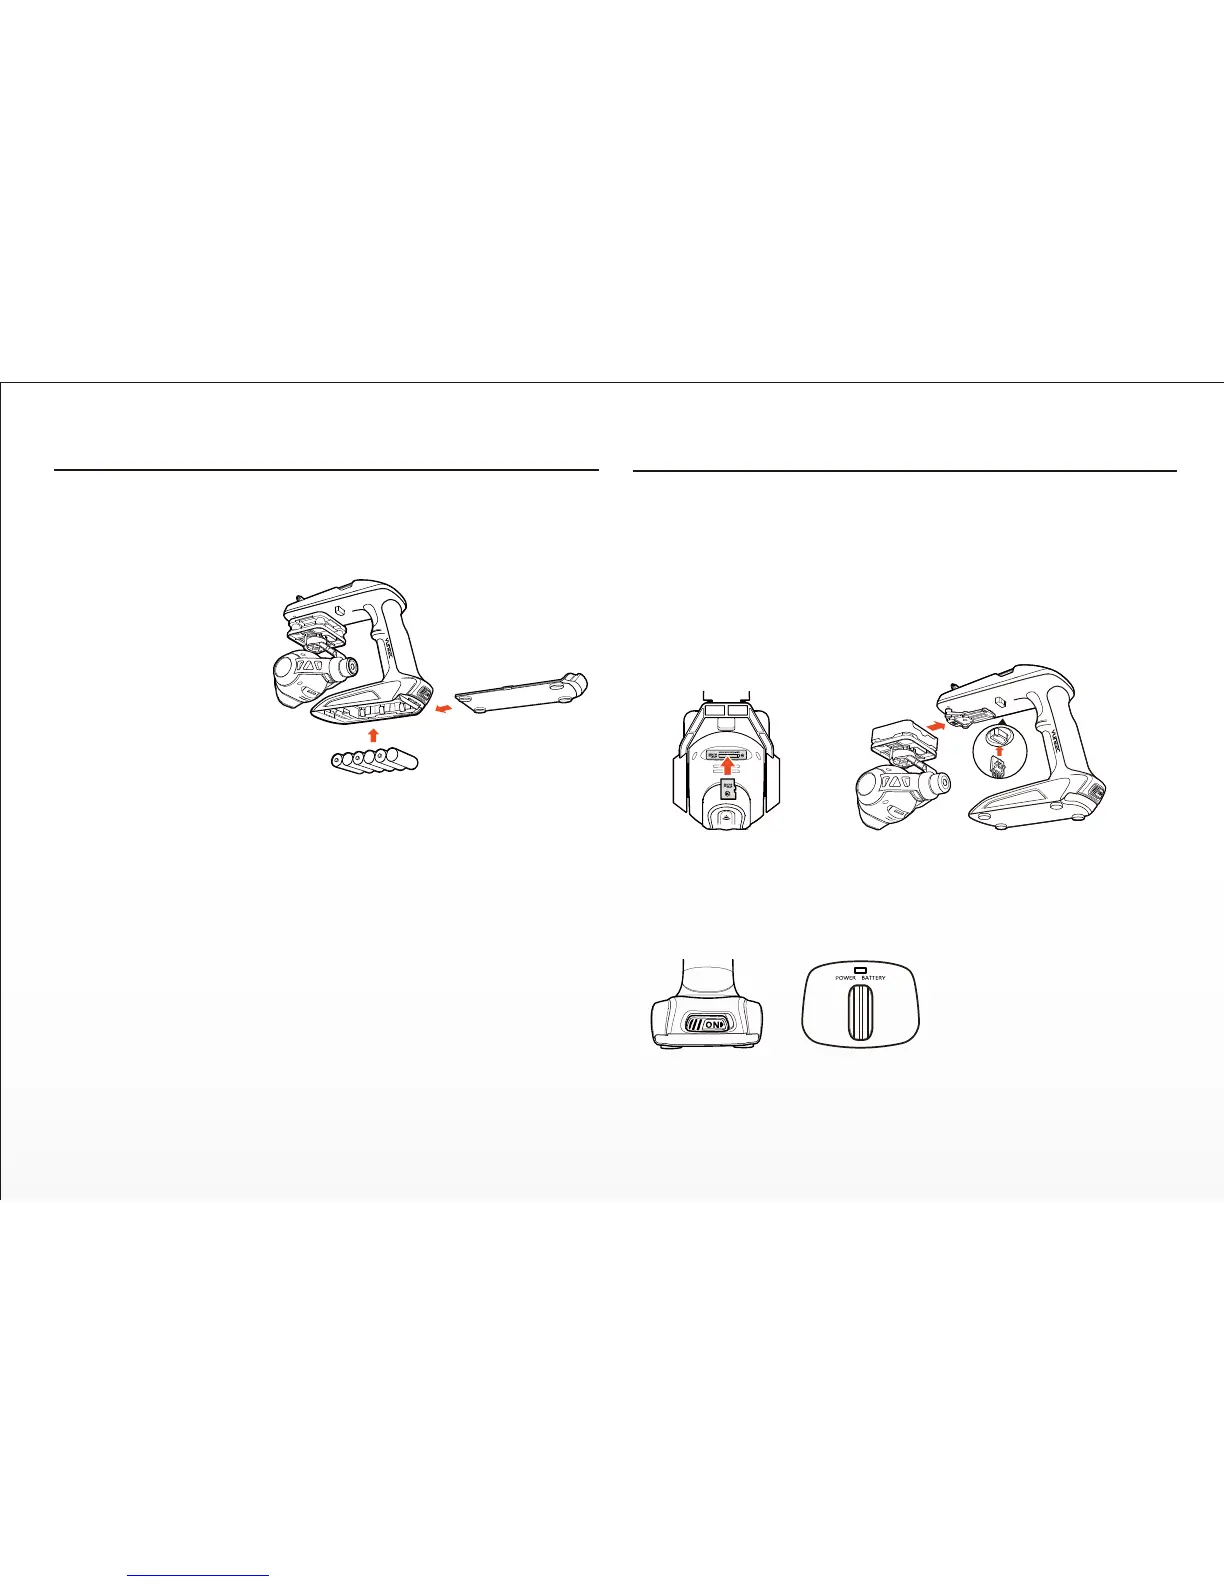
STEP 1) Remove the
Baery Cover / Door from
the boom of the Steady-
Grip™
Hold the boom of the
SteadyGrip™ toward
yourself with the front
part facing downward.
Installing The Steadygrip™ Baeries
WARNING: Before switching on the SteadyGrip™ it is highly recommended
to first securely aach the CGO2+ to your SteadyGrip™.
QUICK TIP: It’s a good idea to ensure you have your microSD card with lots
of space for photos and videos handy.
STEP 1) Carefully slide the top part of the CGO2+ (that also aaches below the nose
of the Q500 Typhoon) onto the mount below the front part of the SteadyGrip™. A
corresponding ‘click’ will be noced once the CGO2+ has securely been installed into
the slide-in mount on the SteadyGrip™.
Aaching The CGO2+ to The Steadygrip™
Slide the baery cover / door upward with slight force and inspect the AA
baery compartment.
STEP 2) Install 6x AA Baeries
For long life and extended run me, we recommend Energizer® 1.5V AA
Baeries which are known to have 2,850mAh of stored energy. The
SteadyGrip™ will run for approximately 48-64 minutes depending on the
gravity of usage.
STEP 3) Re-installing the Baery Cover / Door on the boom of the
SteadyGrip™
Once you’ve installed 6 fresh AA baeries, Hold the boom of the Steady-
Grip™ toward yourself with the front part facing downward. Slide the
baery cover / door downward with slight force and ensure you hear and
feel a noceable ‘click’ indicang the baery cover / door has been closed
securely.
STEP 2) Carefully connect the CGO2+’s power/control connector to the power/control
port of the CGO SteadyGrip™ and then insert a microSD card into the corresponding slot
on the boom of the CGO2+. You can use the included 8GB card (from your RTF
package) or any Class 10 microSD card up to 128GB.
STEP 3) Powering on and inializaon. Place your CGO SteadyGrip™ on a flat and stable
surface, then switch on the Steady-
Grip™ and it will inialize aer 4-8
seconds of no movement or
vibraon.
SteadyGrip™ Main LED Status:
Power On: Green LED Blinking for 8 seconds (Starng up, Inializaon) and Then Solid
Green for READY TO USE!
Low Voltage Warning: Green LED Blinking Slowly
Voltage Dropping: Green Blinking LED Speeds Up As The Voltage Drops
CGO2+ Error: Red LED Blinking