TD 92930EN
13 December 2013 /Ver B
Configuration Manual
WL3 and WL3 Plus WLAN Handset
12
4. Installation of WLAN Handsets
then log on the Device Manager. After log in, the settings in the handset are changed
according to the templates, that were applied to the Numbers, in the Device Manager
application in WSG.
NOTE: If using Easy Deployment, only perform step 6) below.
1 Open the WinPDM.
2 Do one of the following:
• If a network template was created in the Device Manager in WSG, export this
template and import it to WinPDM. See
Appendix A for more information.
(Recommended)
• Create a template (see 4.5.1 Create a template on page 15) with the following
network parameters:
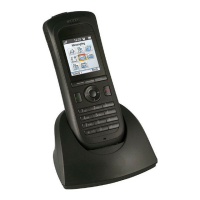
3 Place the handset in the Desktop Programmer (DP1) cradle.
4 Run the template. See 4.5.3 .Apply a Template to a Handset without a Number
on page 15.
5 Remove the handset when synchronization is finished.
6 Enter the Number and the password
1
(if any). Press “Login“.
7 Repeat step 3 – 6 for all handsets.
Settings that were stored for the handset in the Device Manager in WSG are now
downloaded to the handset. This can, for example, be unique soft- or hot keys that
have been prepared earlier. When the settings have been downloaded to the handset,
the handset can restart, depending on the parameter changes.
The handset synchronizes with the WSG at startup, and also immediately after any
handset parameter change. (The change is done either using the handset keypad, or
when editing parameters in the Device Manager in the ). Depending on what is
changed, and where the change is done, the parameters are synchronized to, or from,
the handset.
Those changes are not stored in the WinPDM, as there is no connection between the
WinPDM and the WSG Device Management database. The database in the WinPDM
synchronizes with the handset, when the handset is placed in the Desktop Programmer
(DP1) cradle (online via USB).
NOTE: As there is no connection between the WinPDM and the WSG Device
Management databases, except over the handset, the WLAN and WSG settings
can differ in the WinPDM and the WSG. Parameters can inadvertently be
reverted with old values, when first, the WinPDM synchronization process runs,
(when the handset is placed in the Desktop Programmer (DP1) cradle), and after
that, (when the handset is removed from the Desktop Programmer (DP1) cradle),
- Network settings
a
(located under Network > Network A (B, C, or D)
a. All required system settings for the WLAN. For example SSID and Security
mode.
NOTE: If the production system is using 802.1x security, this method is not the
best option, since the certificates must be manually installed in the handset before
they login for the first time (before step 6). The Easy Deployment process over-
comes this problem by using a staging WLAN, which does not use 802.1x.
- WSG settings
b
(located under Device > WSG)
b. IP address and password (if any) to WSG.
NOTE: The parameters in this template should be identical to the
parameters in the network template created in the WSG.
1. The password is only required if the “Password“ parameter is set.

 Loading...