14
Installing / Replacing your iColor coater - UV Lamp (continued)
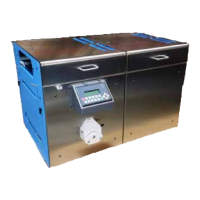
9. With the UV bulb access covers and heat sink removed. Taking care not to touch the UV bulb, gen-
tly pull UV bulb by the white end cap through either the OP or NOP side UV bulb access hole.
10. Carefully unwrap the New bulb. Take care NOT to touch the glass surface with your ngers as it
will cause the bulb life to decrease. Gently slide the bulb through the access hole and place ends in
mounts.
NOTE: If you accidentally touch the bulb with your ngers or hands be sure to clean the bulb
with Isopropyl Alcohol (IPA) as soon as possible
11. Reinstall Bulb Access Covers making sure the tab is on top of the bulb end caps. This will ensure
the bulb remains properly seated in the mounts. (Failure to do so will result in bulb breakage when
the shutter is activated).
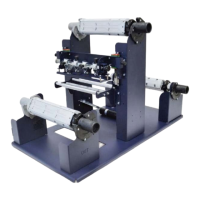
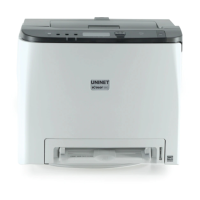
12. Connect the wires to the terminal blocks. Make sure to place the wire into the terminal block above
the incoming wire.
13. Replace the Heat Sink and close the UV chamber safety cover.
14. Plug in Coating Pump.
15. Replace the Side Covers, plug in Control Panel, reinstall Control Panel Mount.
Figure - Bulb Connect
(Operators Side )
Figure - Bulb Connect
(Non- Operators Side)
Bulb Connect
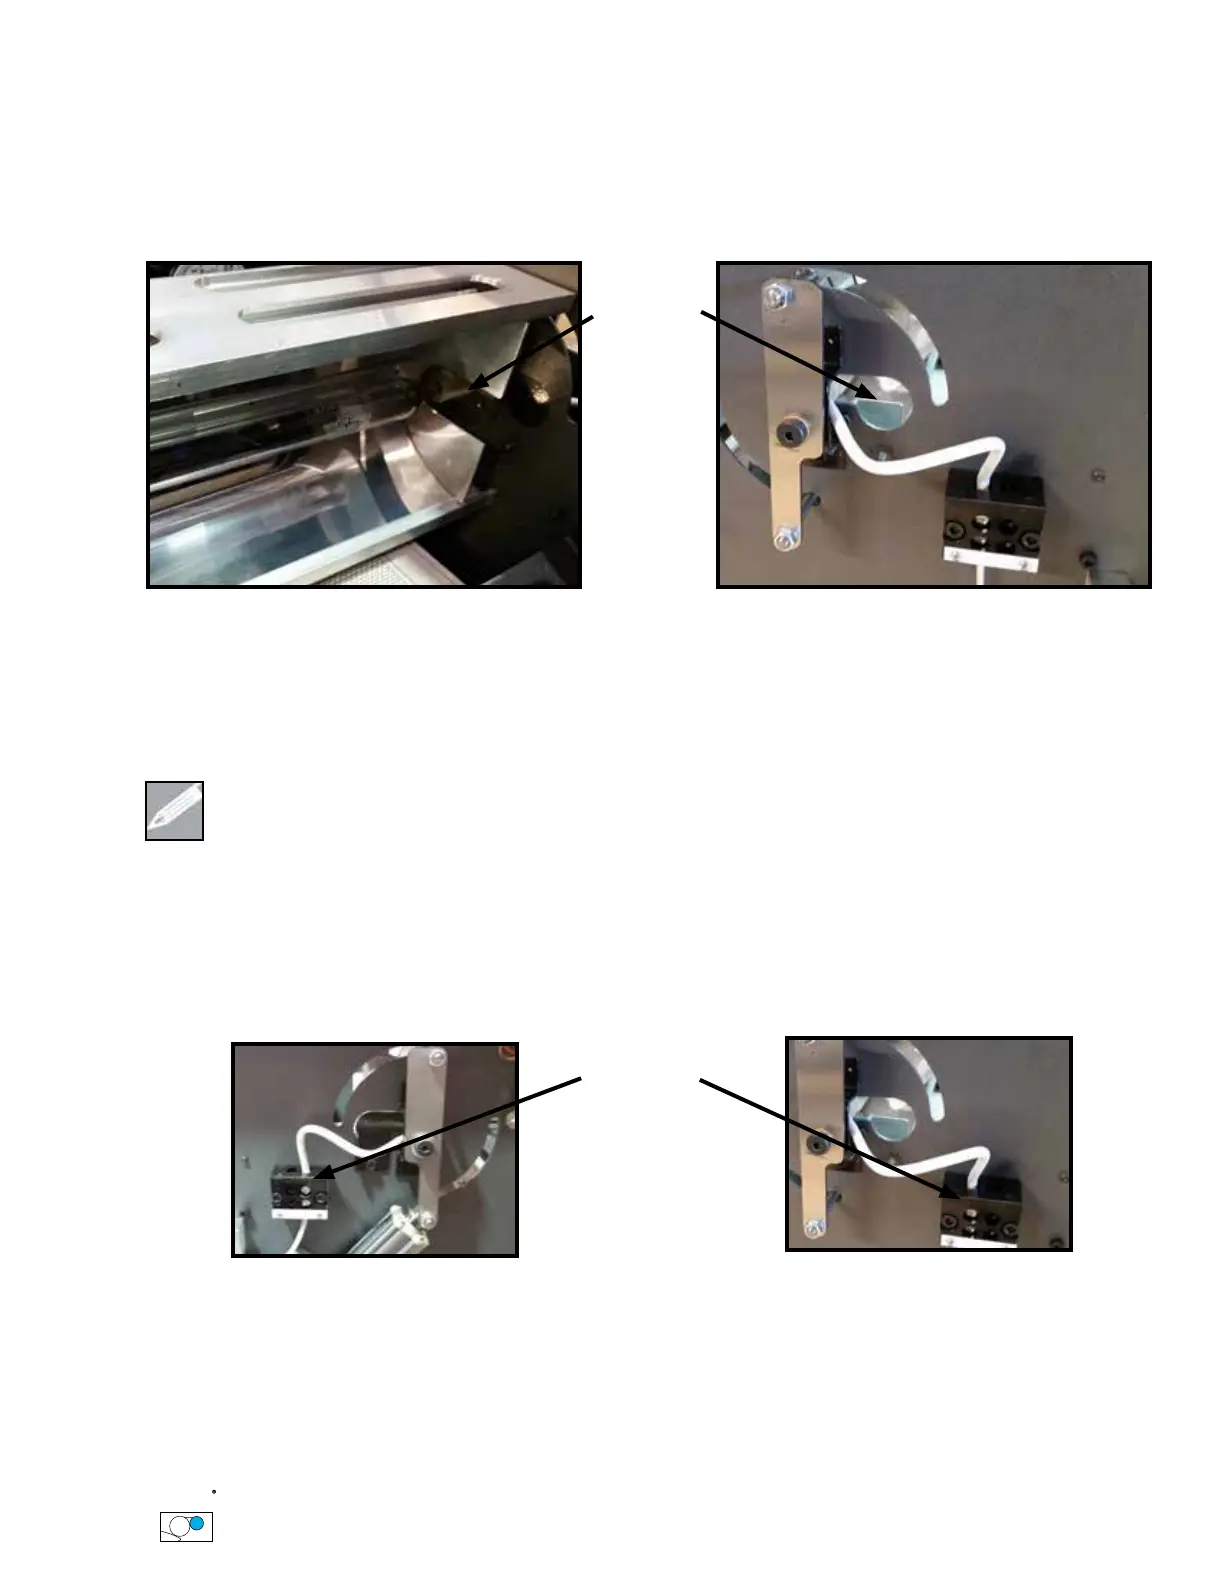
Figure - Rotated UV Reector with Heat Sink
Removed
Figure - UV Bulb Access Hole
Bulb Access
Hole