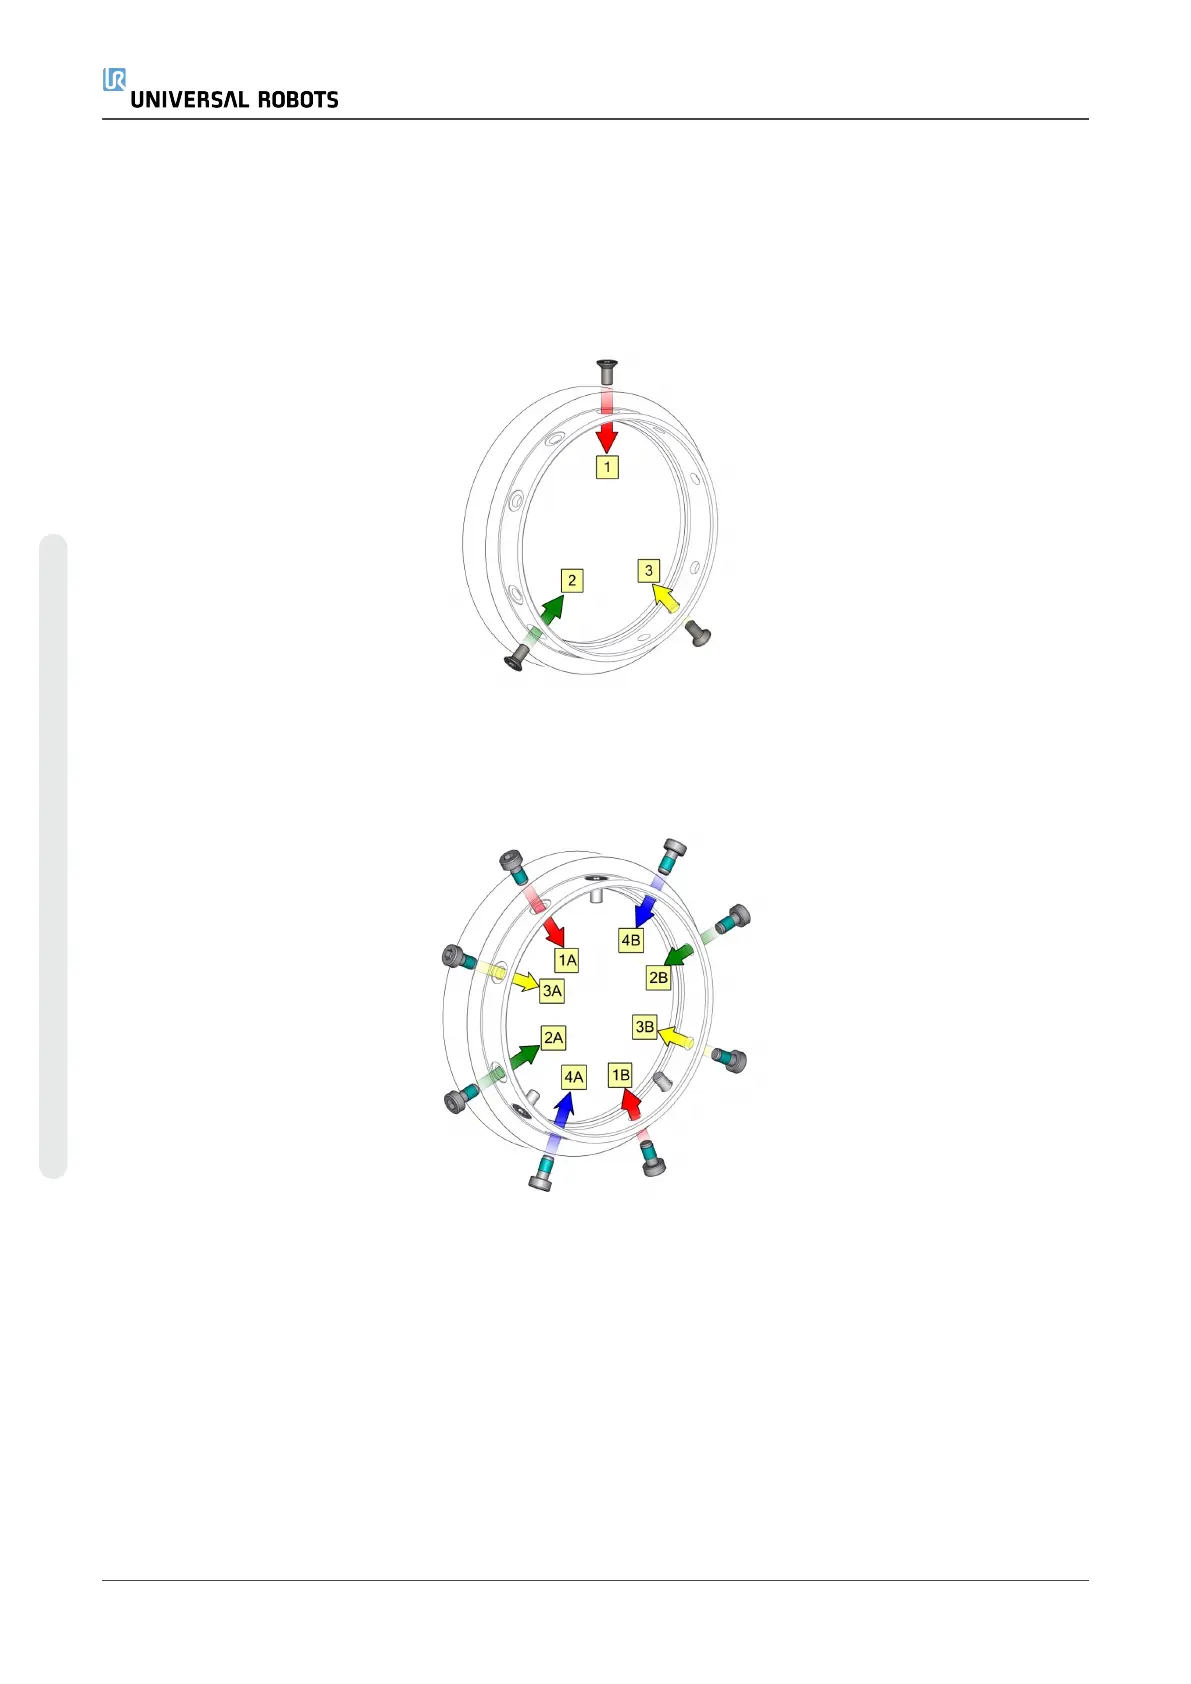
1. Orient the joints according to the marks (indicated by red arrows in the image below) and
gently push the two joints together.
2. Insert and tighten the hex countersunk screws according to the image below. Do not exceed
recommended torque.
Example: 1, 2, 3
3. Insert and tighten the hex screws according to the image below. Do not exceed
recommended torque.
Example: 1A, 1B, 2A, 2B etc.
e-Series 34 Service Manual
Copyright © 2009–2024 by UniversalRobotsA/S. All rights reserved.
 Loading...