Page 10
49668501 Rev. D Radial 8, 88, HT Feeders (Dispensing Heads)
This document supports Dual, Triple, and Quad Span Feeder Assemblies (Dispensing Heads)
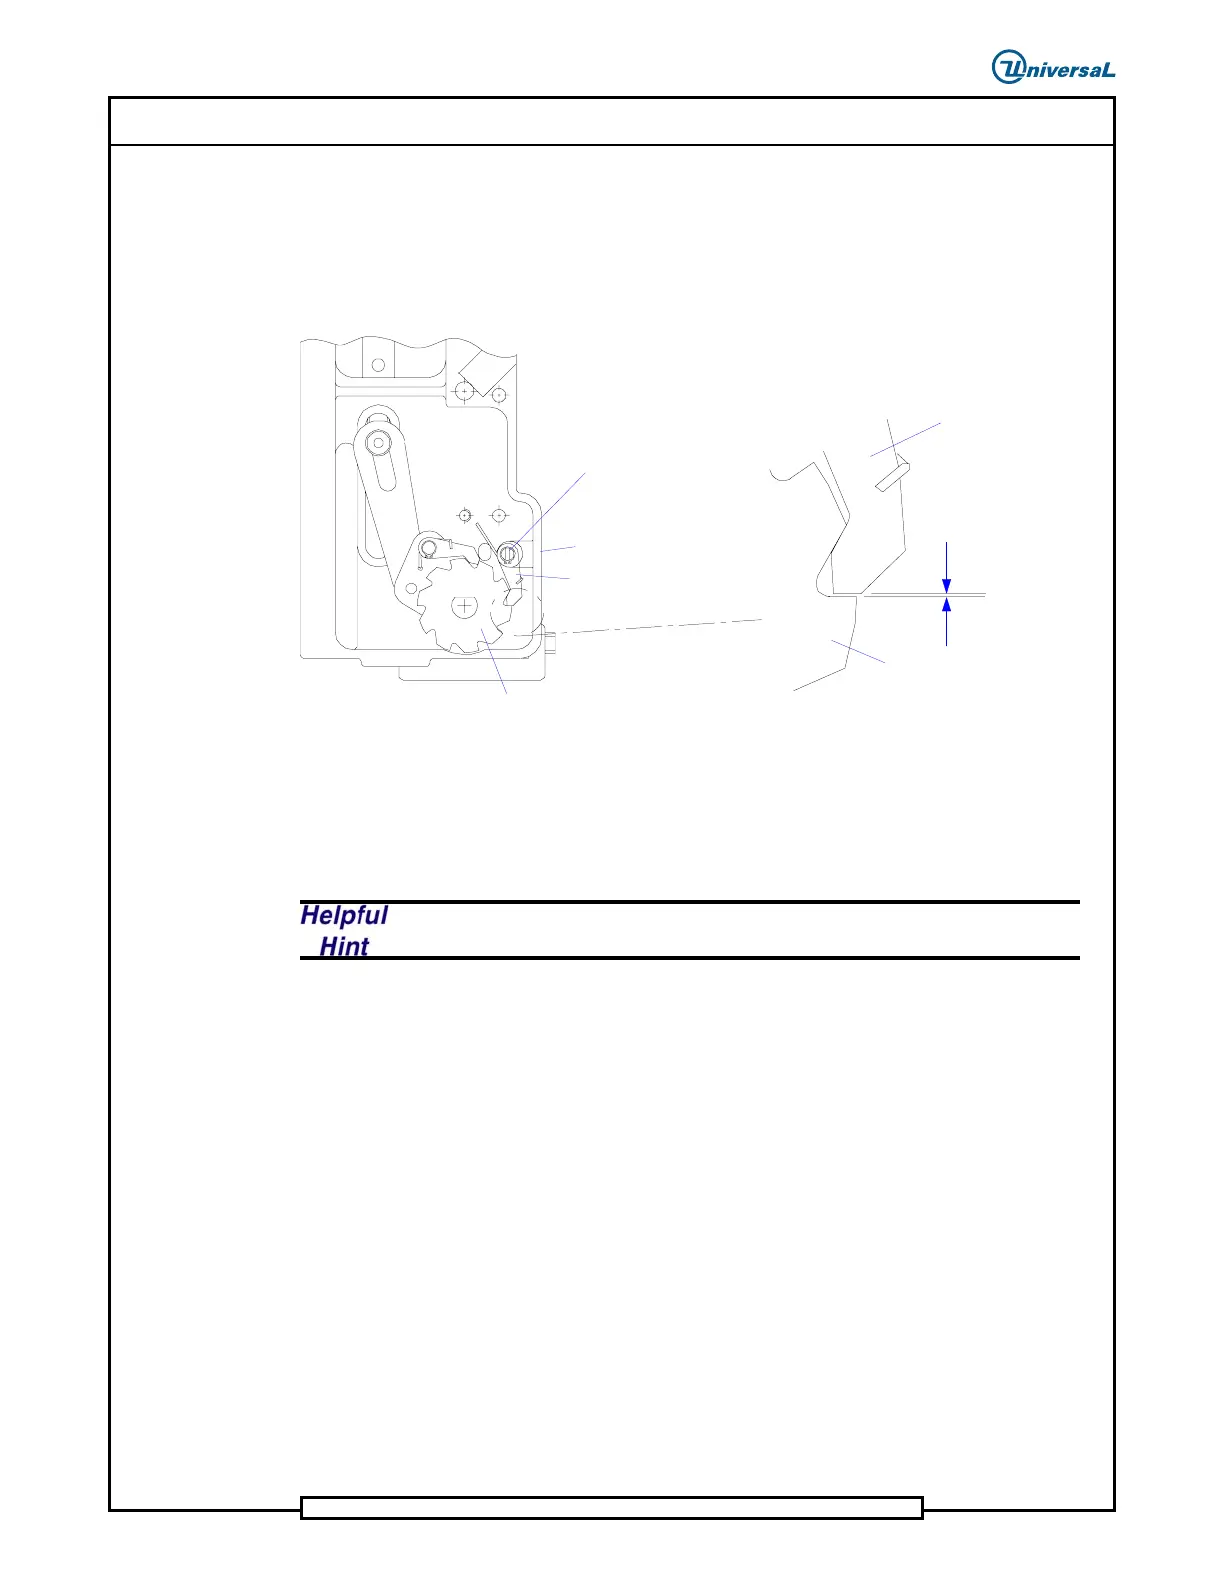
3. Loosen the set screw that secures the anti-back-up dog eccentric in
position as illustrated. Turn the set screw in that secures the eccentric
until it bottoms out on the eccentric, but do not tighten.
4. Manually actuate the main driver to position the reference mark on the
ratchet wheel at the anti-back-up dog.
Eccentric
Locking Set Screw
Anti-backup Dog
Ratchet Wheel
Clearance .002 inch
(0,05mm)
Feeder
(bottom view)
Anti-backup
Dog
Ratchet Wheel
5. Rotate the eccentric to increase the clearance between anti-back-up dog
and the ratchet wheel.
6. Place a .002 inch (0,05mm) feeler gauge or shim stock between the
anti-back-up dog and the ratchet wheel.
Use a slightly larger size feeler gauge, adjust to be tight.
7. Rotate the eccentric adjustment screw until the shim stock can not be
easily removed from between the anti-back-up dog and the ratchet
wheel.
8. Loosen the eccentric until there is a slight drag.
9. Tighten the set screw after the correct clearance has been set.
10. Connect the air to the feeder and cycle the feeder observing the
function of the anti-back-up dog.
11. If the anti-back-up dog fails to drop into position on any tooth, repeat
the procedure and adjust the anti-back-up dog to the tooth where it did
not correctly drop into position.
12. Install the feeder on the machine.
End of procedure