Page 10 113100-000 | MX15 / MX19 - Operator Manual
Maintenance
M
AINTENANCE
WARNING
!
!
Never perform service while the platform is elevated without first blocking the elevating assembly.
DO NOT stand in the elevating assembly area while deploying or storing the brace.
B
LOCKING
T
HE
E
LEVATING
A
SSEMBLY
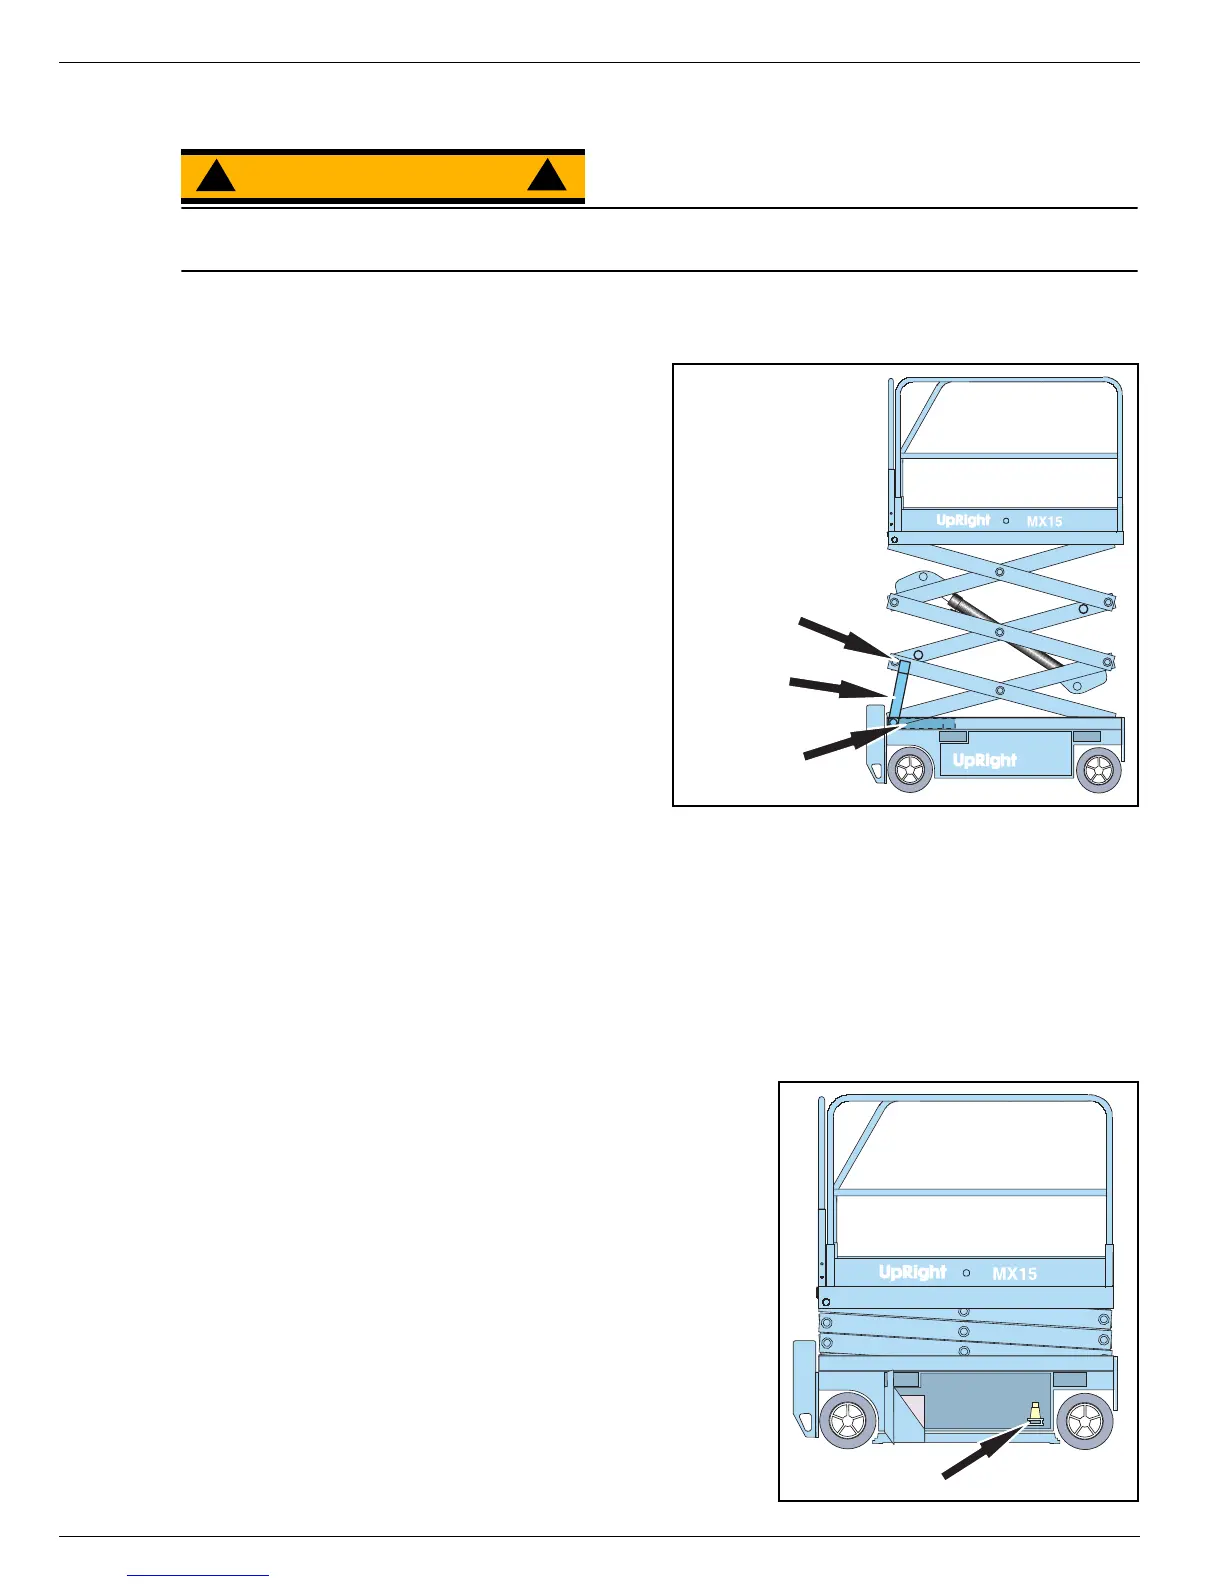
Figure 7:
Elevating Assembly Brace
E
LEVATING
A
SSEMBLY
B
RACE
I
NSTALLATION
1. Park the machine on a firm, level surface. Com-
pletely unload the platform before deploying the
Elevating Assembly Brace.
2. Verify that the Chassis and Platform Emergency
Stop Switches are ON by pulling each button
out.
3. Turn and hold the Chassis Key Switch to
CHASSIS. Push the Chassis Lift/Lower Switch to
UP and elevate the platform approximately
2,1 m (7ft.).
4. Rotate the Elevating Assembly Brace to a verti-
cal position.
5. Carefully lower the platform until the end of the
Elevating Assembly Arm Weldment rests on the
Brace.
E
LEVATING
A
SSEMBLY
B
RACE
S
TORAGE
1. While holding the Brace, slowly raise the platform using the Chassis Controls until the end of the Elevat-
ing Assembly Arm Weldment clears the Elevating Assembly Brace.
2. Rotate the Elevating Assembly Brace forward to rest on the Chassis.
3. Push the Chassis Lift/Lower Switch to LOWER and completely lower the platform.
L
EVEL
S
ENSOR
Figure 8:
Level Sensor Location
The Level Sensor Is located inside the chassis. To verify the
sensor is working properly there are two LED's under the sen-
sor; green indicates the sensor is ON (has power), red indi-
cates the sensor is LEVEL.
T
ESTING
THE
L
EVEL
S
ENSOR
1. Place machine on firm level surface.
2. Open the door.
3. Push and hold the sensor off of level.
4. Push the Chassis Lift Switch to the UP position.
• The alarm should sound, and the platform should not lift.
5. Close and latch the door.
Elevating
Assembly Arm
Weldment
Brace
Installed
Brace
Stored
Level Sensor
 Loading...