55Instructions for installation and servicing ecoTEC 839592_12
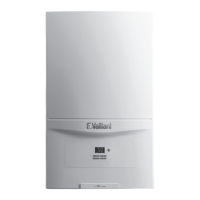
9.2 Replacing burner
Danger!
Before replacing the component, comply with
the safety instructions in Section 9.1.
• Dismantle the burner module as described in Section 7.2.1.
1
Fig. 9.1 Replacing burner
•
Loosen the 4 screws (1) on burner, and remove the burner.
•
Mount the new burner with a new seal. Ensuring that the
notch in the burner aligns with the burner viewing window.
• Install the burner module as described in Section 7.2.4.
• After completing the work, check for gas leaks and
perform a function check (see section 7.6).
9.3 Replacing fan or gas valve
Danger!
Before replacing the component, comply with
the safety instructions in section 9.1.
• Turn off the boiler.
• Isolate the electrical supply to the boiler.
• Remove the air intake pipe (Fig. 7.1, Pos. 2).
• Loosen the gas supply pipe on the gas fitting (Fig. 7.2,
Pos. 3).
1
3
2
4
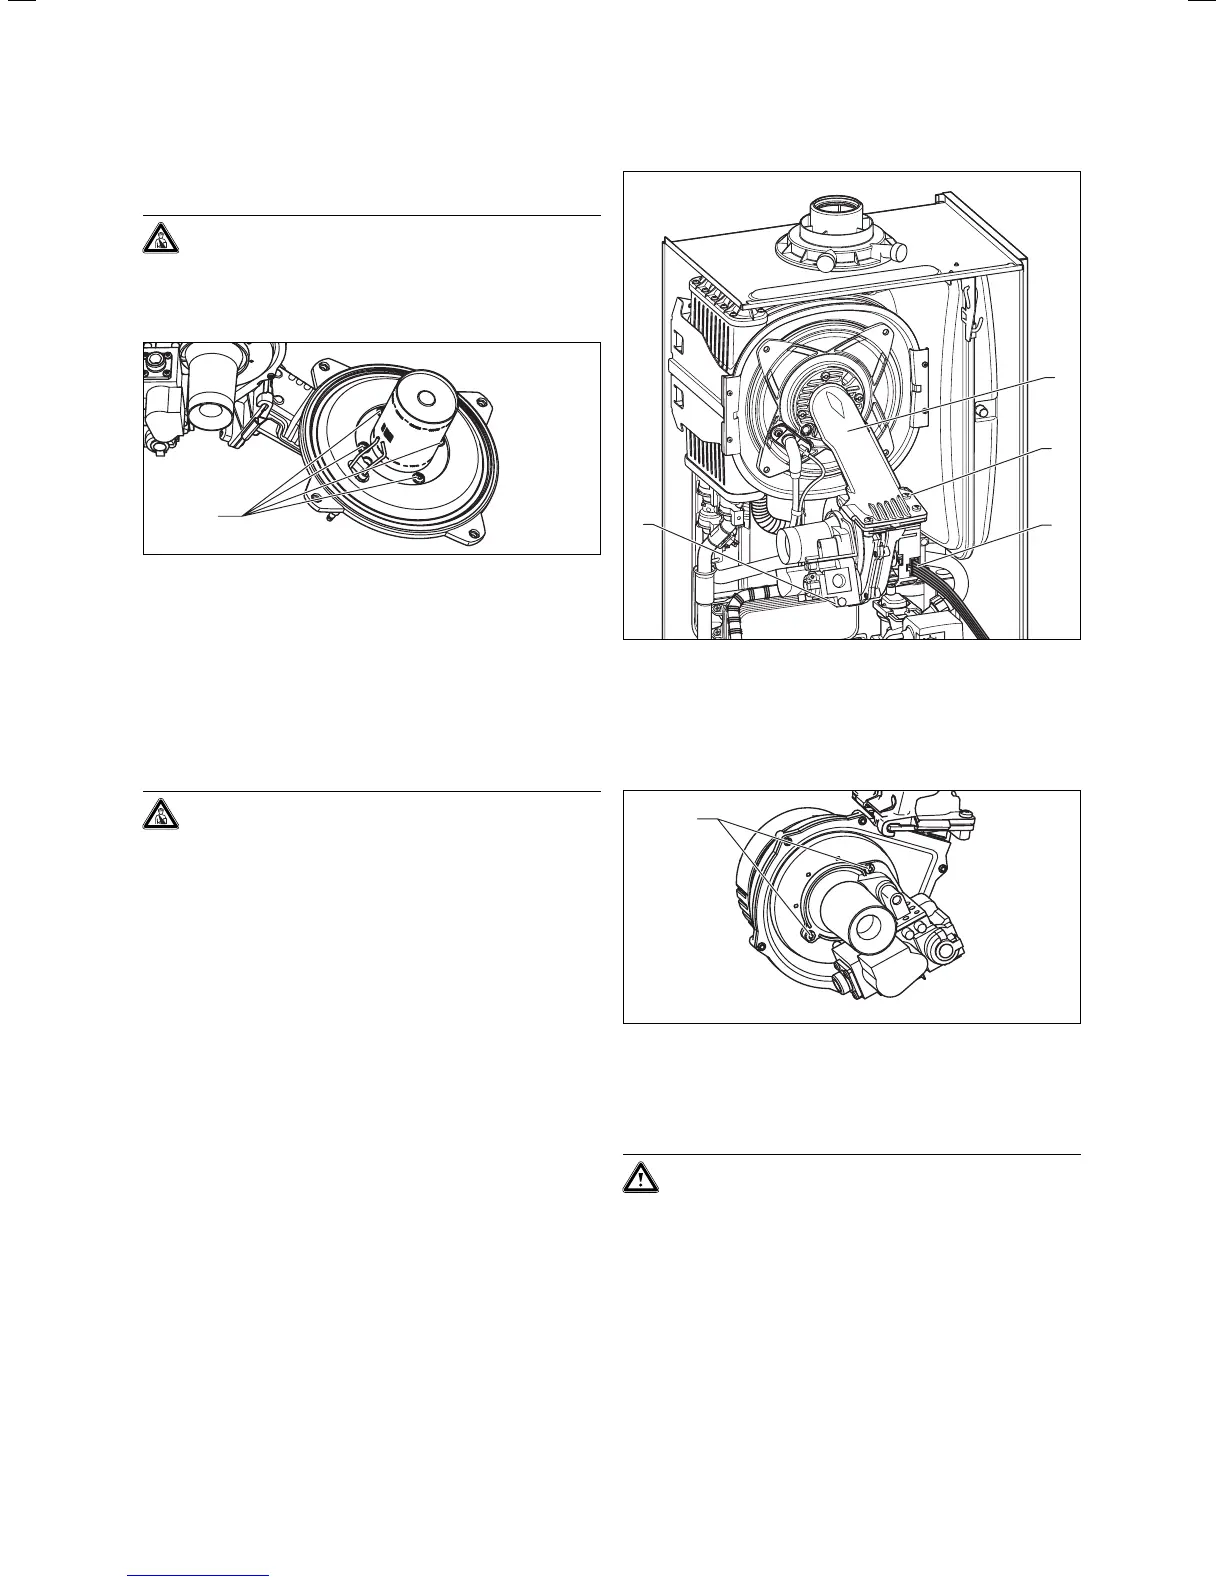
Fig. 9.2 Dismantling fan with gas fitting
• Pull out the plug (4) from the gas valve.
• Pull out the plug (3) from the fan.
• Remove the three screws (2) on the burner module (1).
• Remove the complete “gas valve/fan” unit.
5
Fig. 9.3 Gas fitting/fan screwed joint
• Remove both fixing screws (5) on the gas valve and
remove the fan from the gas valve.
• Replace the defective component.
Caution!
Mount the gas valve and the fan in the same
position as before.
• Screw on the fan with the gas valve. Use new seals.
• Install the complete “gas valve/fan” unit in reverse
sequence.
• After completing the work, check for gas leaks and
perform a function check (see section 7.6).
Parts replacement 9

 Loading...