Installation ________________________________________________________________________
Vaisala _________________________________________________________________________ 17
CAUTION
In pressurized processed it is essential to tighten the
supporting nuts and screws very carefully to prevent
loosening of the probe by the action of pressure.
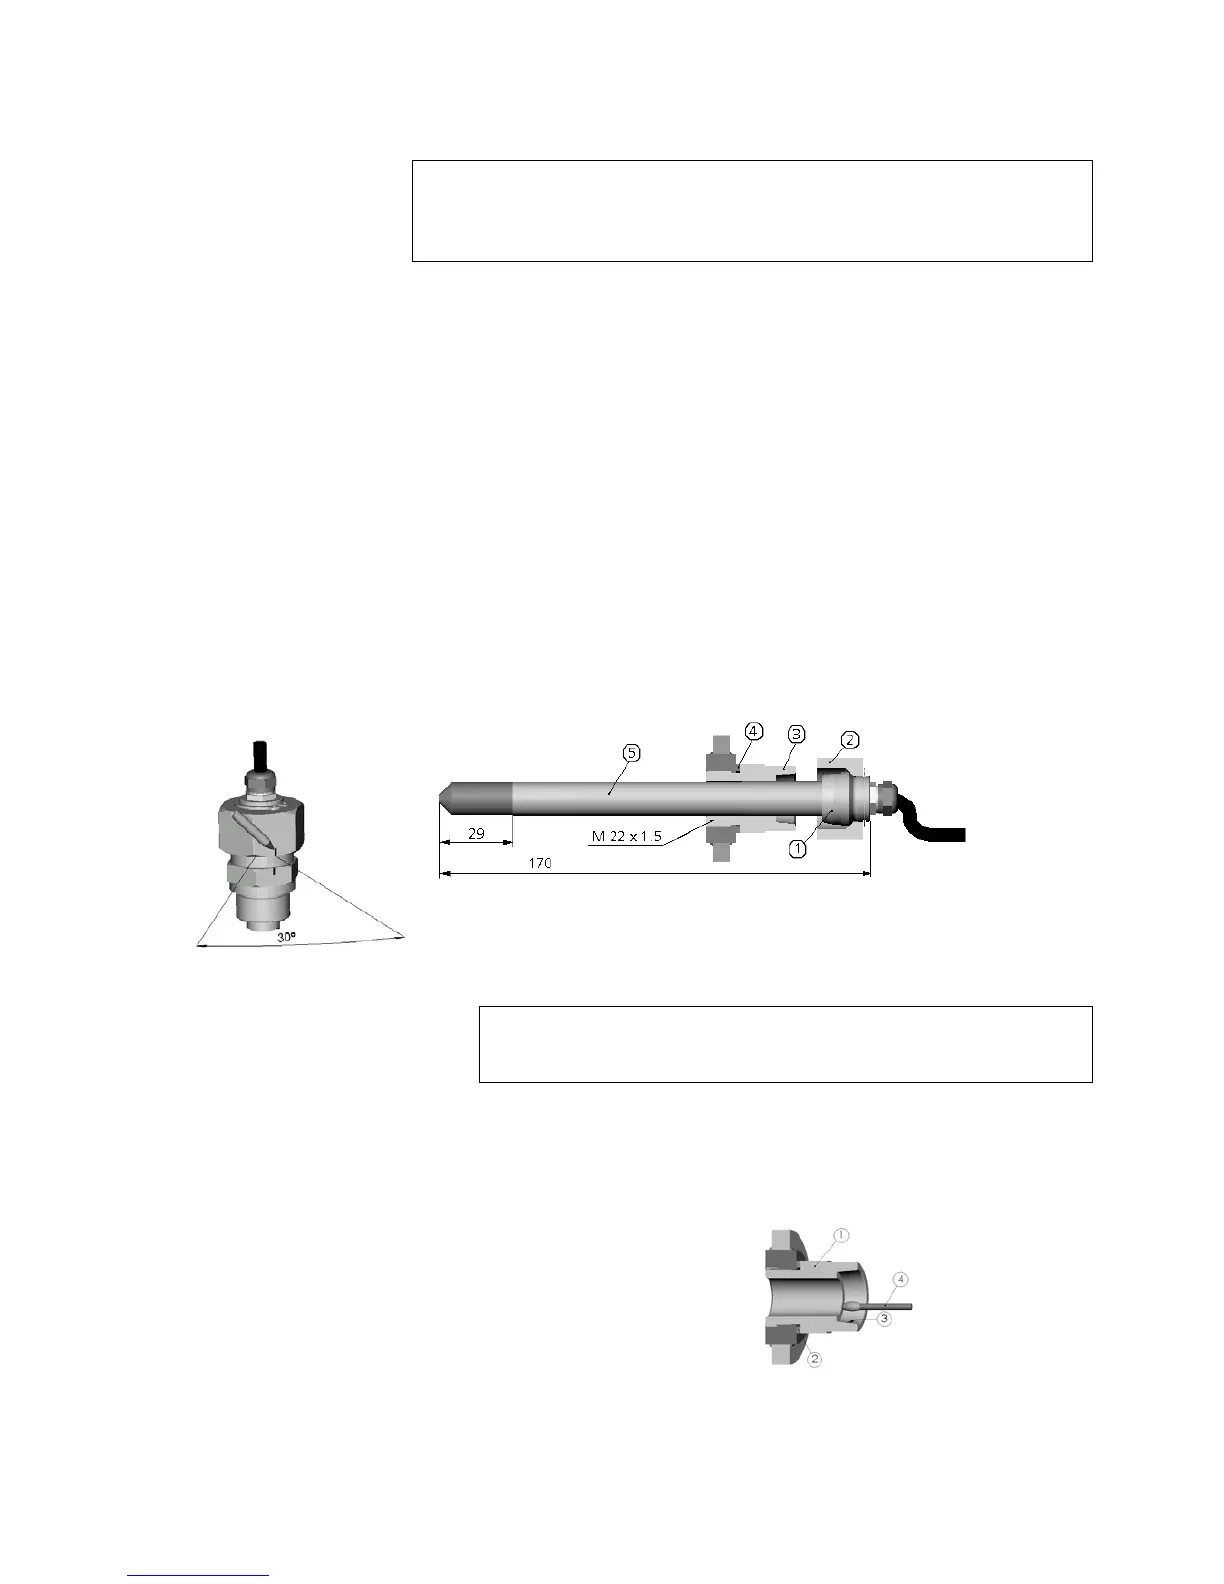
1. Unscrew the fitting screw from the nut and the sensor head.
2. Fasten the fitting screw to the chamber wall with a sealing washer.
Tighten the fitting screw into the threaded sleeve with a torque
spanner. The tightening torque is 150±10 Nm (110±7 ft-lbs)
3. Insert the body of the sensor head into the fitting screw and screw
the nut manually to the fitting screw until the connection feels tight.
4. Mark both the fitting screw and the nut hex.
5. Tighten the nut a further 30° (1/12 turn) or if you have a torque
spanner tighten it with a torque of 80 ±10 Nm (60±7 ft-lbs).
NOTE
After detachment the nut must be tightened
without increased effort.
6. Clean and grease the tightening cone of the fitting screw after every
tenth detachment. Change the sealing washer every time the fitting
screw is detached. Use high-vacuum grease (e.g. Down Corning,
Europe) or a similar grease.
1. tightening cone
2. nut
3. fitting screw
4. sealing washer
5. sensor head
 Loading...