Installation Attaching the UMP
14
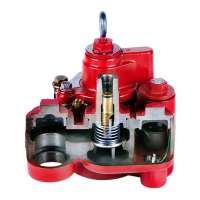
Figure 6. Verifying Pigtail’s Female Connector Is Seated Properly
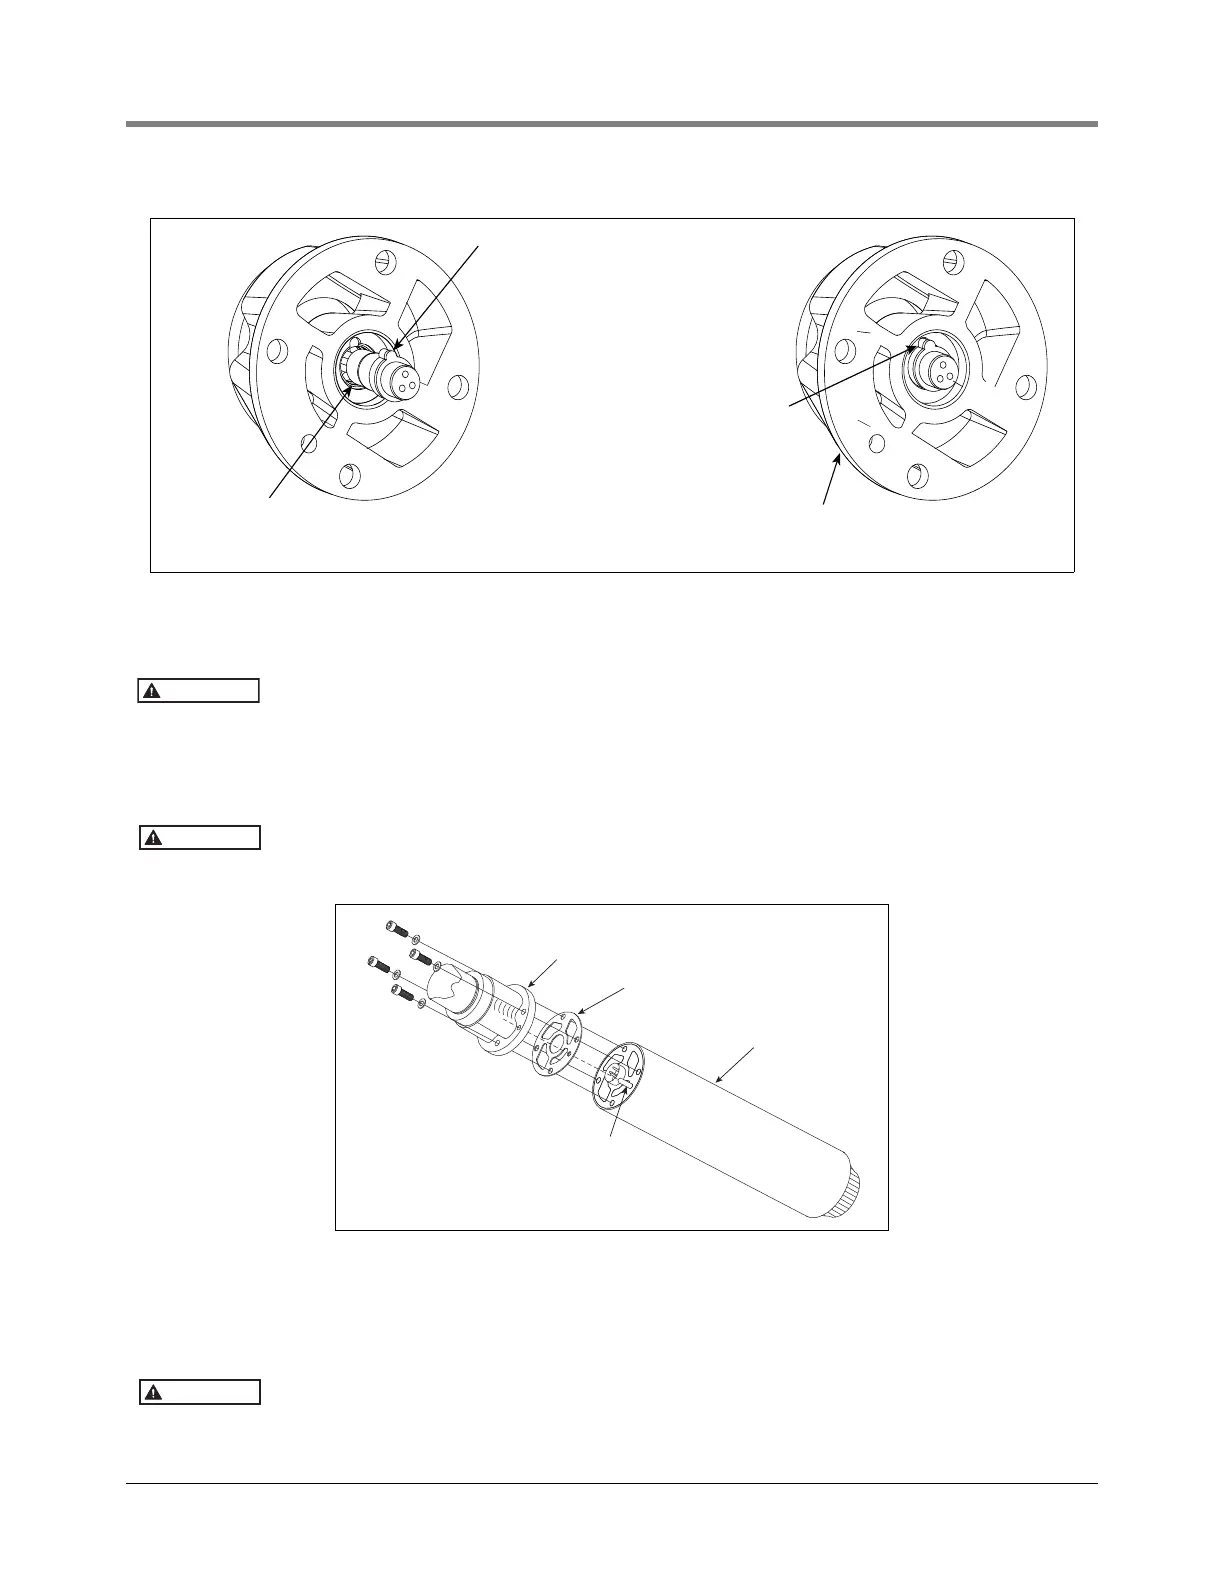
2. Place the new gasket on the new UMP so that all holes align (see Figure 7).
Gaskets from competitive UMPs will not seal properly and performance will be re-
duced.
3. Align the UMP positioning dowel insert in the proper hole in the discharge head (see Figure 6) and push the
UMP into position using hand force only. The UMP should be snug against the discharge head prior to
installing the UMP retaining bolts.
Use hand force to push the UMP onto the discharge head. If the UMP does not seat
snug against the discharge head, remove the UMP and correct the problem.
Figure 7. Aligning The UMP Gasket
4. Install the UMP retaining bolts and lock washers (see Figure 7). Snug and then torque the bolts using a cross
pattern. Torque to 7 ft-lbs (11 N•m).
Do not use the bolts to pull the UMP into position. Use the cross pattern to snug and
torque bolts. Do not over torque the bolts. Not following instructions may cause parts
to fail.
Insert the positioning dowel
on the UMP in this hole
rjpumps\fig36.eps
Connector's o-ring
(-015 [0.551'' ID x
0.070'' wide])
Pigtail female connector/indexing tab is out
of its socket - this is the incorrect position
when attaching the UMP!
Pigtail female connector/index-
ing tab is fitted in notch of its
socket - this is the correct
position when attaching the
UMP!
rjpumps/fig6.eps
UMP
Positioning
dowel
Gasket
Discharge head