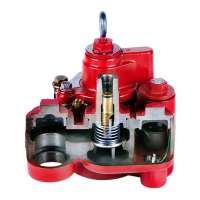
Installation Installing the Pump
18
Separation of Zone 0 and Zone 1 is accomplished by the male connector partition wall
between the packer and manifold connection. Connection of the UMP wiring is within
the Zone 0 boundary and Increased Safety measures inside the flameproof enclosure
must be ensured during field wiring connections.
13. Connect like colored wires from the UMP to like colored wires to the male connector with supplied Thomas &
Betts #T&B RBB217 butt splice connectors and making a mechanical crimp.
14. Pull on each wire to verify a reliable crimp was achieved.
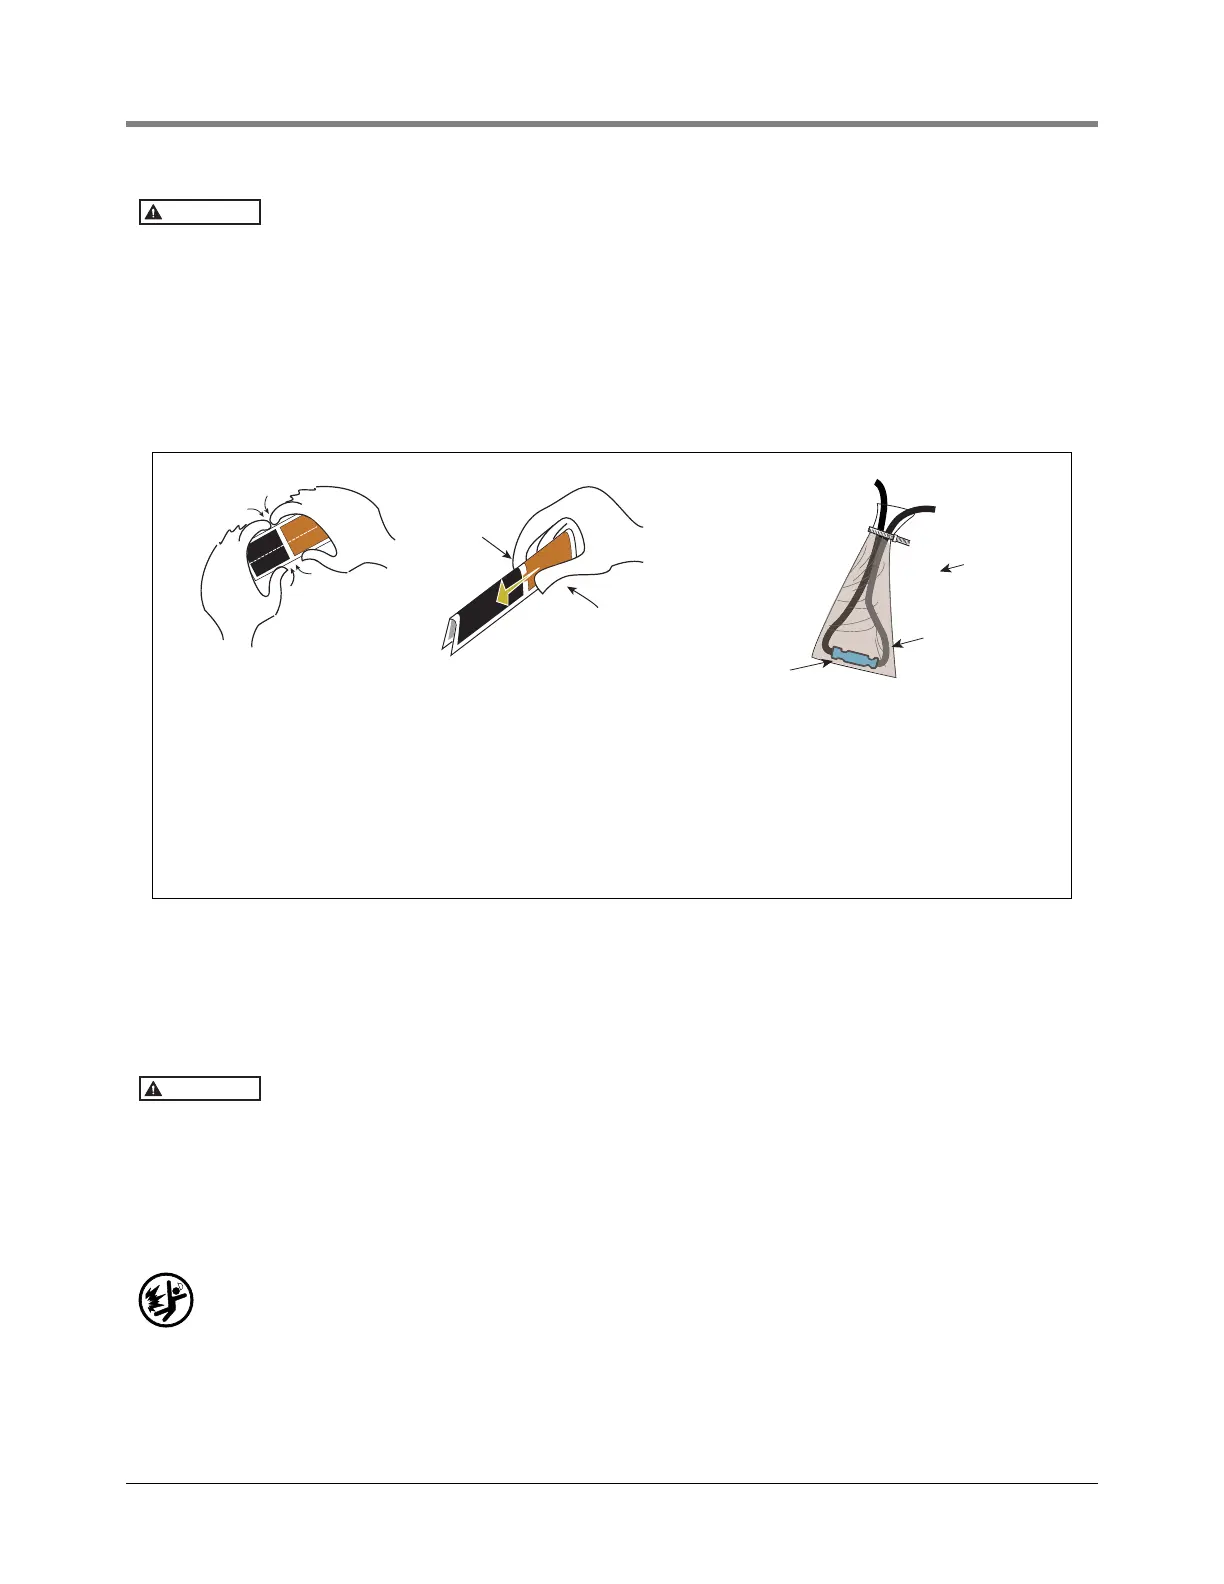
15. Insulate the three connections by placing each by itself into an epoxy sealant bag following steps A, B, C
below.
16. When finished sealing the wires, coil the wires inside the packer's wiring compartment as neatly as possible
(see Figure 13). For clarity, the epoxy packs are shown transparent.
17. Lubricate the O-ring on the packer wiring compartment cover (with lifting eyebolt) with petroleum based jelly.
Screw in the packer wiring compartment cover (thread sealant should not be used). Torque to 35 ft-lbs (50
N•m).
Confirm that the lifting eyebolt is properly torqued to 10 ft-lbs (13.6 N•m) with a mini-
mum of 6 full threads installed. Occasionally, eyebolts are removed after pump instal-
lation and corrosion may occur in the threaded areas of the wiring compartment cover
(eyebolt plug) and the eyebolt. If corrosion has occurred, the cover and eyebolt should
be replaced.
18. Utilize the lifting eyebolt to suspend the pump vertically and then install the pump onto the riser pipe using UL
classified for petroleum, non-setting thread sealant until watertight and align appropriately to connect to the
product line piping.
When servicing equipment, use non-sparking tools and use caution when removing or
installing equipment to avoid generating a spark.
To male
connector
Tie wrap
Butt splice
From pigtail
ACB
Wire insulation is
fully into epoxy
Only one
connection
per bag.
Instructions:
NOTE: When temperature is below 50°F (10°C), keep
resin in a warm place prior to mixing (e.g., in an
inside pocket next to body).
1. Open epoxy sealant package, and remove resin pak.
2. Holding resin pak as shown in A, bend pak along
long length.
3. As shown in B, firmly squeeze the RED SIDE of the
resin, forcing it through the center seal and into
BLACK SIDE.
4. Mix thoroughly to a uniform color by squeezing
content
s back and forth 25-30 times.
5. Squeeze mixed, warm resin into one end of bag and
cutoff other end.
6. Slowly insert wiring connection into sealing pack until
it is snug against the opposite end as shown in C.
7. Twist open end of bag and use tie wrap to close it off
and position the tie wrapped end up until the resin
gels.