Service And Repair Replacing the Check Valve Assembly
35
7. Replace the protective plug over the service screw and fully thread into place to ensure a good seal.
8. Open the air purge screw 2 - 3 turns counterclockwise (see Figure 26).
The air purge screw is retained by a hitch pin to limit travel. Do not attempt to rotate
beyond 3 turns.
9. Turn the pump on and let it run for about 2 minutes to purge air from the manifold’s hydraulic cavities. While
the pump is still running, turn the air purge screw clockwise until it is completely closed.
10. If applicable, open the ball valve down line from the pump.
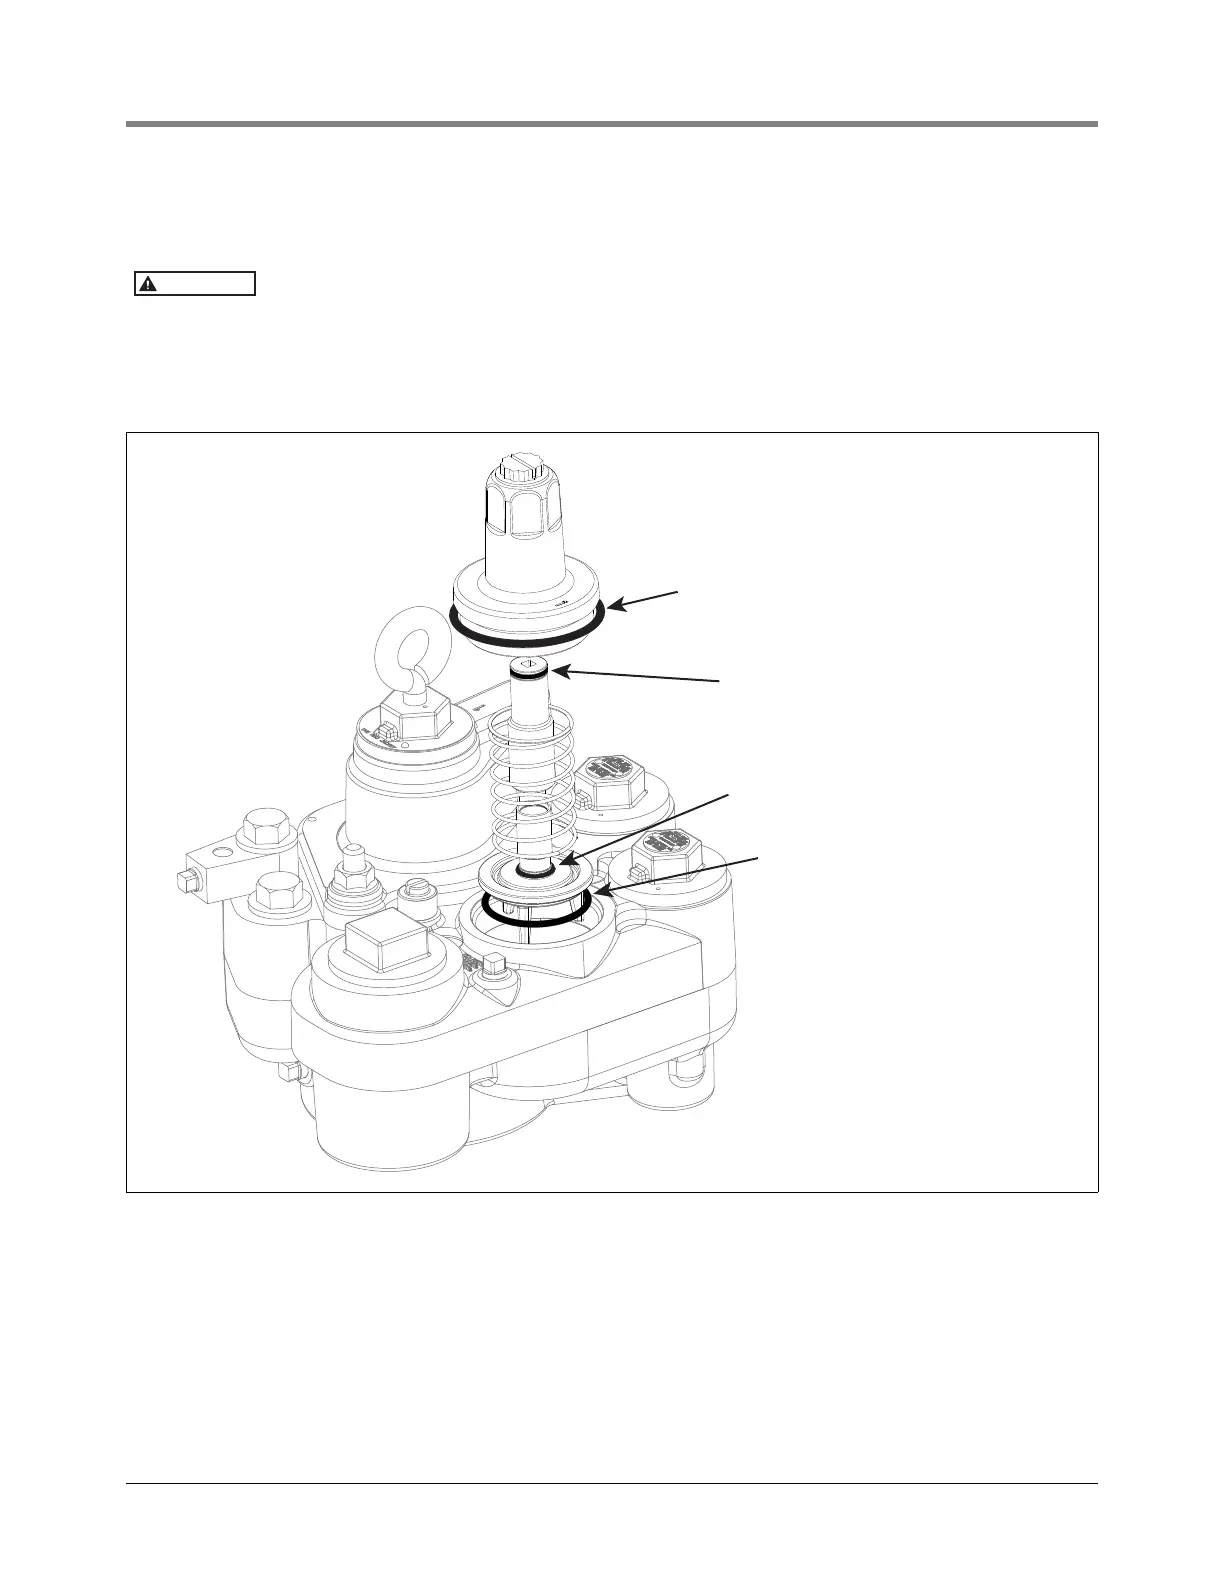
Figure 30. Inserting Check Valve Assembly Into Manifold
Check valve housing o-ring
(-231 [2.609'' ID x 0.139'' wide])
Check valve main seal o-ring
(-225 [1.859'' ID x 0.139'' wide])
Lock down seal o-ring
(-114 [0.612'' ID x 0.103'' wide])
Service screw o-ring
(-114 [0.612'' ID x 0.103'' wide])
rjpumps/fig39.eps