Service And Repair Replacing the Pigtail
39
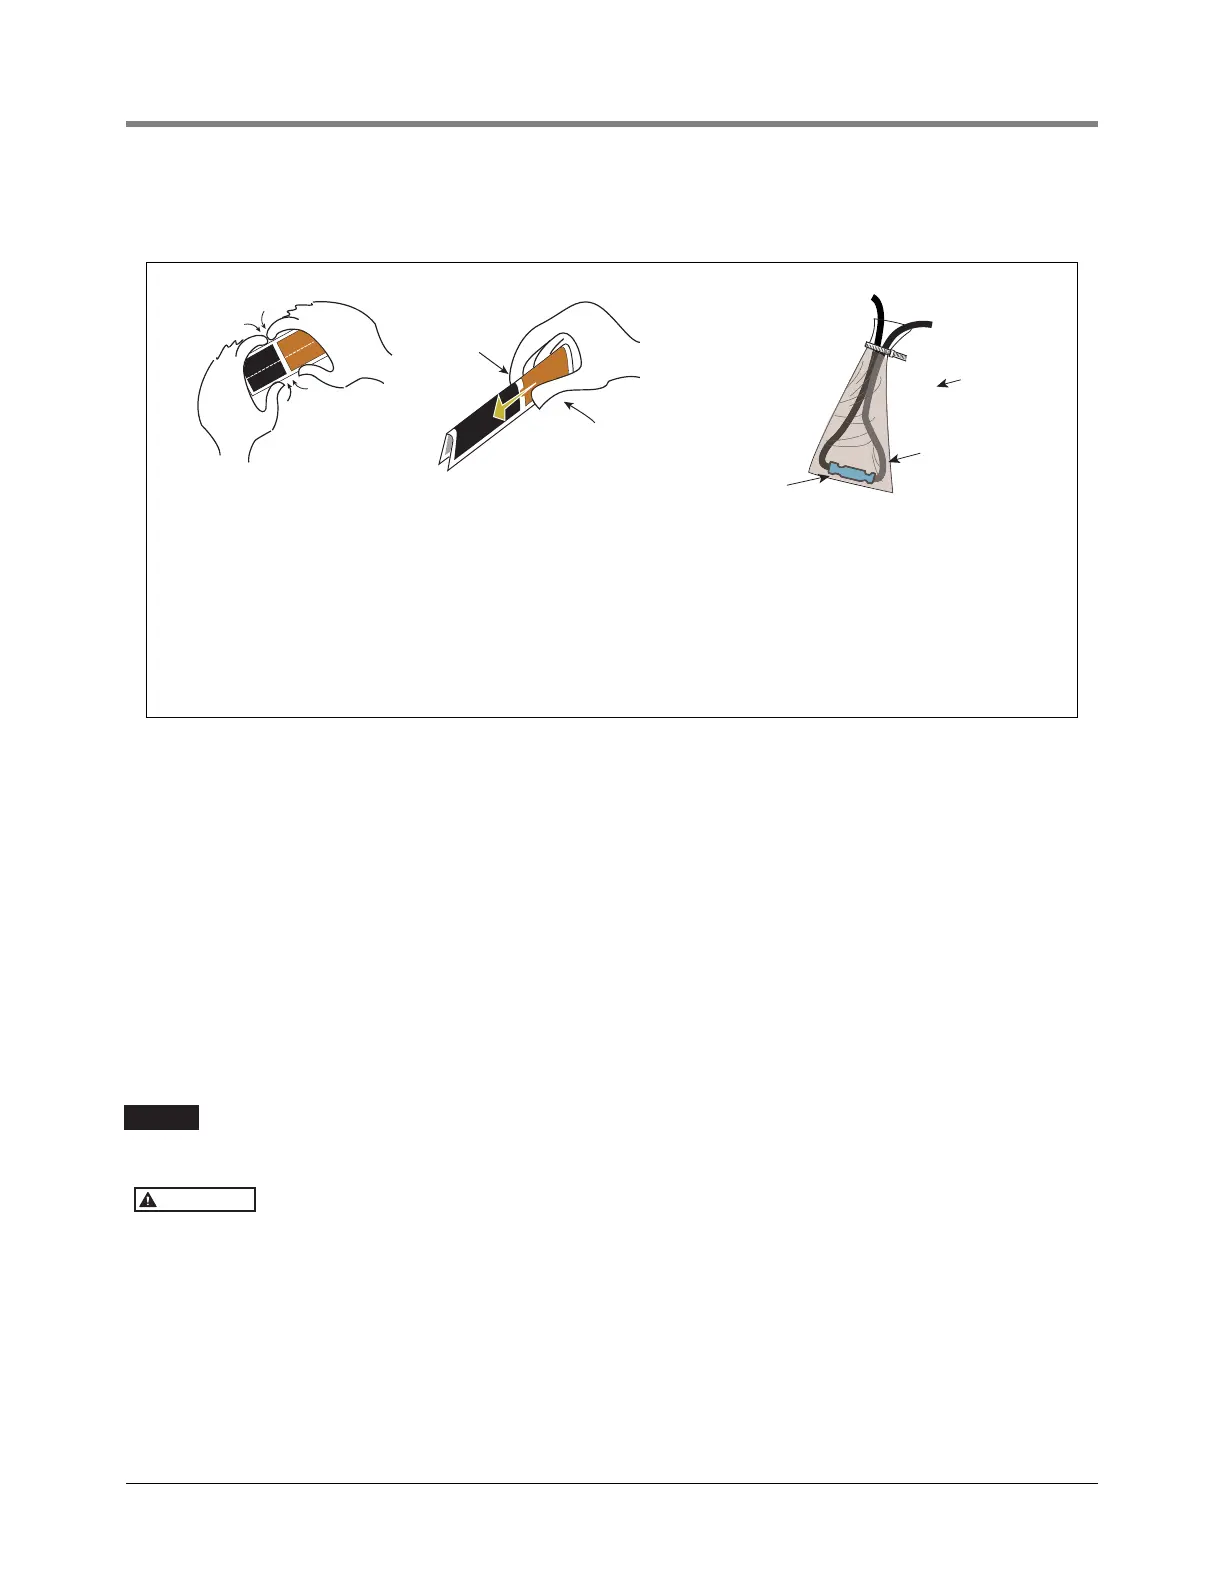
18. Insulate the three connections by placing each by itself into an epoxy sealant bag following steps A, B, C
below.
19. When finished sealing the wires, coil the wires inside the packer's wiring compartment as neatly as possible
(see Figure 13 on page 19).
20. Get a 2.090’’ ID x 0.118’’ wide O-ring from the Hardware/Seal Kit. Lubricate the O-ring on the packer wiring
compartment cover (with lifting eyebolt) with petroleum based jelly. Screw in the packer wiring compartment
cover (thread sealant should not be used) and torque to 35 ft-lbs (48 N•m).
21. Get the three extractable O-ring seals ( 3.975’’ ID x 0.210’’ wide [upper], 3.850’’ ID x 0.210’’ wide [middle],
and 3.725‘’ x 0.210’’ wide [lower]) from the Hardware/Seal Kit. The three O-rings are very close in size so take
extra care to distinguish each one before replacing them in the extractable. Lubricate each O-ring with
petroleum jelly and then install them in their assigned grooves in the extractable - see Figure 29 on page 33.
22. Remove the manifold’s female connector’s O-ring - see Figure 29 on page 33. Get a 0.862’’ ID x 0.103’’ wide
O-ring from the Hardware/Seal Kit and lubricate it with petroleum jelly. Slide the O-ring over the female
connector and push it down into its groove.
23. Reinstall the extractable unit into the manifold and tank. Install the new extractable lock-down nuts from the kit
and torque them in an alternating pattern to 50 ft-lbs (68 N•m).
Remove the springs around the lock-down studs and replace with the springs from the kit.
24. Turn the air purge screw 2 - 3 turns counterclockwise (see Figure 31).
The air purge screw is retained by a hitch pin to limit travel. Do not attempt to rotate
beyond 3 turns.
25. Turn the pump on and let it run for about 2 minutes to purge air from the manifold’s hydraulic cavities. While
the pump is still running, turn the air purge screw clockwise until it is completely closed.
26. If applicable, open the ball valve down line from the pump.
To male
connector
Tie wrap
Butt splice
From pigtail
ACB
Wire insulation is
fully into epoxy
Only one
connection
per bag.
Instructions:
NOTE: When temperature is below 50°F (10°C), keep
resin in a warm place prior to mixing (e.g., in an
inside pocket next to body).
1. Open epoxy sealant package, and remove resin pak.
2. Holding resin pak as shown in A, bend pak along
long length.
3. As shown in B, firmly squeeze the RED SIDE of the
resin, forcing it through the center seal and into
BLACK SIDE.
4. Mix thoroughly to a uniform color by squeezing
content
s back and forth 25-30 times.
5. Squeeze mixed, warm resin into one end of bag and
cutoff other end.
6. Slowly insert wiring connection into sealing pack until
it is snug against the opposite end as shown in C.
7. Twist open end of bag and use tie wrap to close it off
and position the tie wrapped end up until the resin
gels.