Installing Software Features Feature Upgrade Procedure
17
7. Turn on power to the console and follow the required Feature Upgrade procedure. When you have completed
the Feature Upgrade procedure reverse the steps 3 through 6 above to remove the thumb drive and reattach
the printer cable to its CPU board USB connector.
8. Close the door and replace the two #8 taptite screws.
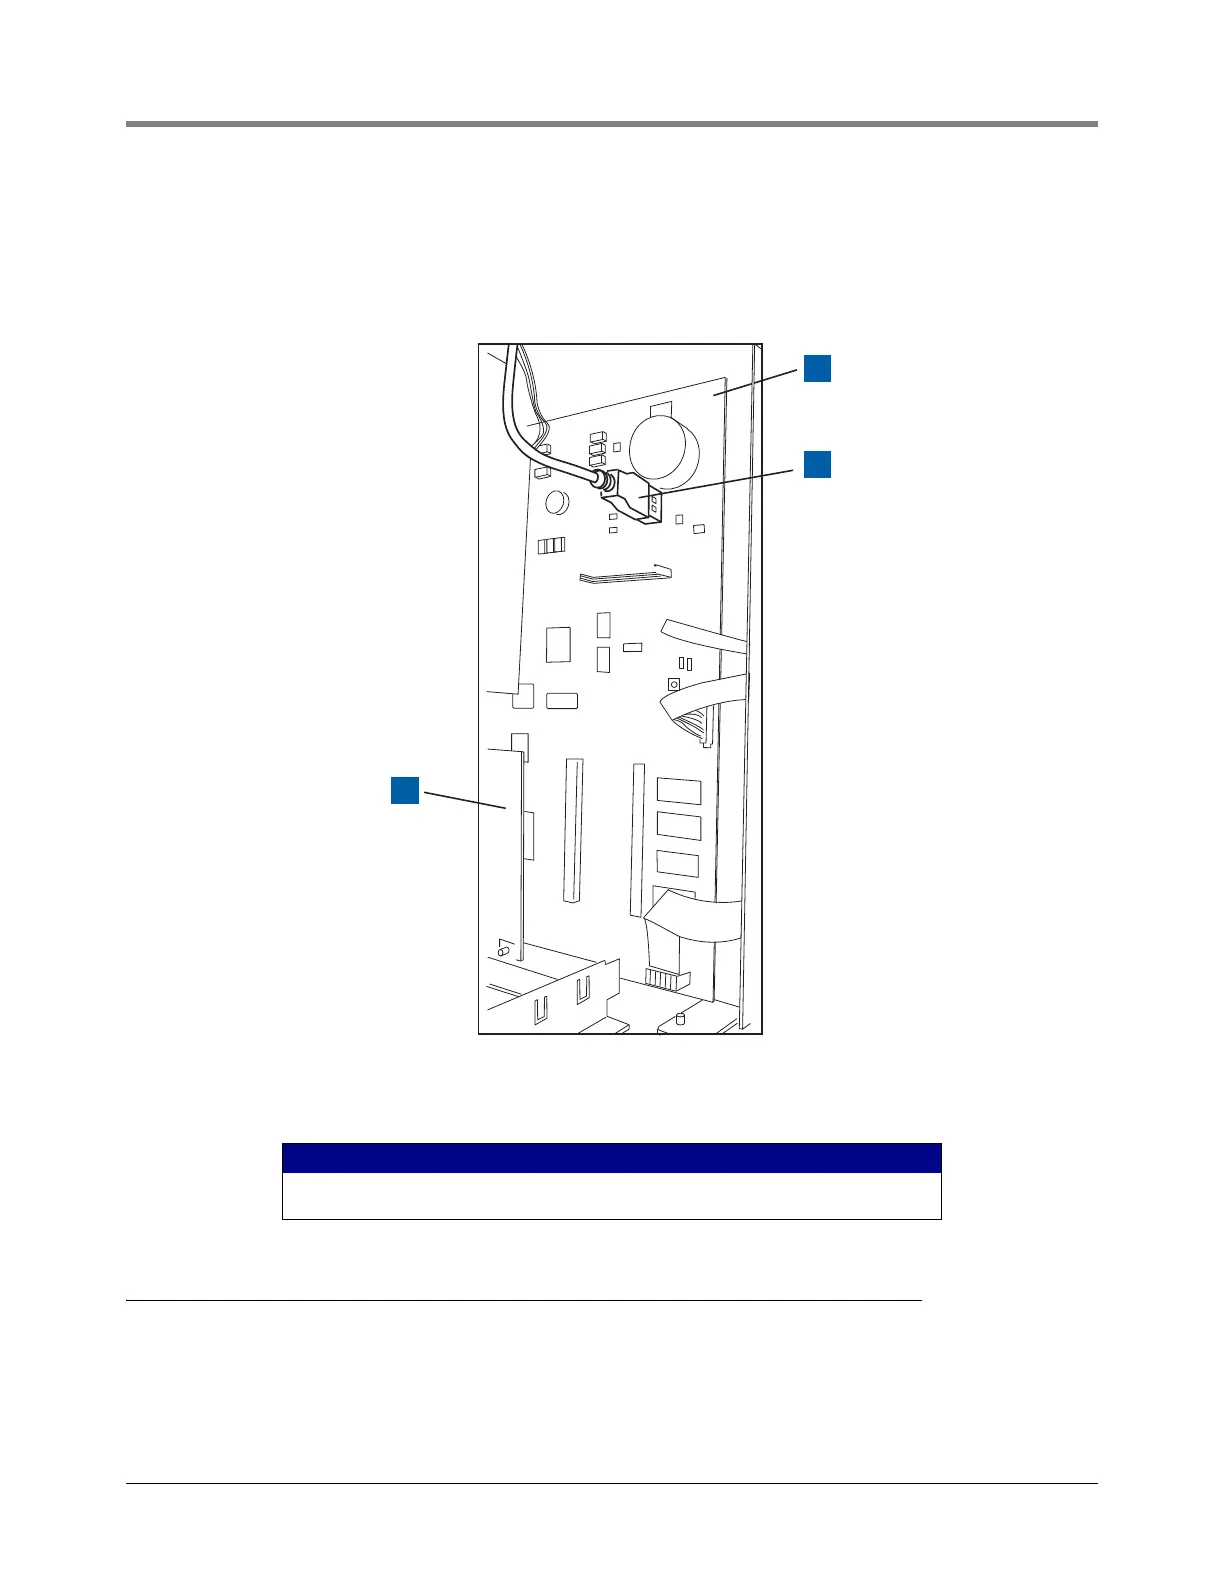
Figure 14. Locating Printer’s USB connector
Feature Upgrade Procedure
1. On the console’s Home Screen, touch the Diagnostics button to display the Diagnostics Main Screen (see
Figure 3).
2. Touch the Software Maintenance button on the Diagnostic Maintenance screen (see Figure 4).
LEGEND FOR NUMBERED BOXES IN Figure 14
1. Comm module
2. Top of CPU board
3. Printer USB connector
sw feat act2.eps
1
2
3
 Loading...


