26 HE250 - Installation and Operation Manual
5.1.5 Replacing the Door Gasket
It is important to maintain the gasket in good condition. After a year or more of use, the door gasket will
compress and become hard, which may allow air to leak past it. You can test the condition of the door
gasket by closing and latching the door on a strip of paper. Test all around the door. If the paper slips out
easily anywhere, it is time to replace the gasket.
Use the correct replacement gasket that you can purchase from your retailer. The diameter and density of
the gasket is important to getting a good seal.
Place the door face-down on something soft like a cushion of rags or piece of carpet. Remove the old gasket
from the door by pulling and prying it out with an old screw driver. Then use the screwdriver to scrape the
old gasket adhesive from the door. Now run a 1/4” (6 mm) bead of high temperature silicone in the door
gasket groove. Starting from the middle of the hinge side, press the gasket into the groove. Do not stretch
the gasket as you place it. Leave the gasket about 1/2” long when you cut it and press the end into the
groove. Tuck any loose fibres under the gasket and into the silicone. Close the door and do not use the
fireplace for 24 hours.
The glass used in the HE250 is 5 mm thick of dimension: 25 3/8” x 13’’ and tested to reach temperatures up
to 1400º F. If the glass breaks, it must be replaced with one having the same specification. Contact your
Ventis dealer to obtain a genuine replacement part (see “replacement parts”, in appendix to get the proper
part number).
WARNING:
TEMPERED GLASS OR ORDINARY GLASS WILL NOT WITHSTAND THE HIGH TEMPERATURES OF THE
HE250.
DO NOT ABUSE THE GLASS DOOR BY SLAMMING IT AGAINST THR FIREPLACE.
DO NOT OPERATE THE FIREPLACE WITH A CRACKED OR BROKEN GLASS.
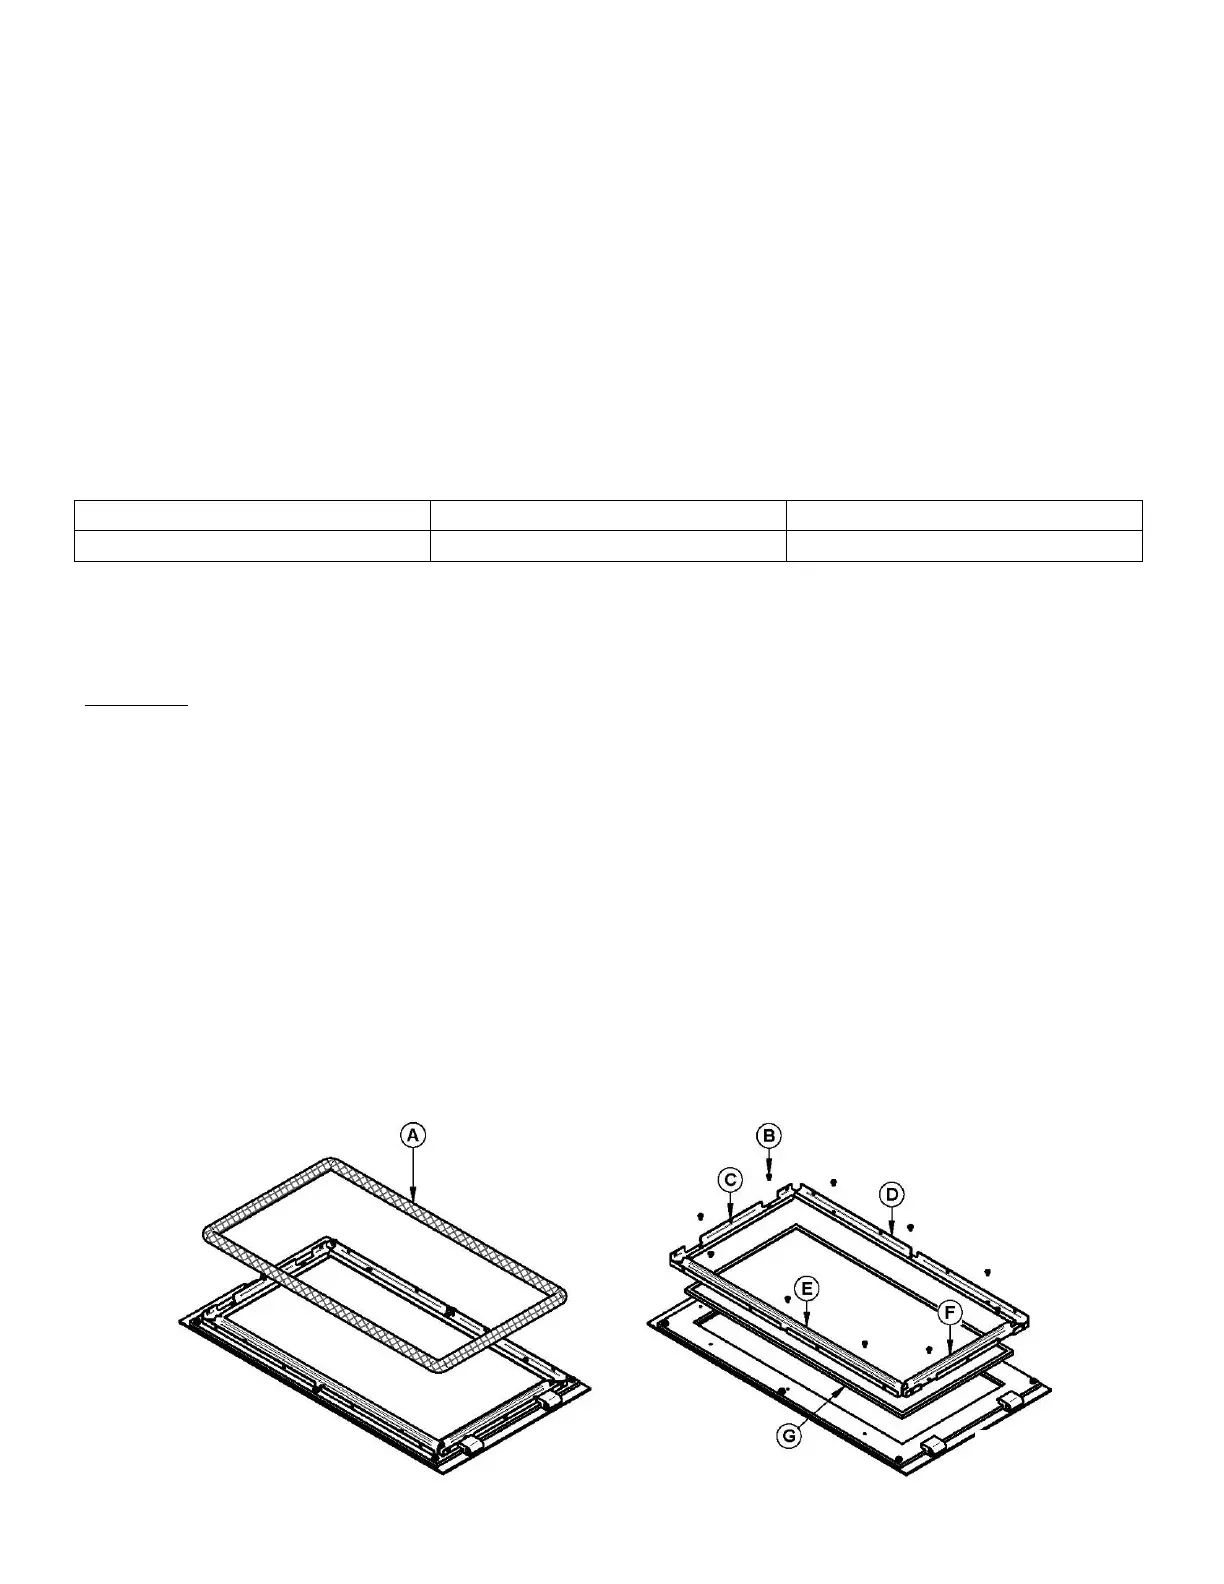
In order to replace the glass, use the following procedure;
1- Remove the gasket (A) placed around the door frame and its adhesive.
2- Remove the 4 glass retainers (C, D, E, F) held in place by 10 screws (B).
3- Remove the glass (G)
To install the new glass, follow the above steps in reverse order.