54 HE250 - Installation and Operation Manual
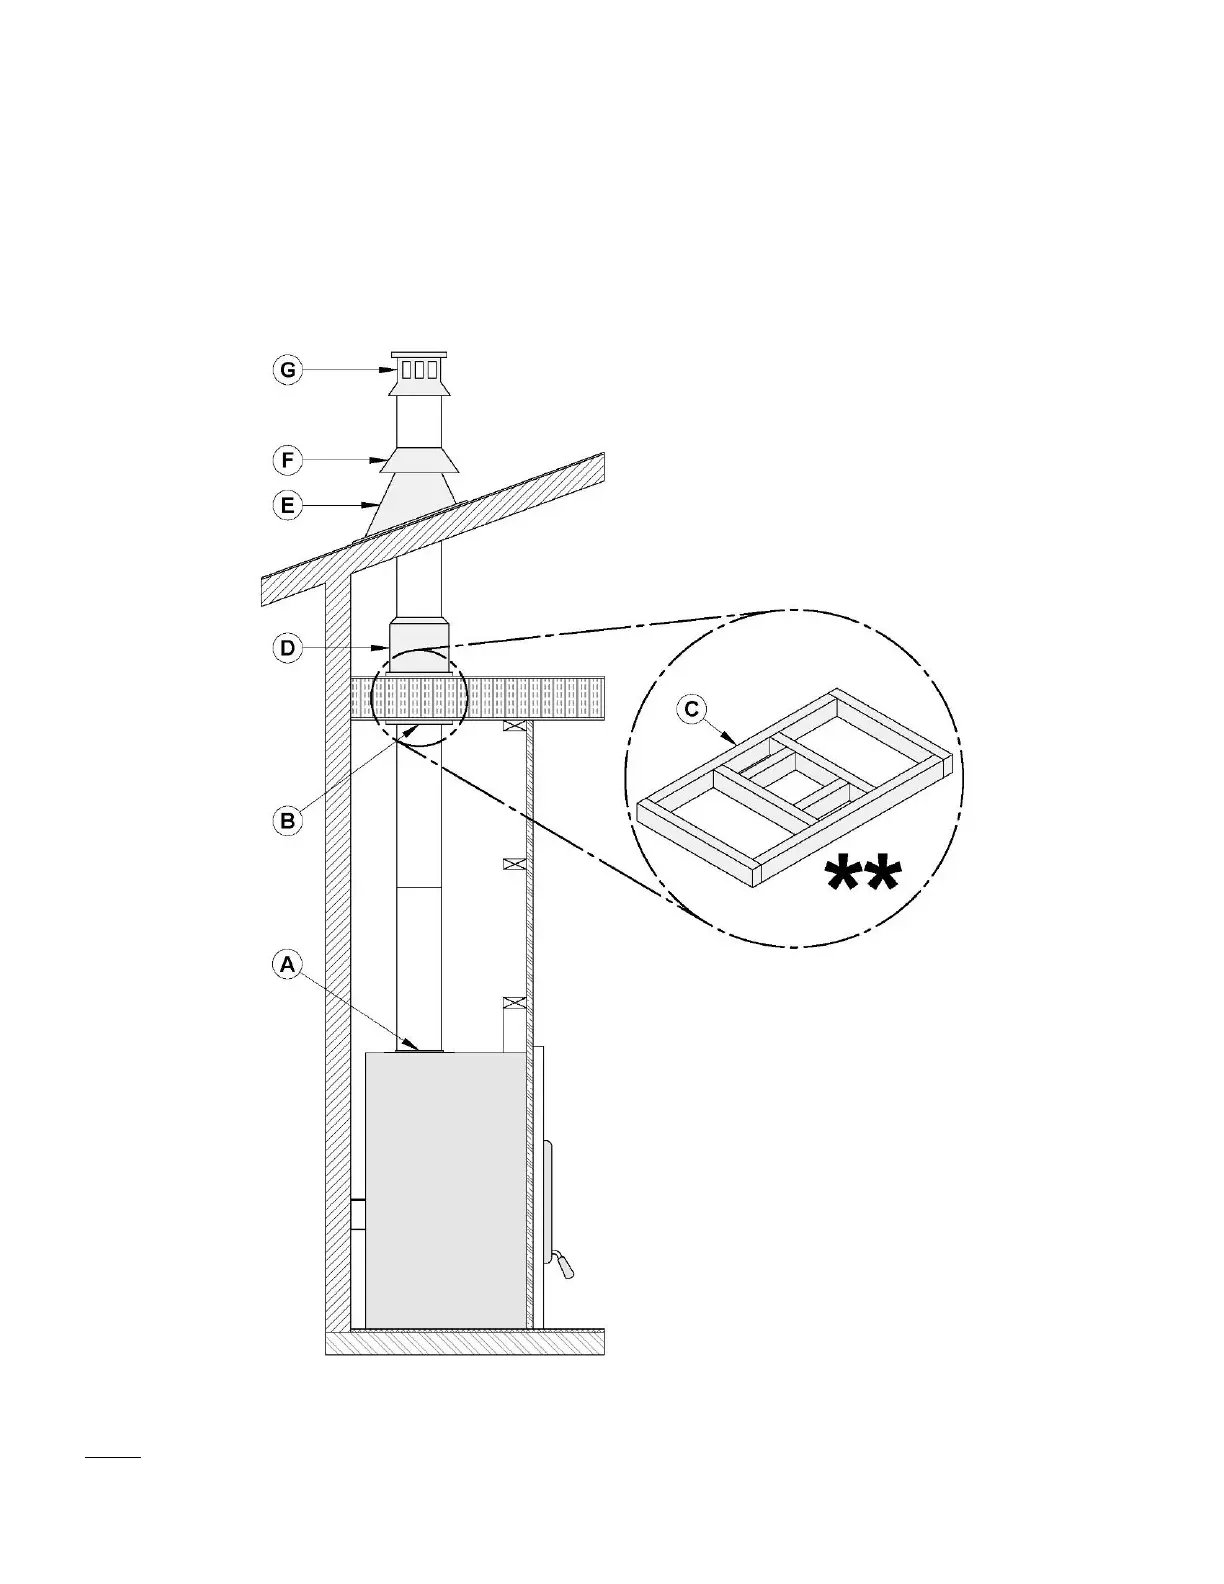
5. Then, put the roof flashing (D) in place and seal the joint between the roof and the flashing with roofing
pitch. For sloping roofs, place the flashing under the upper shingles and on top of the lower shingles.
Nail the flashing to the roof, using roofing nails.
6. Place the storm collar (E) over the flashing, and tighten it with the bolt supplied. Finally, seal the joint
between the storm collar and the chimney, using silicone caulking.
7. Install the chimney cap (G).
8. When a ventilated roof flashing is installed, precautions are to be taken not to caulk or seal the
ventilating openings.
** THE STRUCTURAL INTEGRITY OF THE FLOOR, WALL, AND CEILING/ROOF MUST BE MAINTAINED
NOTE: THE FLOOR AND WALLS BELOW THE ATTIC MUST BE INSULATED USING THE SAME INSULATION.