SERVICE
Service - 53
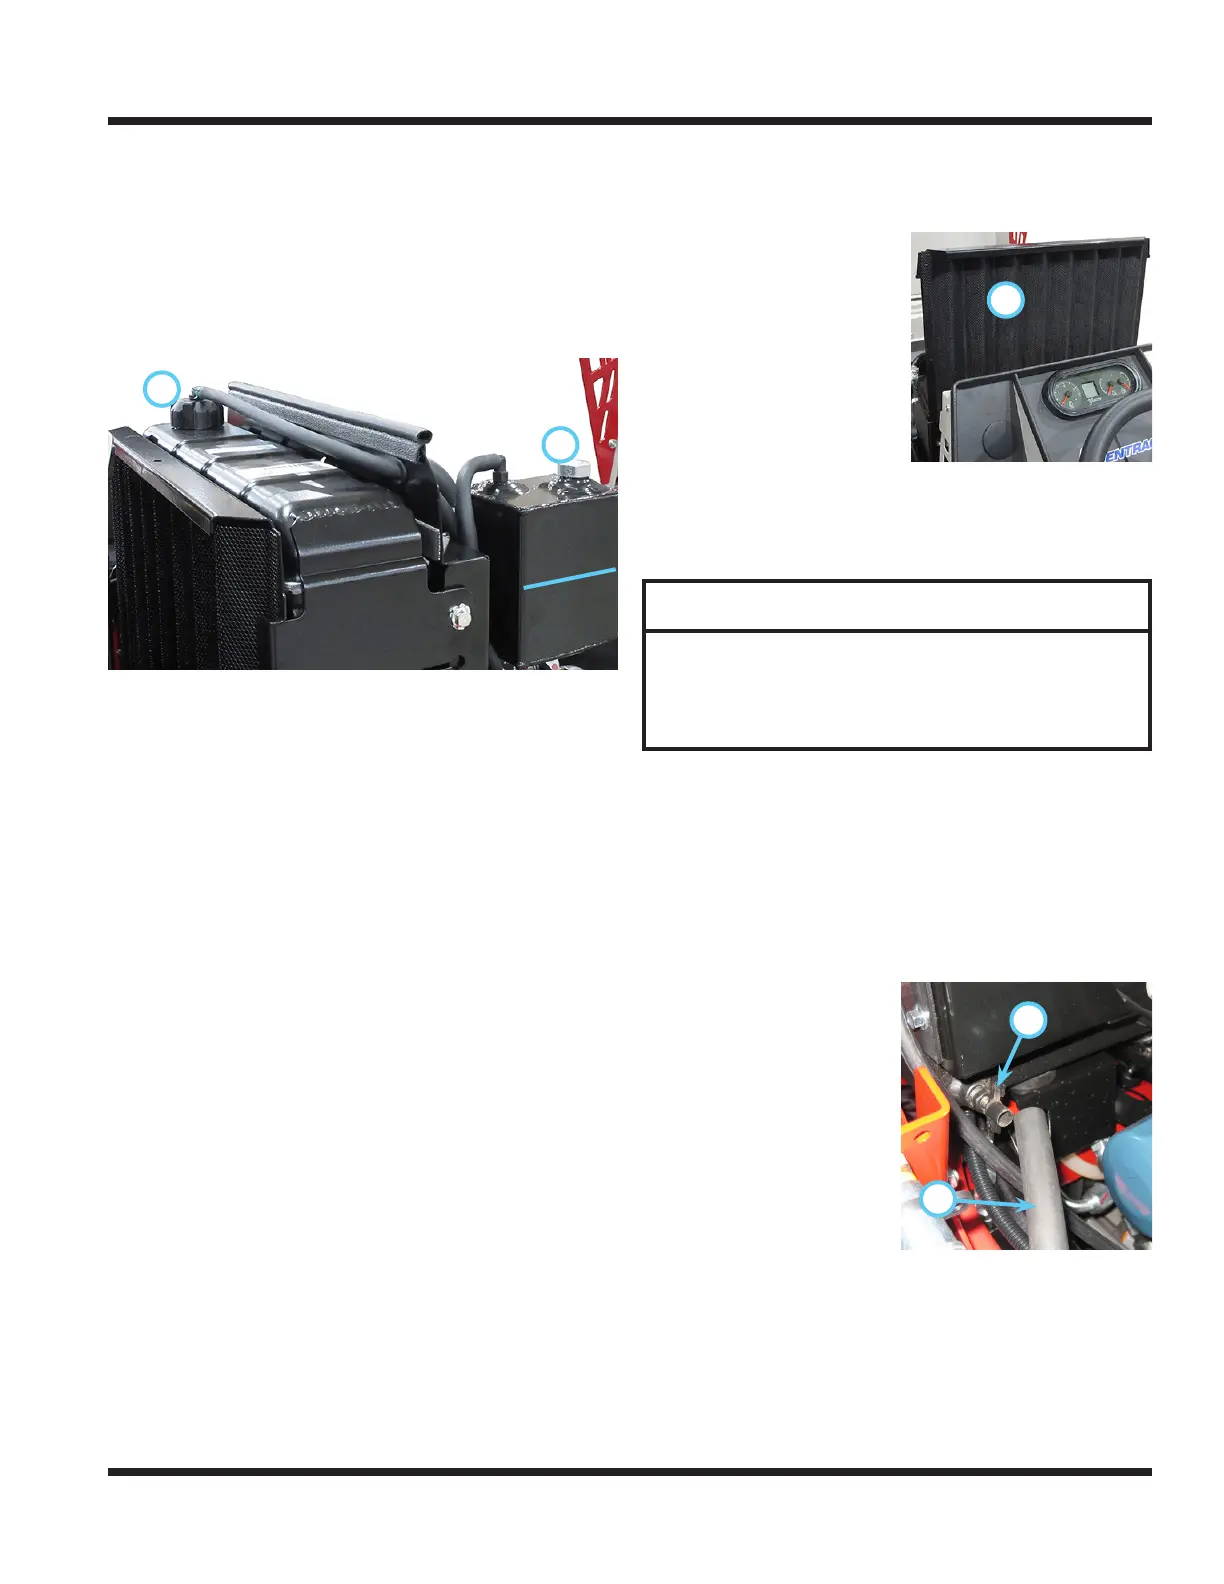
Checking the Cooling System
1. Park the power unit on a level surface.
2. If the power unit has been running, allow the
engine to cool.
3. Remove the cap (A) and check the coolant level
in the coolant recovery tank. When the system is
cold, the coolant recovery tank should be approxi-
mately half full of coolant.
4.
A
B
If the coolant level is low, add coolant to the tank
and reinstall the cap.
5. If the coolant recovery tank is empty, slowly open
the radiator cap (B) until any pressure begins to
vent. After all pressure has been released, remove
the radiator cap.
6. Check to ensure the coolant level is up to the bot-
tom of the ll neck.
7. If the coolant is low, add coolant to the radiator
until it reaches the bottom of the ll neck.
8. Install the radiator cap.
9. Inspect the radiator hoses and clamps for leaks
and deterioration. Replace as needed.
Cleaning the Radiator and Screen
1. If the power unit has been running, allow the
engine and radiator to cool.
A
2. Remove the radiator
screen (A).
3. Remove debris from the
radiator screen using a
brush, compressed air,
or water.
4. When required, clean
debris from the radia-
tor using low pressure
compressed air.
5. Check the radiator ns for damage.
6. Install the radiator screen.
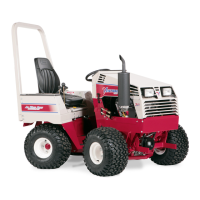
Draining the Cooling System
ATTENTION
Coolant is poisonous to humans and animals and
hazardous to the environment. Drain coolant into
an approved container. Dispose of used coolant in
accordance with local laws.
1. Park the power unit on a level surface.
2. If the power unit has been running, allow the
engine to cool.
3. Remove the right engine cover to access the radia-
tor drain.
4. Slowly open the radiator cap to the rst stop to
allow any pressure to release.
5. Place a drain pan or jug under the right side of the
front frame.
6. Install an 11 mm
A
B
(7/16 inch) ID hose (A)
onto the radiator drain
port (B) and route
down to the drain pan.
7. Turn the drain valve
counterclockwise to
open and drain the
coolant into the drain
pan.