SERVICE
Service - 58
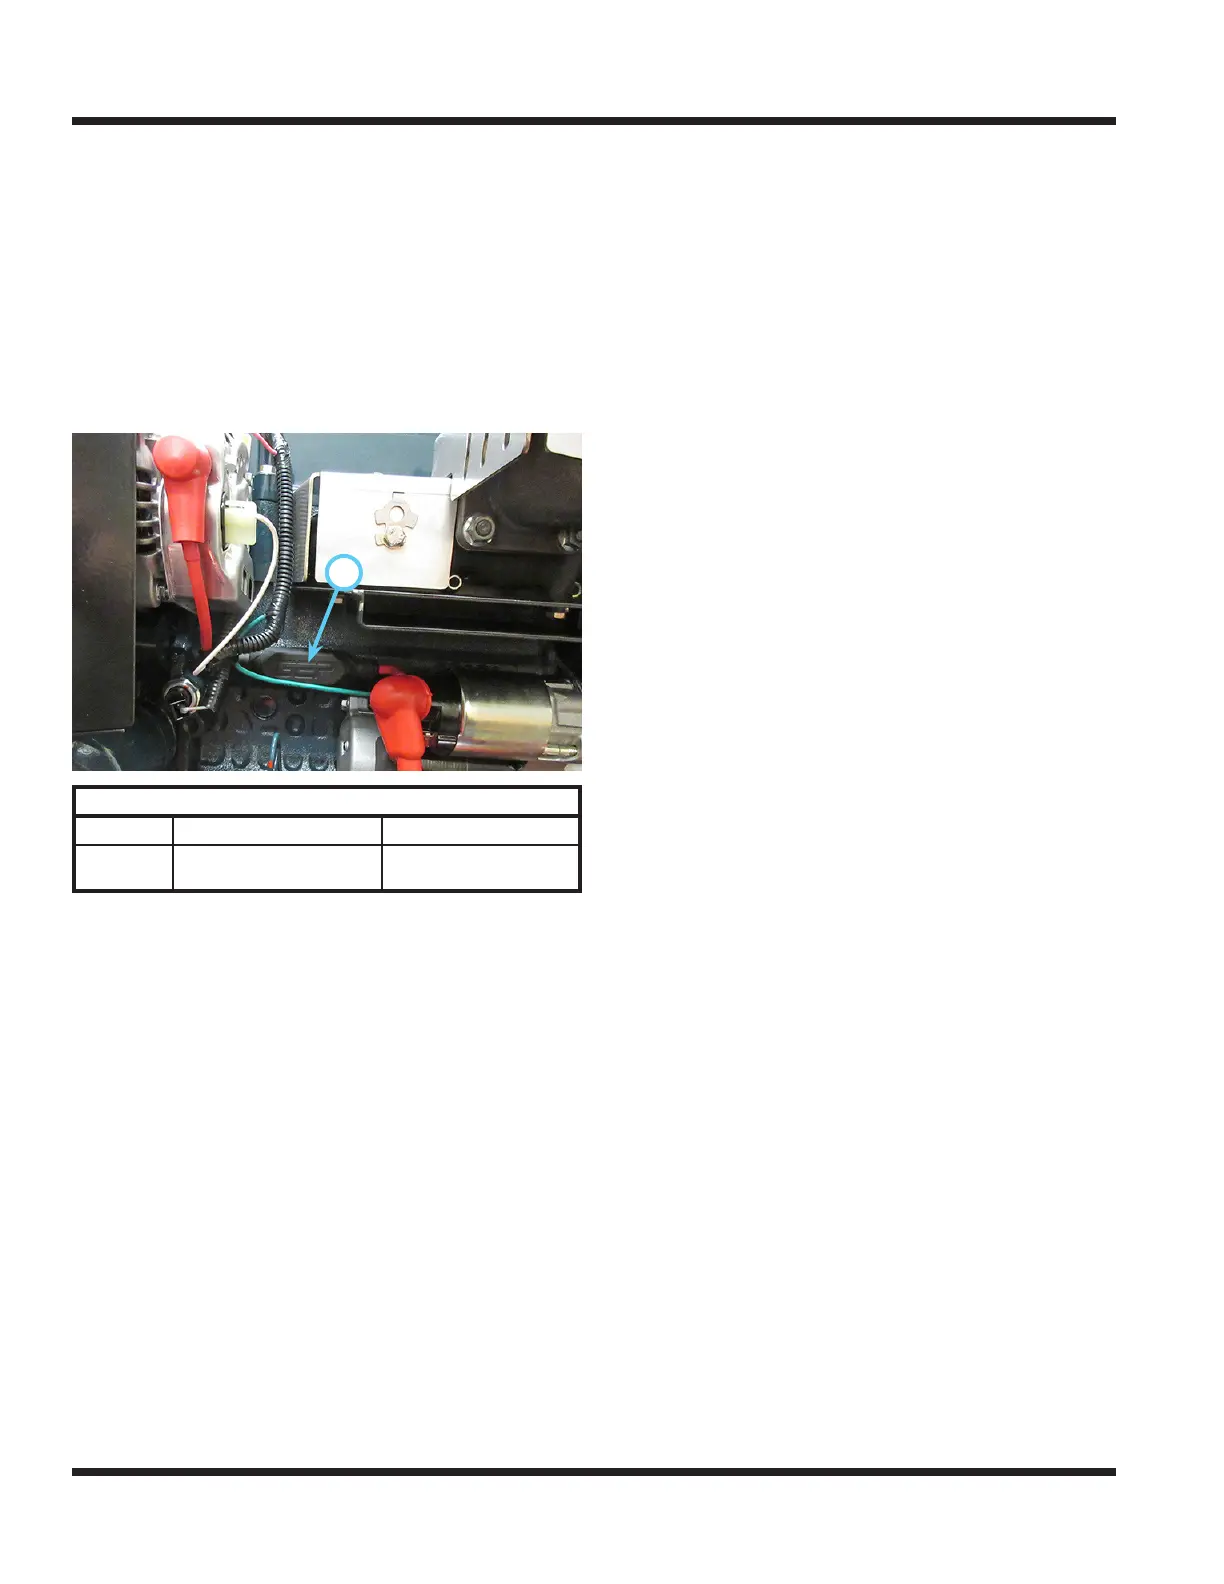
Replacing the Engine Fuse or Fuse Link
1. If the power unit has been running, allow the
engine to cool.
2. Turn the battery disconnect switch to the O
position.
3. Remove the right engine cover.
4. If equipped with an in-line fuse holder, remove
the fuse and insert a new fuse into the holder. If
equipped with a fuse link, remove the fuse link (A)
from the starter and the alternator and install a
new fuse link.
A
Engine Fuses
Position Fuse Circuit
A
80 amp fuse link or
80 amp Maxi fuse
Charge
5. Reinstall the right engine cover.
6. Turn the battery disconnect switch to the On
position.
Switching the Speedometer (mph or km/h)
The wire harness connection for the speedometer
is under the right side of the dash near the warning
alarm. Locate the green wire (labeled B-144) with an
individual plug.
1. For a speedometer readout in miles per hour, the
green wire (B-144) should be connected to the wire
from the information gauge that is labeled B-142.
2. For a speedometer readout in kilometers per
hour, the green wire (B-144) should be connected
to the wire from the information gauge that is
labeled B-143.
Replacing the Head Lights
The head lights are equipped with LEDs and do not use
a replaceable bulb. If a head light no longer functions,
the entire work light must be replaced.
Replacing the Tail Lights
The tail lights are equipped with LEDs and do not use a
replaceable bulb. If a tail light no longer functions, the
entire tail light must be replaced.
Replacing the Work Lights
The work lights are equipped with LEDs and do not use
a replaceable bulb. If a work light no longer functions,
the entire work light must be replaced.
Replacing the Turn Signal Lights
The signal lights that are used for the turn signal / haz-
ard asher kit are equipped with LEDs and do not use
a replaceable bulb. If a signal light no longer functions,
the entire light must be replaced.
Replacing the Strobe Light(s)
Both the ROPS mounted strobe light and the canopy
strobe lights are equipped with LEDs and do not use a
replaceable bulb. If a strobe light no longer functions,
the entire strobe light must be replaced.
Changing the ROPS Strobe Light Flasher
Mode
1. Remove the four screws that fasten the strobe light
to the strobe light frame.
2. Locate the yellow wire from the strobe light. This
wire is used to cycle the strobe light modes.
3. Turn the ignition key to the On position to turn on
accessory power.
4. Turn the strobe light switch to the On position.
5. Insert the bare end of the yellow wire into the back
of the terminal on the red power supply wire. Each
time you touch the yellow wire against the red wire,
the strobe will change modes.
6. When the desired mode is reached, turn the strobe
light switch to the O position and turn the ignition
key to the O position.
7. Reinstall the strobe light back onto the strobe light
frame.

 Loading...


