8
INSTALLATION
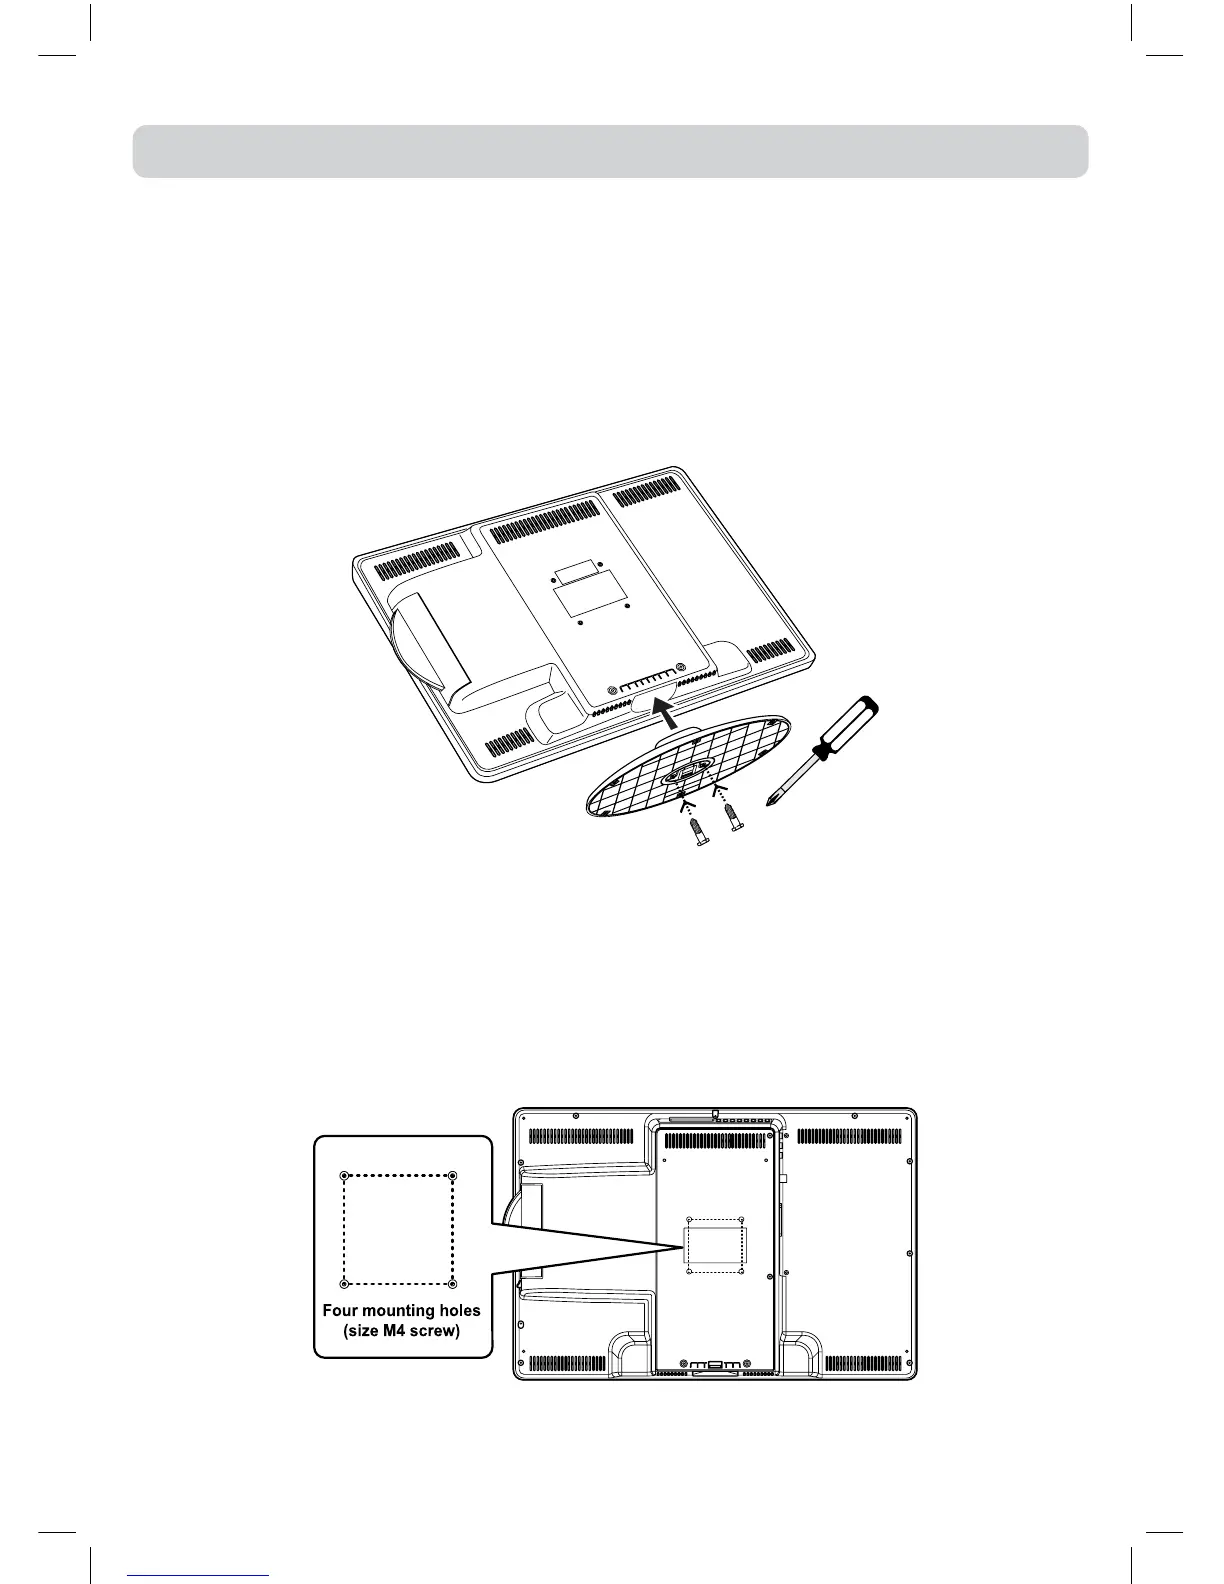
INSTALLING / REMOVING THE STAND
WARNING:The LCD Displayisveryfragile,and mustbeprotectedatalltimeswheninstalling/
removingthestand.Besurethatnohardorsharpobject,oranythingthatcouldscratchordamage
theLCDdisplay,comesintocontactwithit.DoNOTputpressureonthefrontoftheunitatanytime
becausethescreencouldcrack.
1.Disconnectanycablesorcordsconnectedtotheunit.
2.Laytheunitdownonaatsurface,sothebackisfacingup,makingsuretoplaceasoftcushioned
material(suchasapilloworthickpieceoffoam)beneaththescreen.
3.Install/removethetwoscrewsandtheninstall/removetheSTANDto/fromtheTV.
MOUNTING ON THE WALL
ThisunitisVESA-compliant,andisdesignedtobewall-mountedwithaVESA-compliant75mmx
75mmmountingkitdesignedforat-panelTVs(soldseparately).Mountthisunitaccordingtothe
directionsincludedwiththemountingkit.
Note:
Removethestandbeforemountingtheunitonthewall.
IMPORTANT
Screws must not project more than 8mm into the TV or damage may occur. For secure fixing make
sure at least 4mm of the screw thread is engaged.
75mm
75mm