5. By default, the default sensors page is displayed. Navigate to the System tab, then the Network
page to configure the device's network properties. The unit's IP Address, Subnet Mask,
Gateway and DNS settings can either be assigned manually, or acquired via DHCP.
6. Click Save.
NOTE: After the changes are saved, the browser will no longer be able to reload the web page from the
192.168.123.123 address and displays "Page not Found" or "Host Unavailable" message; this is normal.
After you are finished configuring the unit's IP address, repeat the steps above changing the
computer's Ethernet NIC card settings to the ones you wrote down prior to changing them.
3.3 Web Interface
The unit is accessible via a standard, unencrypted HTTP connection as well as an encrypted HTTPS
(TLS) connection.
NOTE: An administrator account (username and password) must be created when logging in the
device the first time.
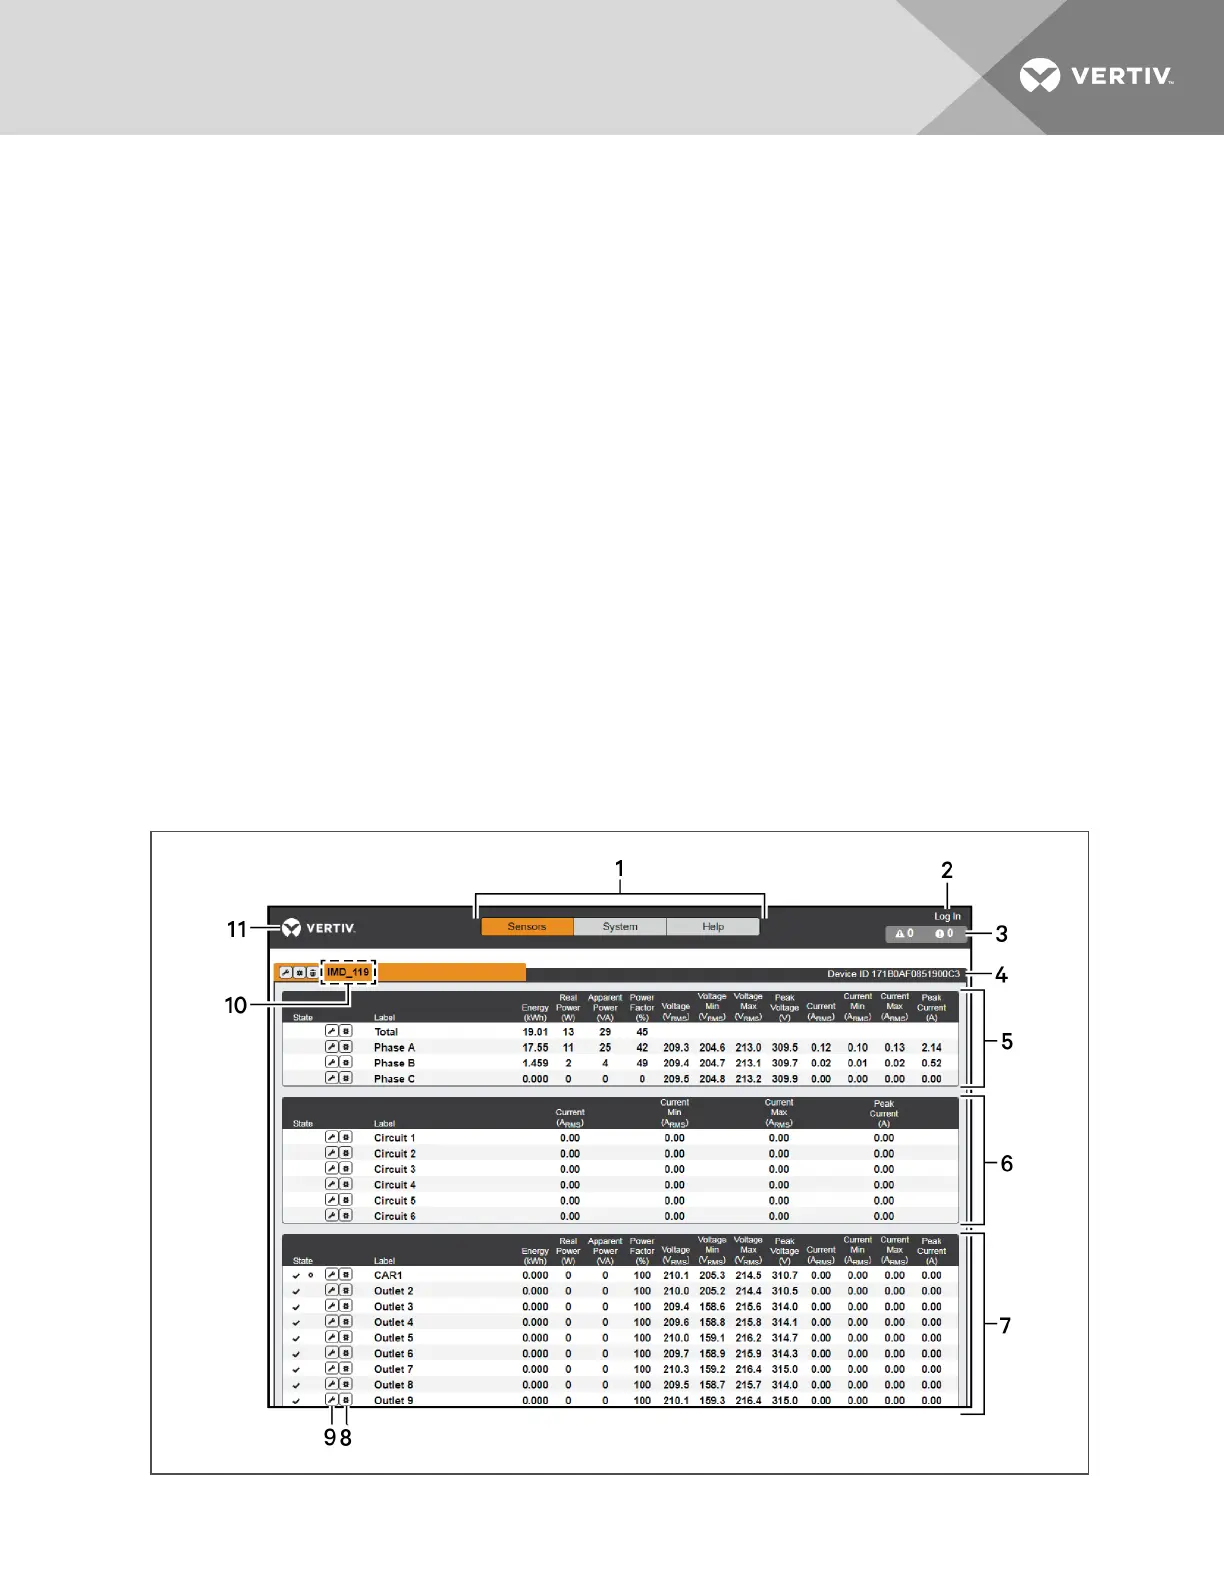
3.3.1 Home page
The Home Page gives both current and historical views of the unit’s data. Real-time readings are provided
for all rPDU data and individual circuits' data.
Figure 3.6 Home Page
3 Setup
25
 Loading...