11
Section B – Cabinet
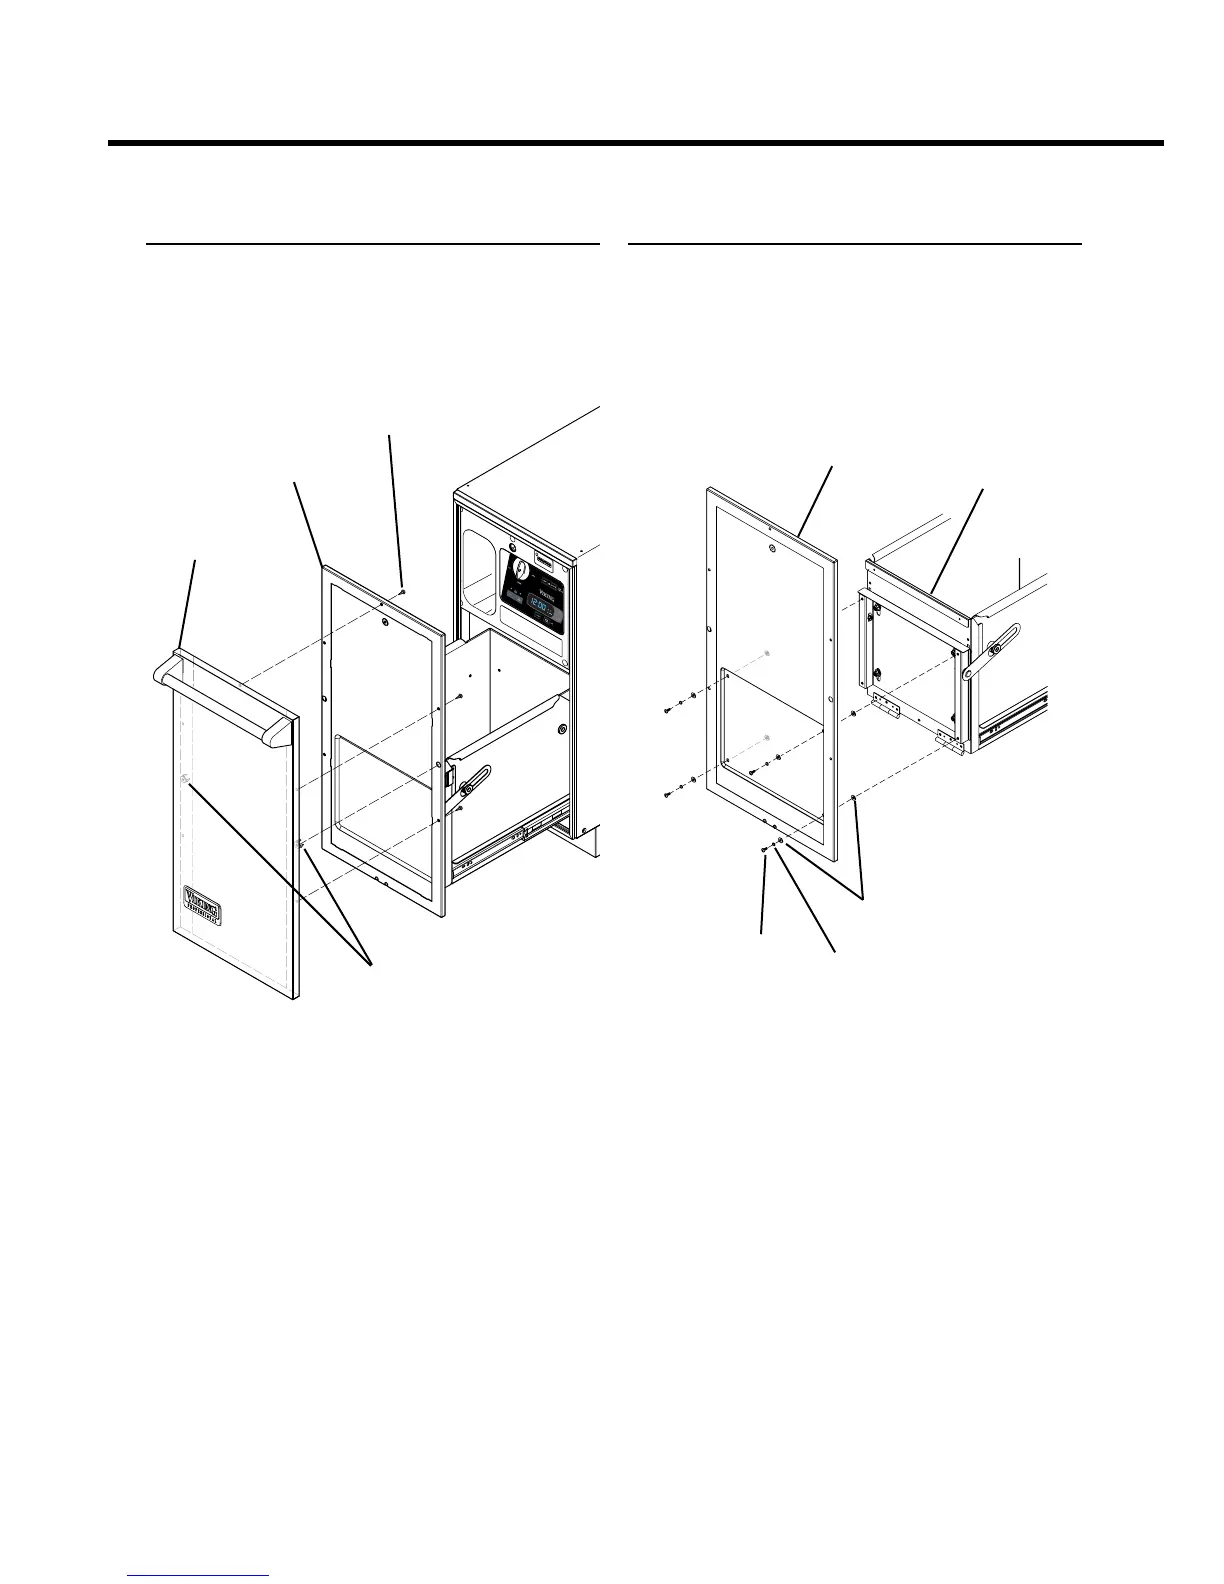
Decorative Door Panel
REMOVE AND REINSTALL
Should the Viking decorative door panel with handle
become damaged, replace it with a new one. Removing
the decorative door is also essential for servicing the
compactor’s door pan.
DOOR PAN
ASSEMBLY
DECORATIVE
DOOR PANEL
5 FLAT HEAD SCREWS
2 LOCATOR CLIPS
1. Remove the ve at head screws that attach the
decorative door panel to the door pan assembly.
2. Firmly pull the decorative door panel away from the
door pan to disengage the two locator clips.
3. Position the replacement decorative door panel
in place by snapping the two locator clips into the
corresponding door pan holes.
4. Secure the decorative door panel with the ve at
head screws.
Door Pan Assembly
REMOVE AND REINSTALL
The door pan assembly may be removed if necessary for
trash compactor service.
DOOR PAN
ASSEMBLY
4 SCREWS
TRASH
BUCKET
DOOR
4 LOCK WASHERS
8 FLAT
WASHERS
1. Remove the decorative door panel to access the
door pan assembly.
2. Remove the four Phillips head screws, four lock
washers, and eight at washers that attach the door
pan assembly to the trash bucket door.
3. Re-install using the same hardware. Make sure there
is a at washer on both sides of each of the four holes
in the door pan assembly as shown in the illustration.