16
Section C – Power Unit Mechanism
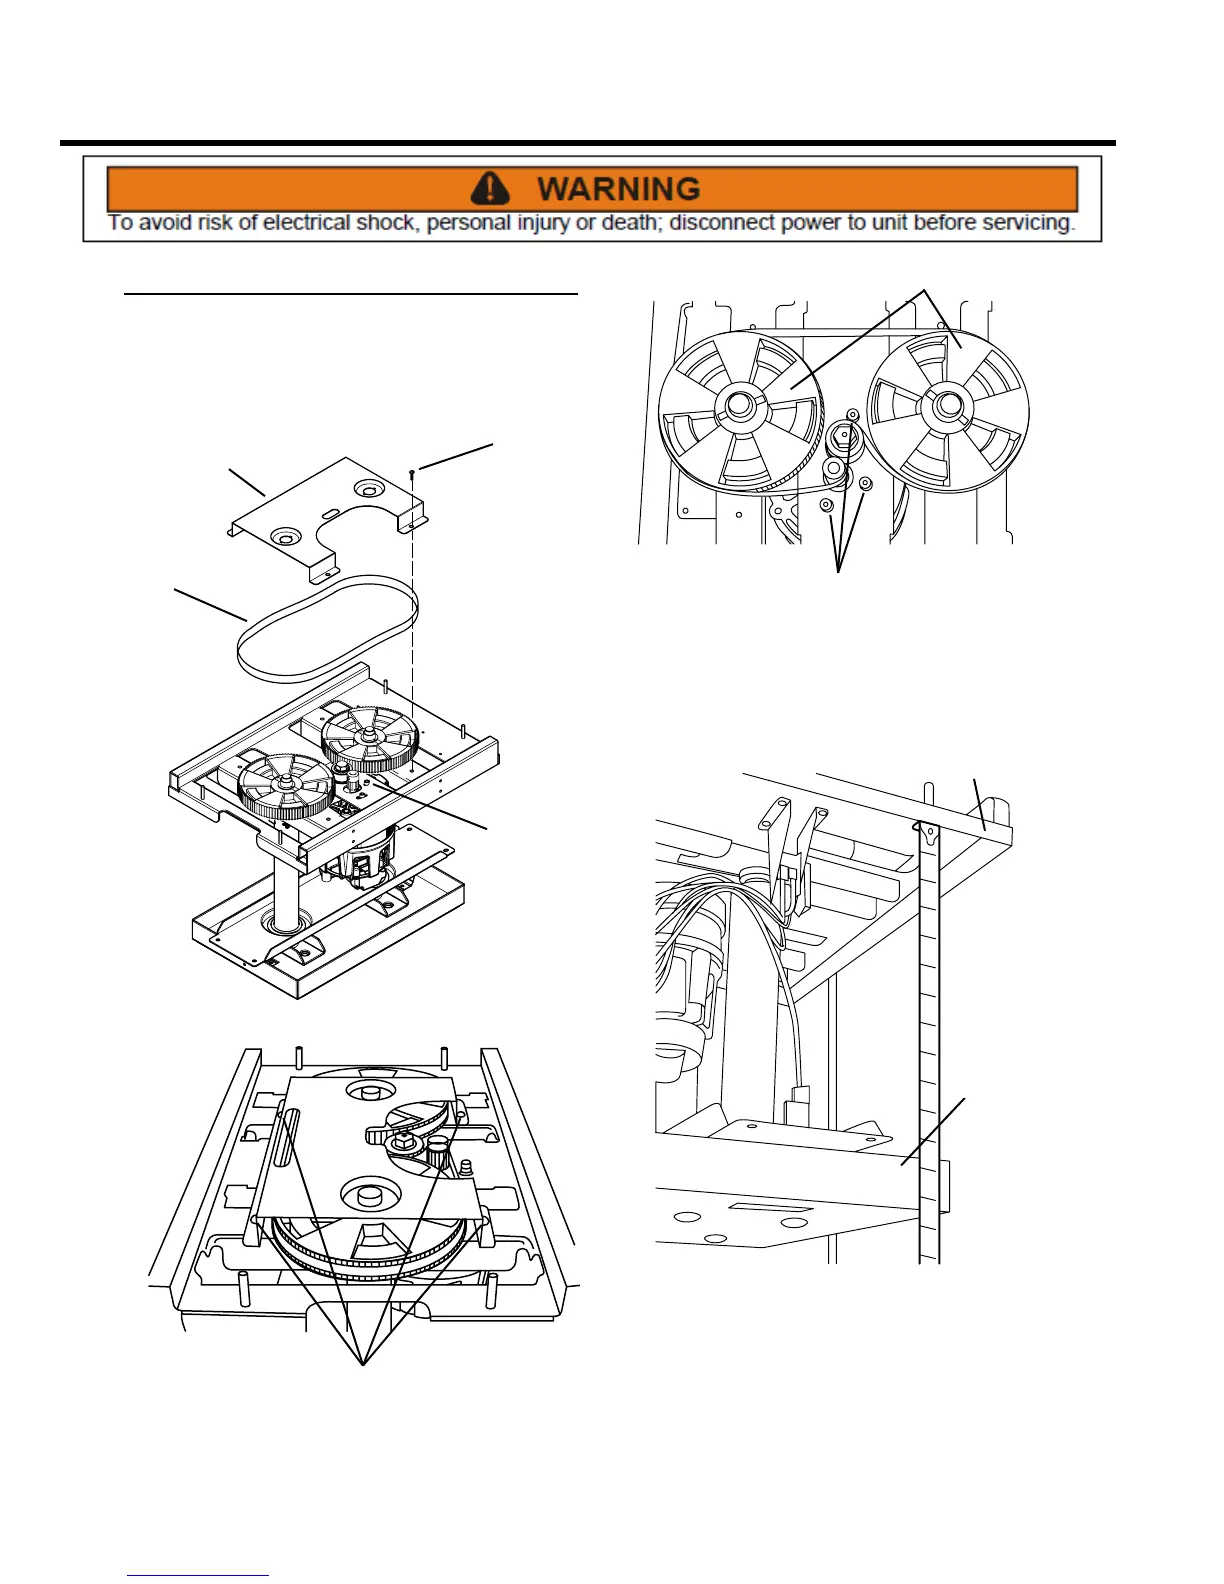
Drive Belt
REMOVE AND REINSTALL
The drive belt transfers power from the motor to the ram
screws. If it requires replacement, follow these steps.
BELT
COVER
BELT
4 COVER
SCREWS
3 MOTOR
SCREWS
SCREWS
1. Remove cabinet cover (see Electrical Components,
Access to Components).
2. Remove the four Phillips head screws that secure the
belt cover to the unit.
CAP SCREWS
DRIVE WHEELS
3. Use a 5 mm hex wrench to loosen the three hex head
cap screws. Rotate motor to loosen belt for removal.
IMPORTANT: Before installing a new drive belt, follow
the instructions below to align the height of both ram
screws.
TOP FRAME
RAM
4. Measure the distance from the underside of the top
frame to the bottom edge of the ram at the front and
rear of the power unit.
5. If the measurements are dierent, rotate the ram screw
drive wheels as necessary until the measurements
match.
6. Install new belt, making sure it seats properly in gear
teeth. Adjust the belt tension by rotating the motor until
the belt deection is 1/2 inch. Tighten the three hex
head cap screws securely. Re-install the belt cover.