Disassembly
36 ©2009 Viking Preferred Service
To avoid risk of electrical shock, personal injury, or death, disconnect electrical power source to unit, unless test
procedures require power to be connected. Discharge capacitor through a resistor before attempting to service.
Ensure all ground wires are connected before certifying unit as repaired and/or operational.
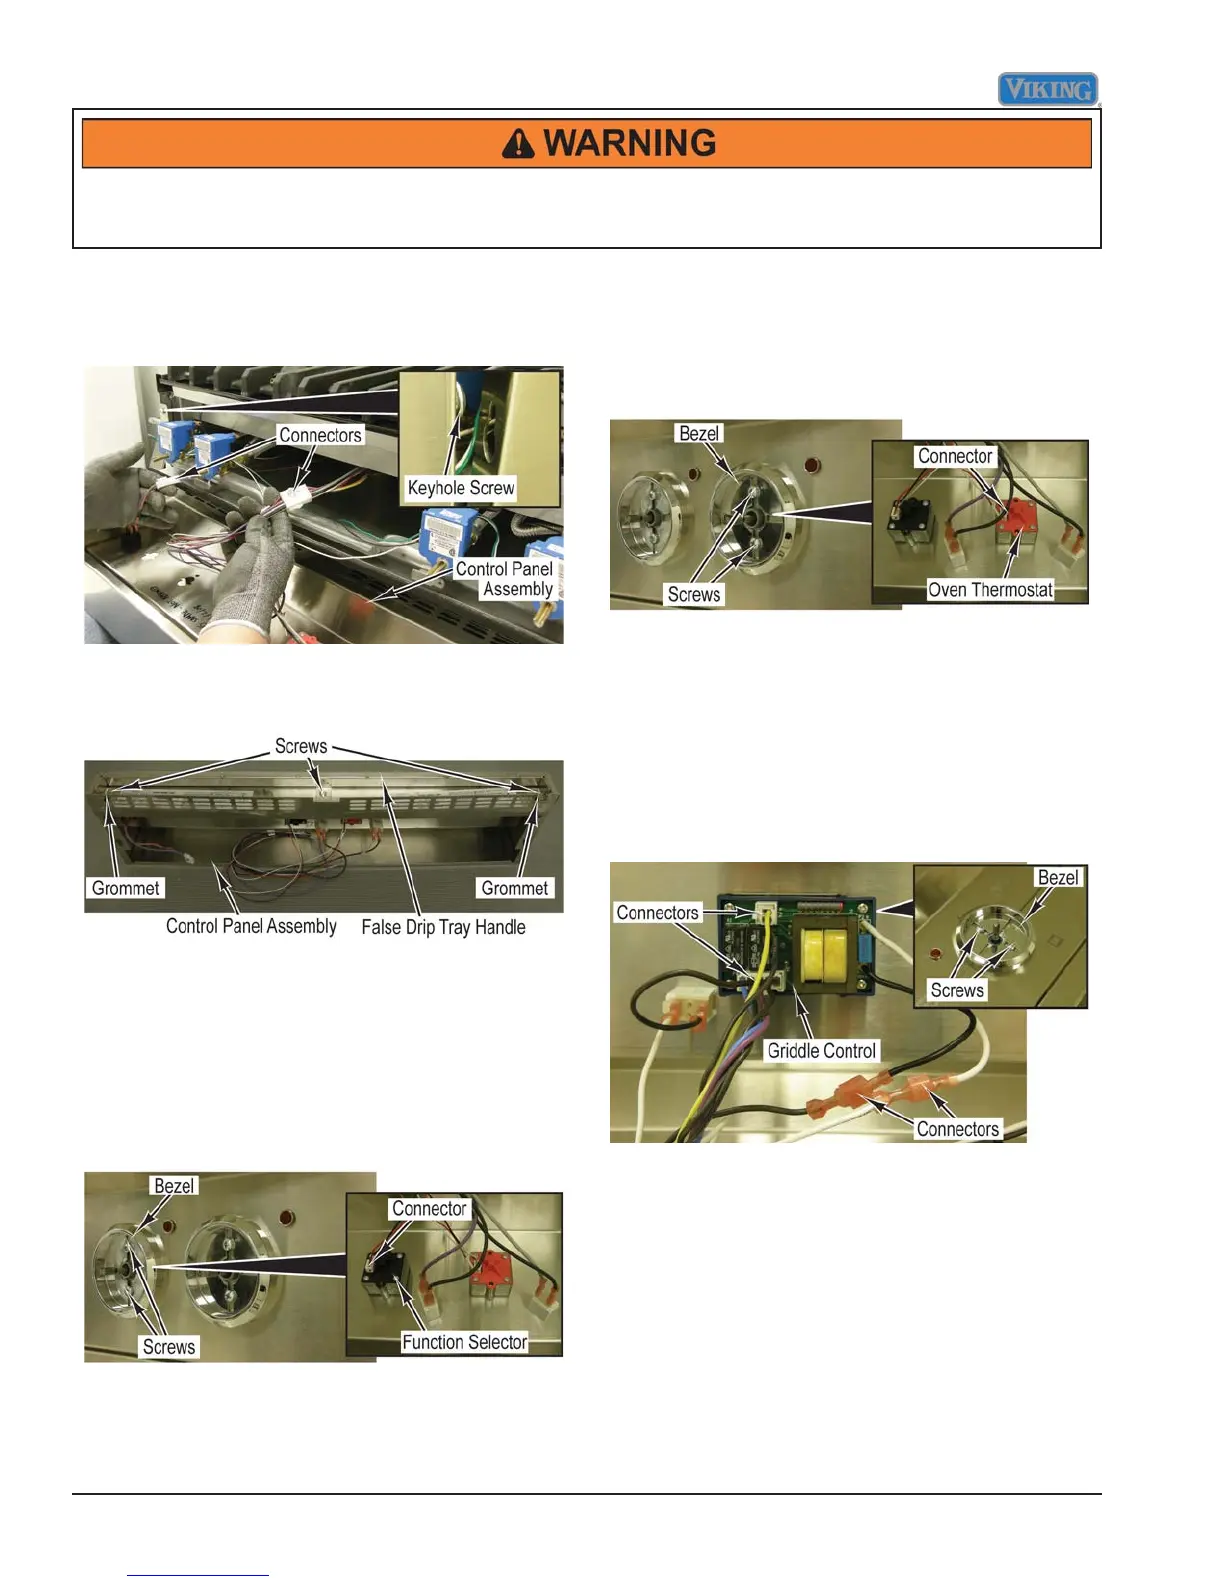
4. Lift up to remove control panel assembly from two
keyhole screws.
5. Tilt control panel assembly forward and disconnect
two connectors to remove from range.
6. Remove grommets from control panel assembly.
7. Remove three screws and false drip tray handle from
control panel assembly.
8. Reverse procedure for installation.
Oven Function Selector Removal
Condition Requirements:
Control Panel Assembly Removed
1. Disconnect connector from the oven function
selector.
2. Remove two screws, bezel, and the oven function
selector from the control panel assembly.
3. Reverse procedure for installation.
Oven Thermostat Removal
Condition Requirements:
Control Panel Assembly Removed
1. Disconnect connector from the oven thermostat.
2. Remove two screws, bezel, and the oven thermostat
from the control panel assembly.
3. Reverse procedure for installation.
Griddle Control Thermostat Removal
(VDSC536-4G, VDSC548-6G, & VDSC548-4GQ)
Condition Requirements:
Control Panel Assembly Removed
1. Mark and disconnect four connectors from the griddle
control.
2. Remove two screws, bezel, and the griddle control
from the control panel assembly.
3. Reverse procedure for installation.



 To Next Page