Disassembly
38 ©2009 Viking Preferred Service
To avoid risk of electrical shock, personal injury, or death, disconnect electrical power source to unit, unless test
procedures require power to be connected. Discharge capacitor through a resistor before attempting to service.
Ensure all ground wires are connected before certifying unit as repaired and/or operational.
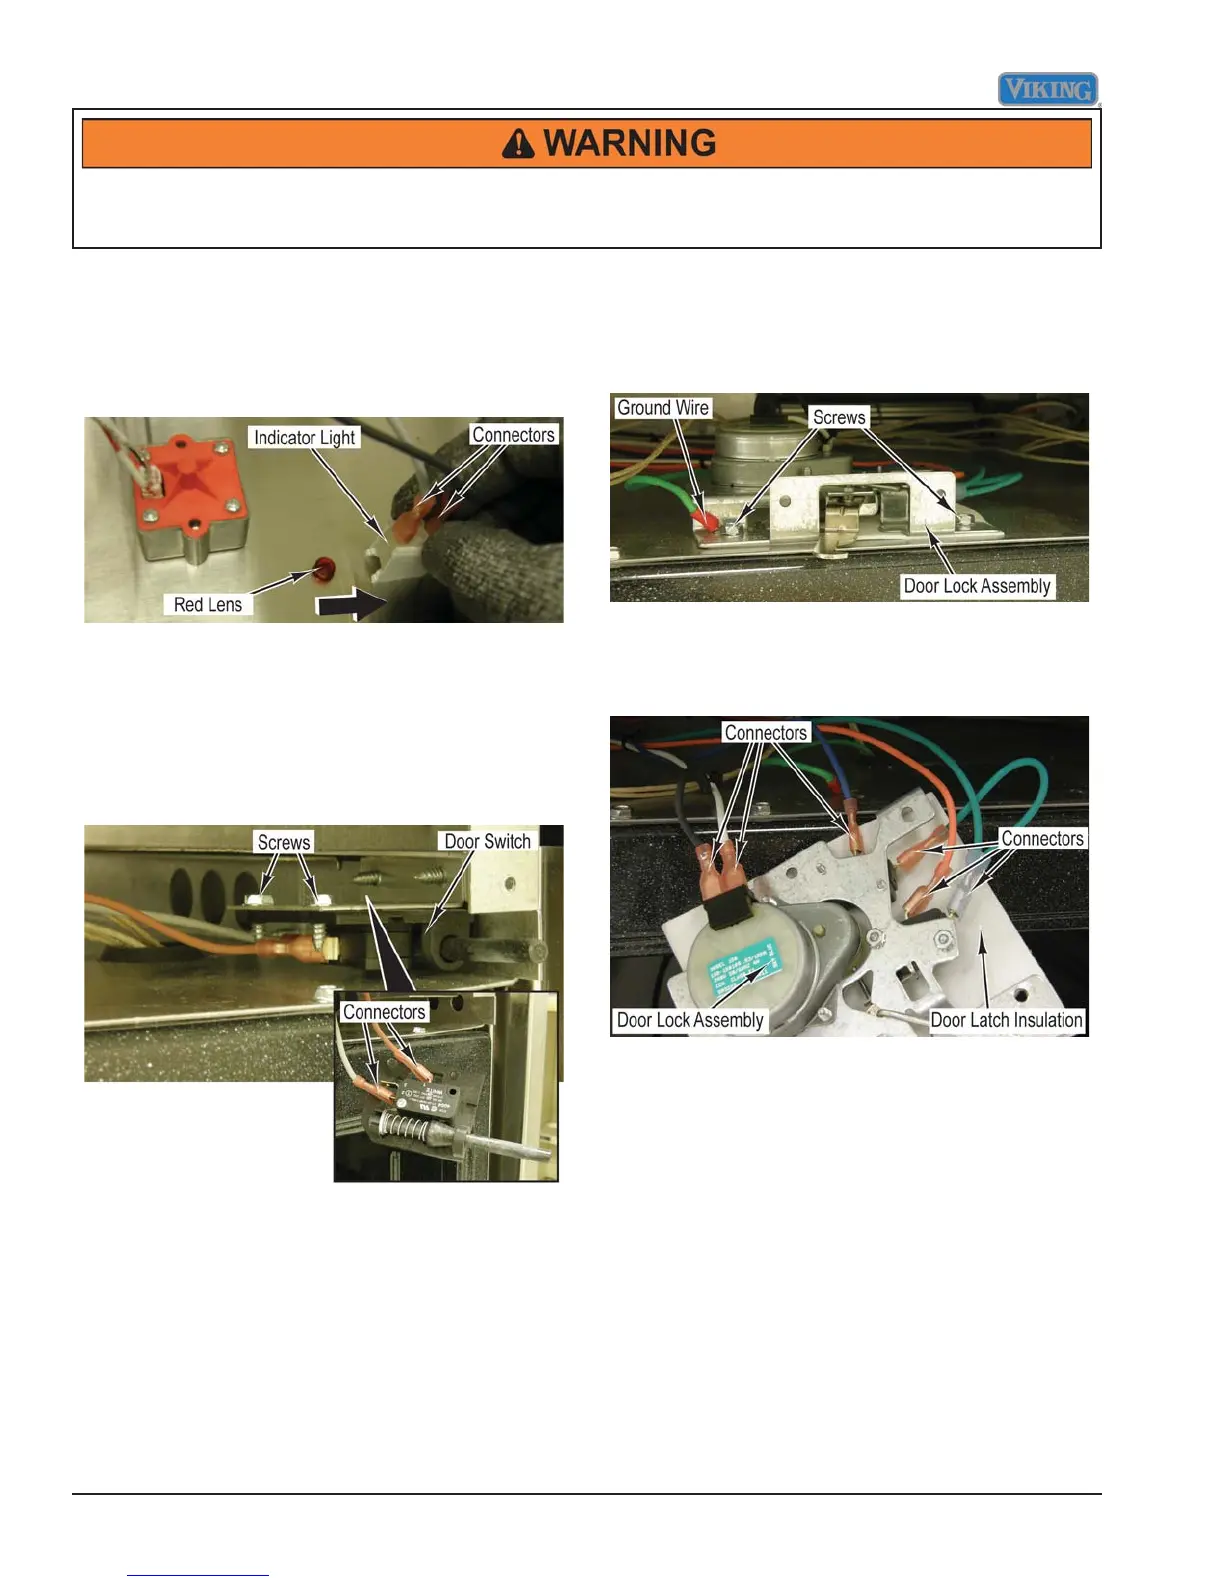
Indicator Lights Removal
Condition Requirements:
Control Panel Assembly Removed
1. Hold the red lens and slide off the indicator light. The
indicator light will only slide in one direction.
2. Disconnect two connectors from the indicator light.
3. Reverse procedure for installation.
Door Switch Removal
Condition Requirements:
Control Panel Assembly Removed
1. Remove two screws and door switch from range.
2. Mark and disconnect two connectors from door
switch.
3. Reverse procedure for installation.
Door Lock Assembly Removal
Condition Requirements:
Control Panel Assembly Removed
1. Remove two screws and ground wire from door lock
assembly.
2. Mark and disconnect six connectors from door lock
assembly.
3. Remove door lock assembly and lower latch
insulation from range.
4. Reverse procedure for installation.



 To Next Page