Disassembly
©2010 Viking Preferred Service 43
To avoid risk of electrical shock, personal injury, or death, disconnect electrical power source to unit, unless test
procedures require power to be connected. Discharge capacitor through a resistor before attempting to service.
Ensure all ground wires are connected before certifying unit as repaired and/or operational.
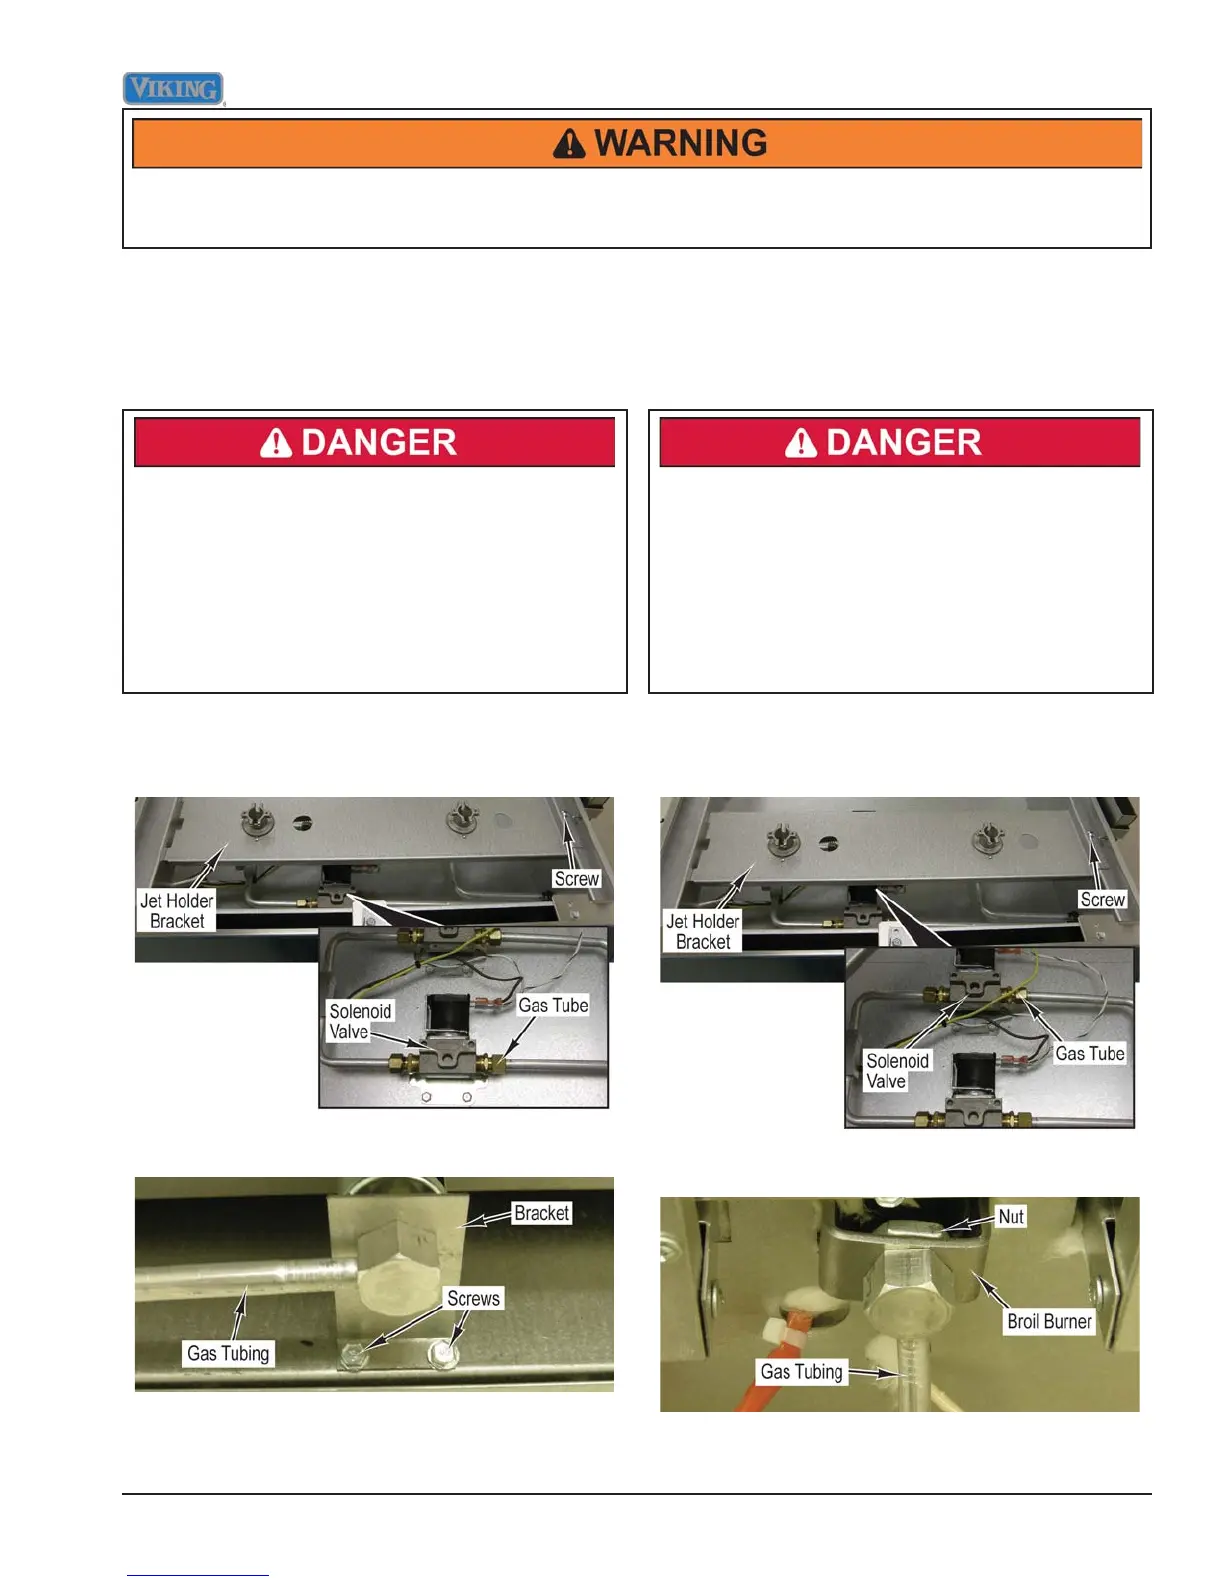
Gas Tubing For Bake Burner Removal
Condition Requirements:
Main Top Removed
Back Panel Removed
Gas Supply Disconnected
Gas leak hazard. To avoid risk of personal injury
or death, leak testing of the appliance must
be conducted according to the manufacturer’s
instructions. Before placing appliance in operation,
always check for gas leaks with soapy water solution.
DO NOT USE AN OPEN FLAME TO CHECK FOR
GAS LEAKS.
1. Remove screw and position jet holder bracket out of
way.
2. Remove gas tube from solenoid valve.
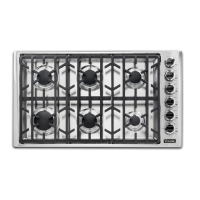
3. Remove two screws, bracket and gas tubing from
range.
4. Remove nut and bracket from gas tubing.
5. Reverse procedure for installation.
6. Perform gas leak test.
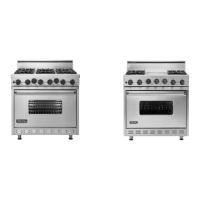
Gas Tubing For Broil Burner Removal
Condition Requirements:
Main Top Removed
Back Panel Removed
Gas Supply Disconnected
Gas leak hazard. To avoid risk of personal injury
or death, leak testing of the appliance must
be conducted according to the manufacturer’s
instructions. Before placing appliance in operation,
always check for gas leaks with soapy water solution.
DO NOT USE AN OPEN FLAME TO CHECK FOR
GAS LEAKS.
1. Remove screw and position jet holder bracket out of
way.
2. Remove gas tube from solenoid valve.
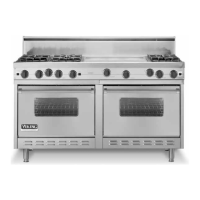
3. Remove nut from broil burner and gas tubing from
range.
4. Reverse procedure for installation.
5. Perform gas leak test.