12
ASSEMBLY
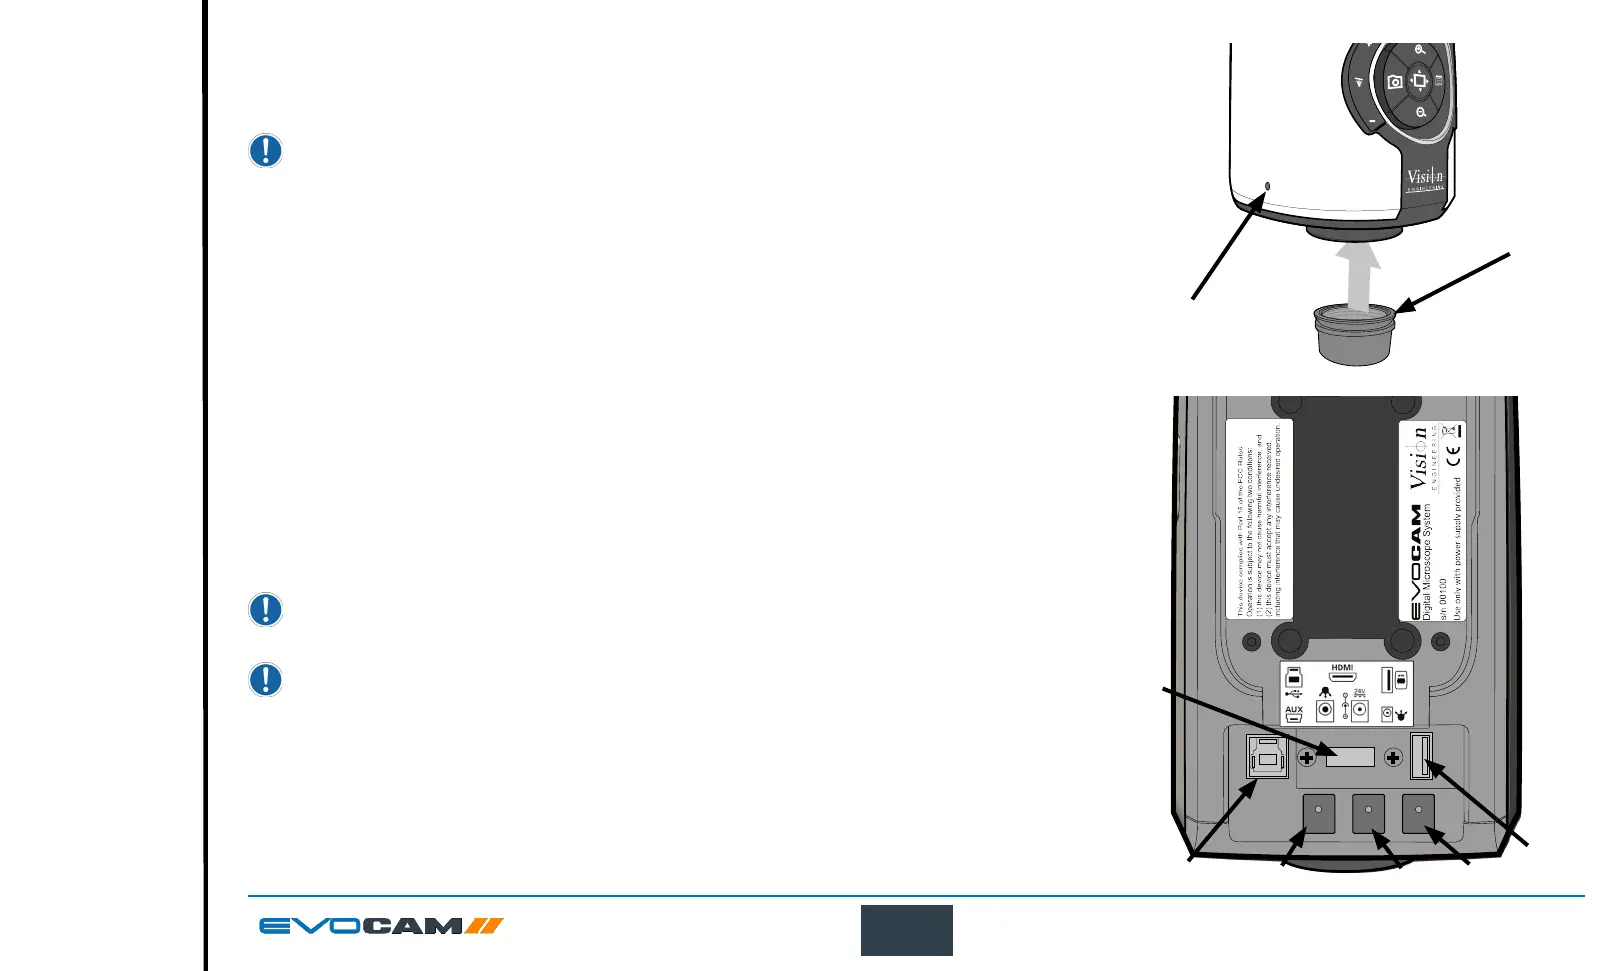
Objective lens
` While holding the objective lens
u
in position, use the HEX key supplied to secure the lens by tightening
the grub screw
v
nger tight.
Do not over tighten the grub screw holding the lens in place.
Cabling
` Plug the HDMI cable into the EVO Cam II connector
u
and the other end into your HDMI-compatible
monitor or TV.
` The USB3 connetor
v
is used for video out and software control.
` Plug the power supply into a mains socket. Plug the power lead from the power supply into the
EVO Cam II power connector
w
on the back of the unit.
` If required, an external ringlight (option) can be used with EVO Cam II. Plug the external ringlight into
the rear panel connector
x
of EVO Cam II.
Only use a Vision Engineering-authorised external ringlight with EVO Cam II.
` Plug the transmitted substage illuminator cable into the connector
y
on the rear panel of EVO Cam II.
The transmitted substage illuminator is an option for use with the Ergo stand.
` Plug the external remote keypad (optional) into socket
z
at rear of EVO Cam II.
u
v
y
z
v
w
x
u