Chapter 3 - Operations 39
Rotary Engraving
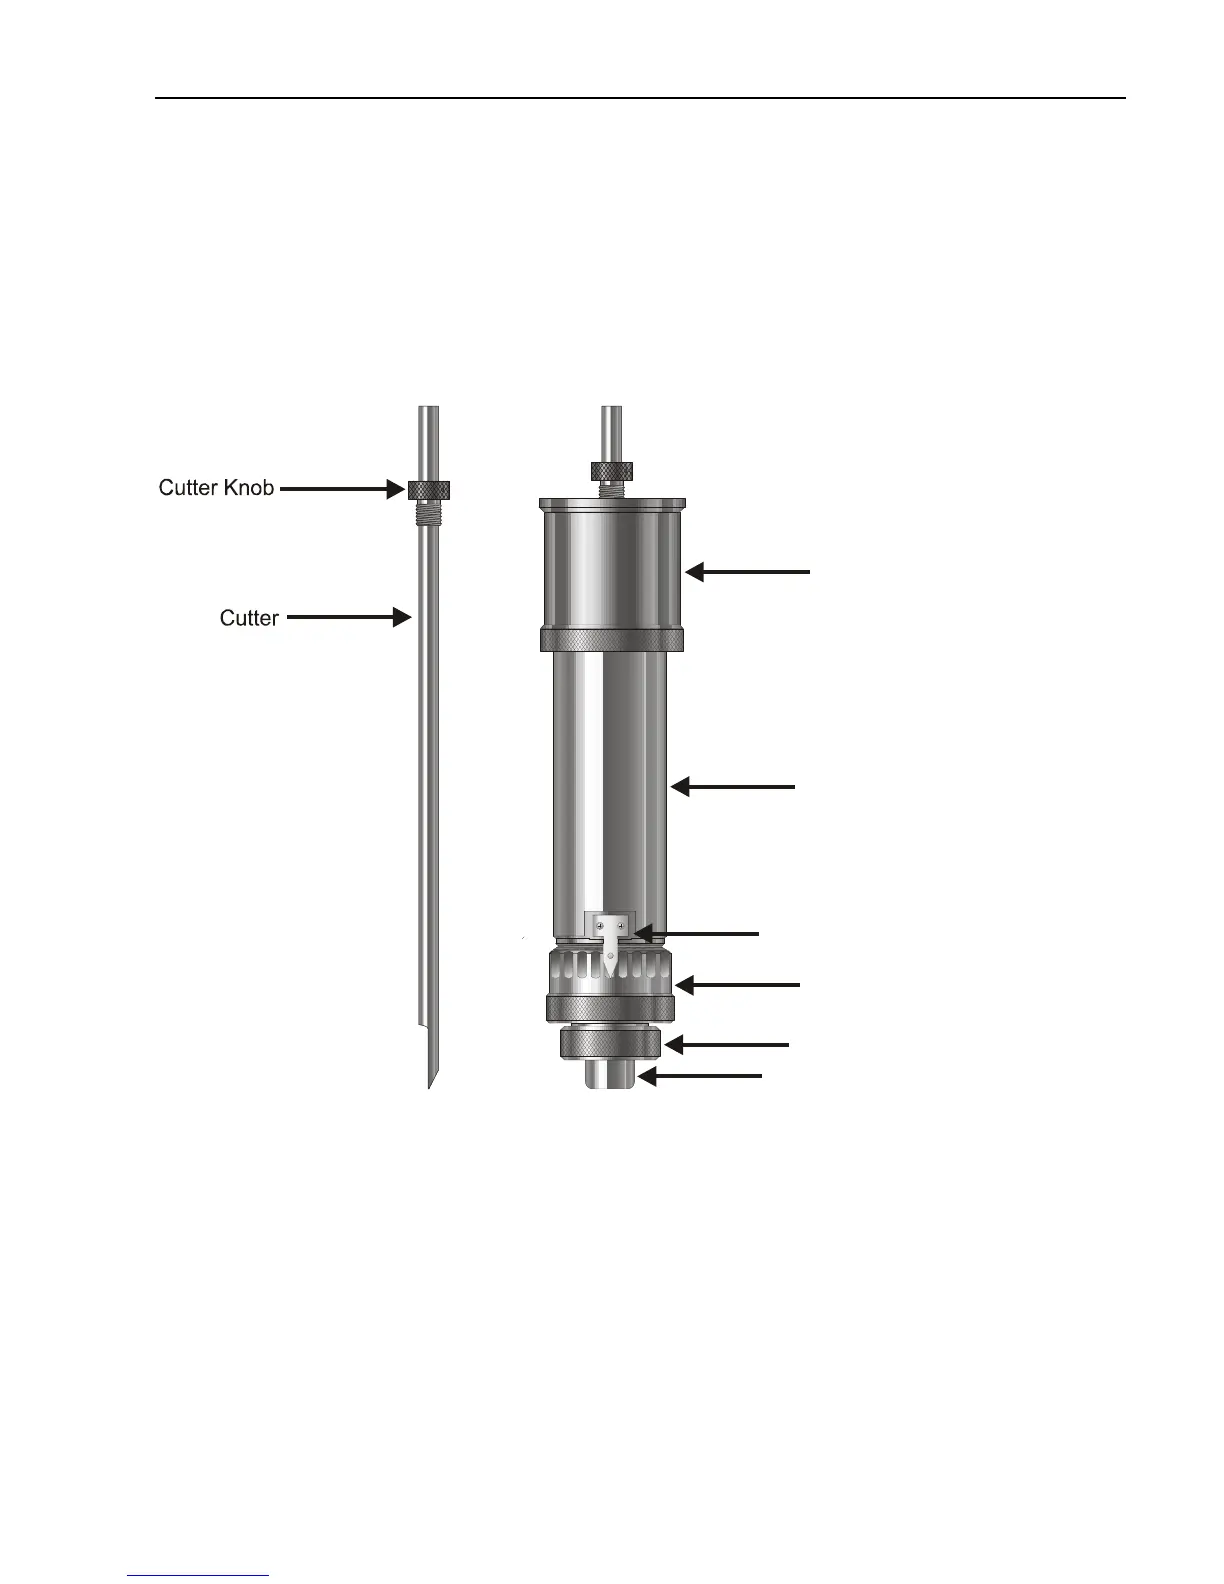
In this section, we will set up to engrave with a rotating cutter. Figure 3.2 on the next
page shows the VE-810 spindle with a rotary cutter.
(Figure 3.2) The VE-810 spindle with rotary cutter
10
Spindle Pulley
Spindle Housin
Pointer
Micrometer
Retainer Ring
Nose Cone
The first thing that you need to do when rotary engraving is to zero the cutter. To do this,
you must first turn the micrometer so that the pointer points to 0. Insert the cutter into the
spindle and screw the cutter knob completely in. Note that the cutter will screw in counter-
clockwise looking down from the top of the spindle. Take a scrap piece of material and
place it flat on the bottom of the nose cone. There will be a small setscrew in the cutter
knob. Loosen the setscrew and push the cutter down until it touches the flat piece of
material that you have at the bottom of the nose cone. Tighten the cutter knob set screw.
The cutter is now zeroed.