i12 Manual Page 30 - Revision: 6-13-2023
INSTALLATION
It is very important to follow all instructions listed. Failure to do so may cause the system to not
operate properly and may impact the long-term reliability of the system.
1. Always check local plumbing codes before tapping into water supply line and drain line. Tap
into the water source with an approved connector.
2. Check incoming water pressure and ensure it is between 50-70PSI. If the water pressure is
above 70PSI then a pressure reducing valve must be installed and set to lower the pressure
to the optimal water pressure between 50-70PSI.
3. Determine the best installation location. Consider user convenience, electrical access, and
water access. The unit performs optimally if within 2- feet of a cold-water supply line.
Connect only to a cold-water supply. Do not install Feed Water Assembly on the Hot Water
Line. Do not place unit where it will be exposed to rain, freezing temperatures or direct
sunlight.
4. The rear of the unit should be installed at least 2” from any vertical surface to ensure
proper air circulation.
5. Check the available power supply to assure proper electrical service. In the U.S., the voltage
specification is 110/120V 60Hz. Voltage outside of this specification will affect the system
performance.
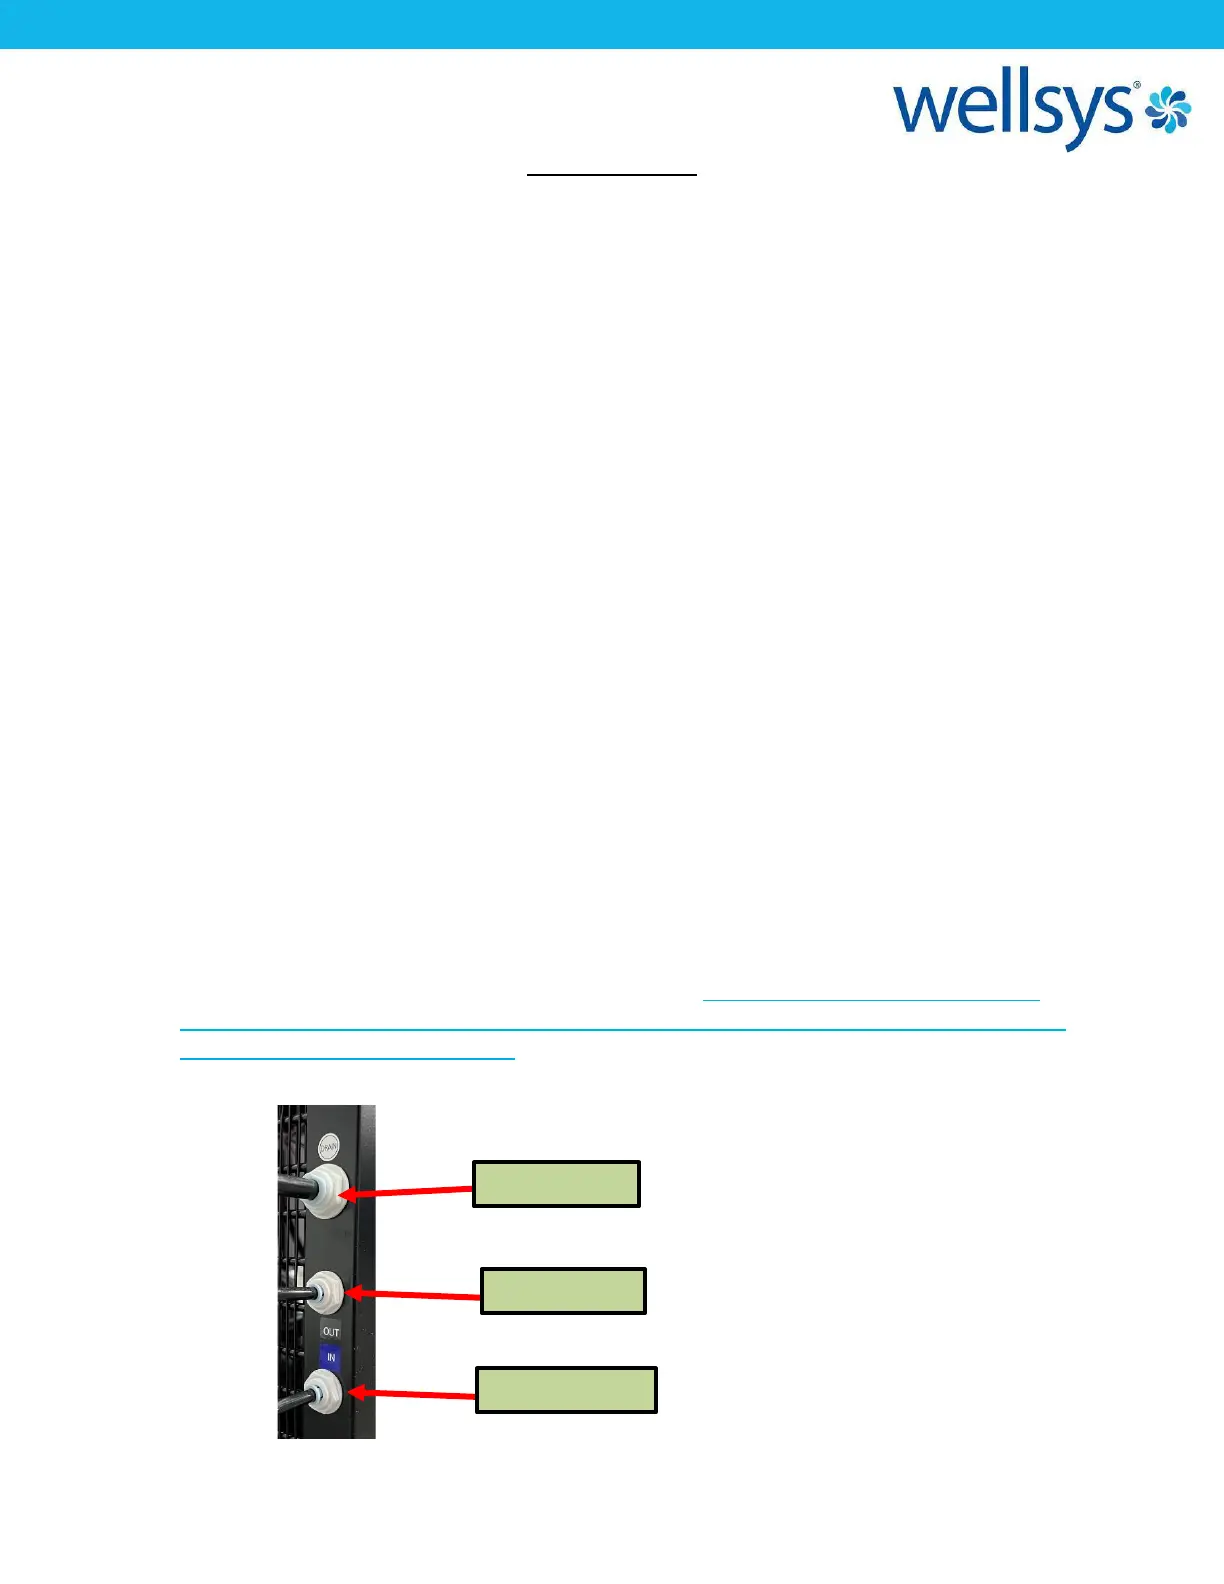
6. Connect the water supply line (¼” LLDPE Tubing) to the “IN” port on the back of the
machine. Using the same type of tubing, connect the “BRINE” port to a drain, OR to a
condensate pump if using one. Using 3/8” LLDPE Tubing, connect the “DRAIN” port to a
drain, OR to the same condensate pump if using one. The filters must be flushed before
allowing the machine to fill with water. Refer to the previous section which outlines how
to flush the filters while installed. With the filters flushed, turn on the water supply and
ensure the ¼-turn valve just before the filters is open.