71
WHILL Model C2/Ci2 User Manual
5
5. Assembly, adjustment, and disassembly
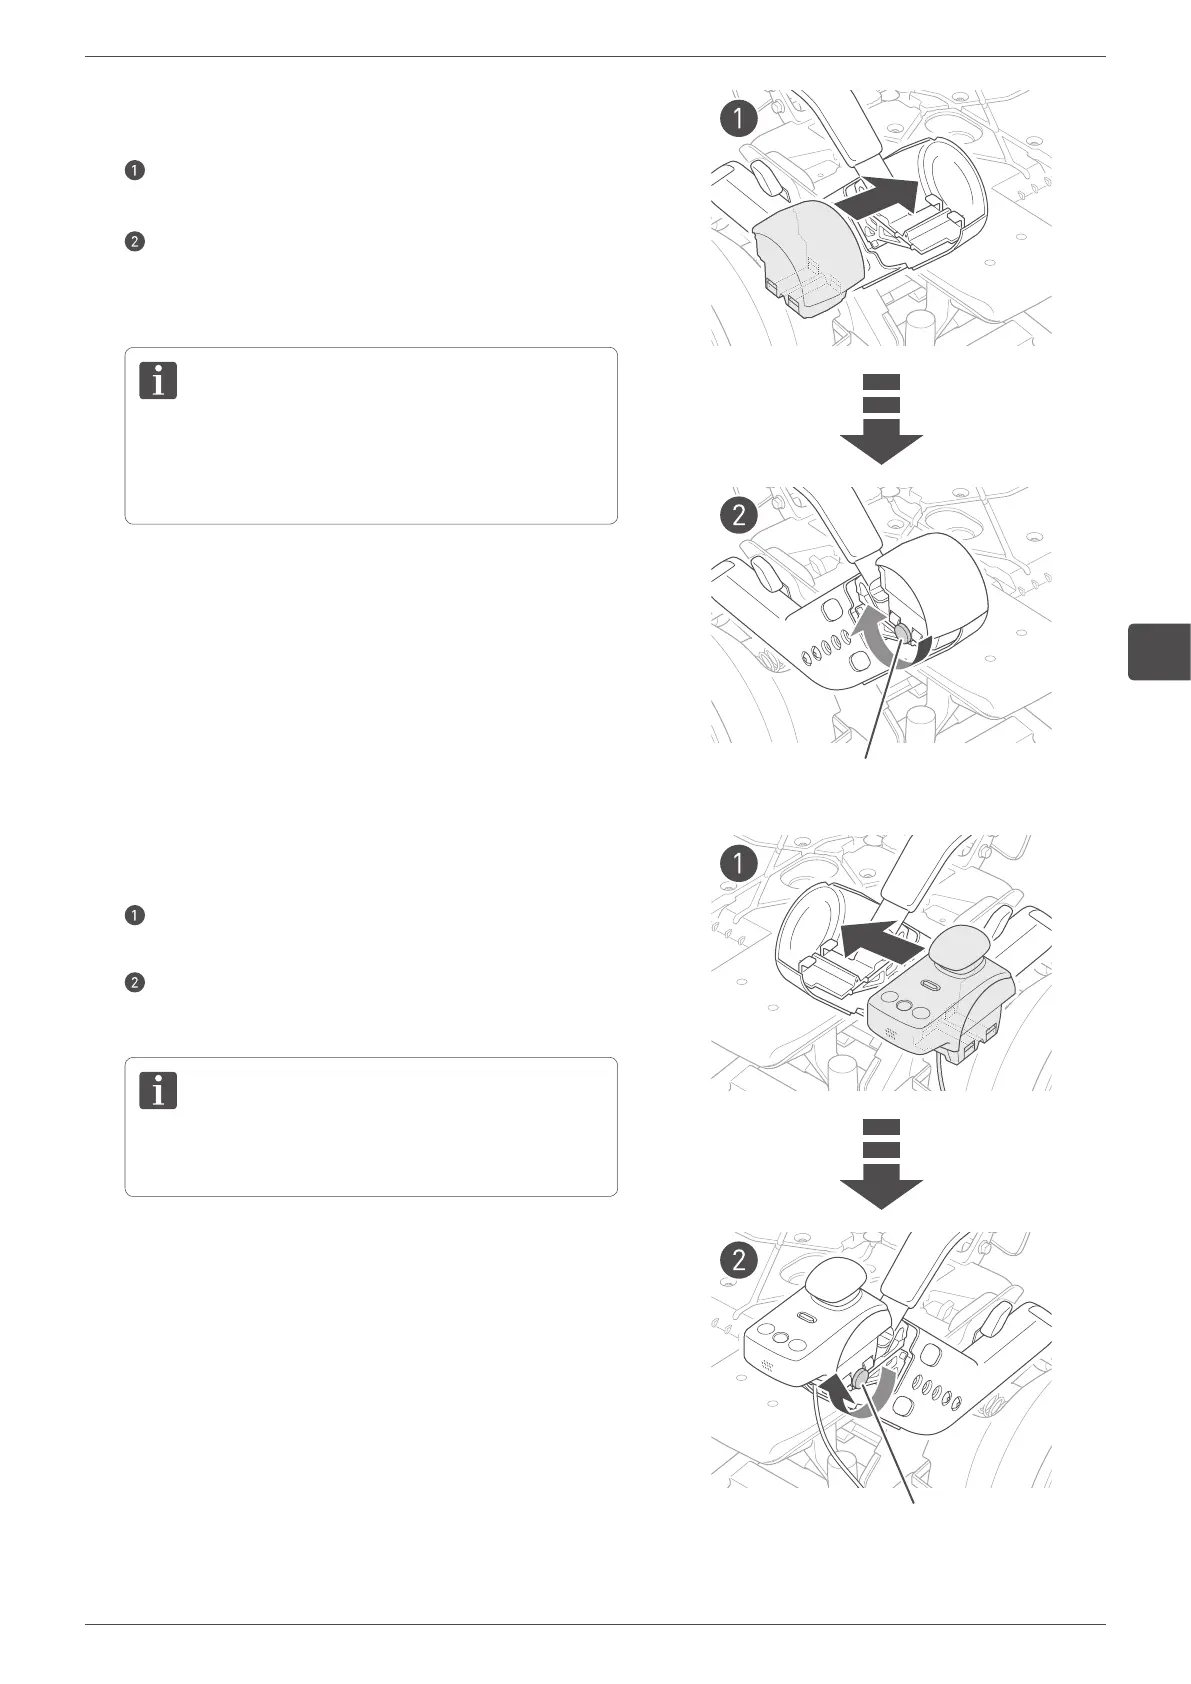
9.
Attach the round unit at the head of the arm that was
removed in Step 8 to the opposite arm.
Insert the grooved part of the round unit to the arm
then slide in the round unit.
Fix the round unit at the head of the arm firmly by
using the screw that was removed in Step 8 with
your hand.
Try to move the round unit at the head of the arm up,
down, left, and right, and check that they are locked
in place.
Screw
10.
Attach the control pad that was removed in Step 7 to
the opposite arm.
Insert the grooved part of the control pad to the
projection on the arm, then slide the control pad.
Fix the control pad firmly by using the screw that
was removed in Step 7 with your hand.
Try to move the control pad up, down, left, and right,
and check it is locked in place.
Screw