COMPONENT TESTING
Whirlpool Smart All-In-One Washer & Dryer
n
3-15
For Service Technician Use Only
Detergent/Softener Level not Detected
Perform the following checks if the washer cannot detect the
level of the detergent or soener in the reservoir.
1. Open dispenser lid on top the washer/dryer and remove
the bulk dispenser container. Remove both the detergent
and soener lters and clean thoroughly with warm
water. Reinstall both lters.
2. Reinsert bulk dispenser container and verify it is fully
seated in the dispenser cavity. Close the bulk dispenser lid
and retest.
¾ If detergent/soener level is not detected, go to step 3.
¾ If detergent/soener level is detected, go to step 11.
3. Open dispenser lid and remove bulk dispenser container.
Save customer’s detergent and soener in spare
container(s). When empty, you should ‘hear’ the oats
moving up and down when the container is rotated
(see Figure 3). If stuck, thoroughly rinse both container
reservoirs with warm water. Fill reservoirs with water to
test oats. Reinstall bulk dispenser container in dispenser
assembly and check for proper operaon.
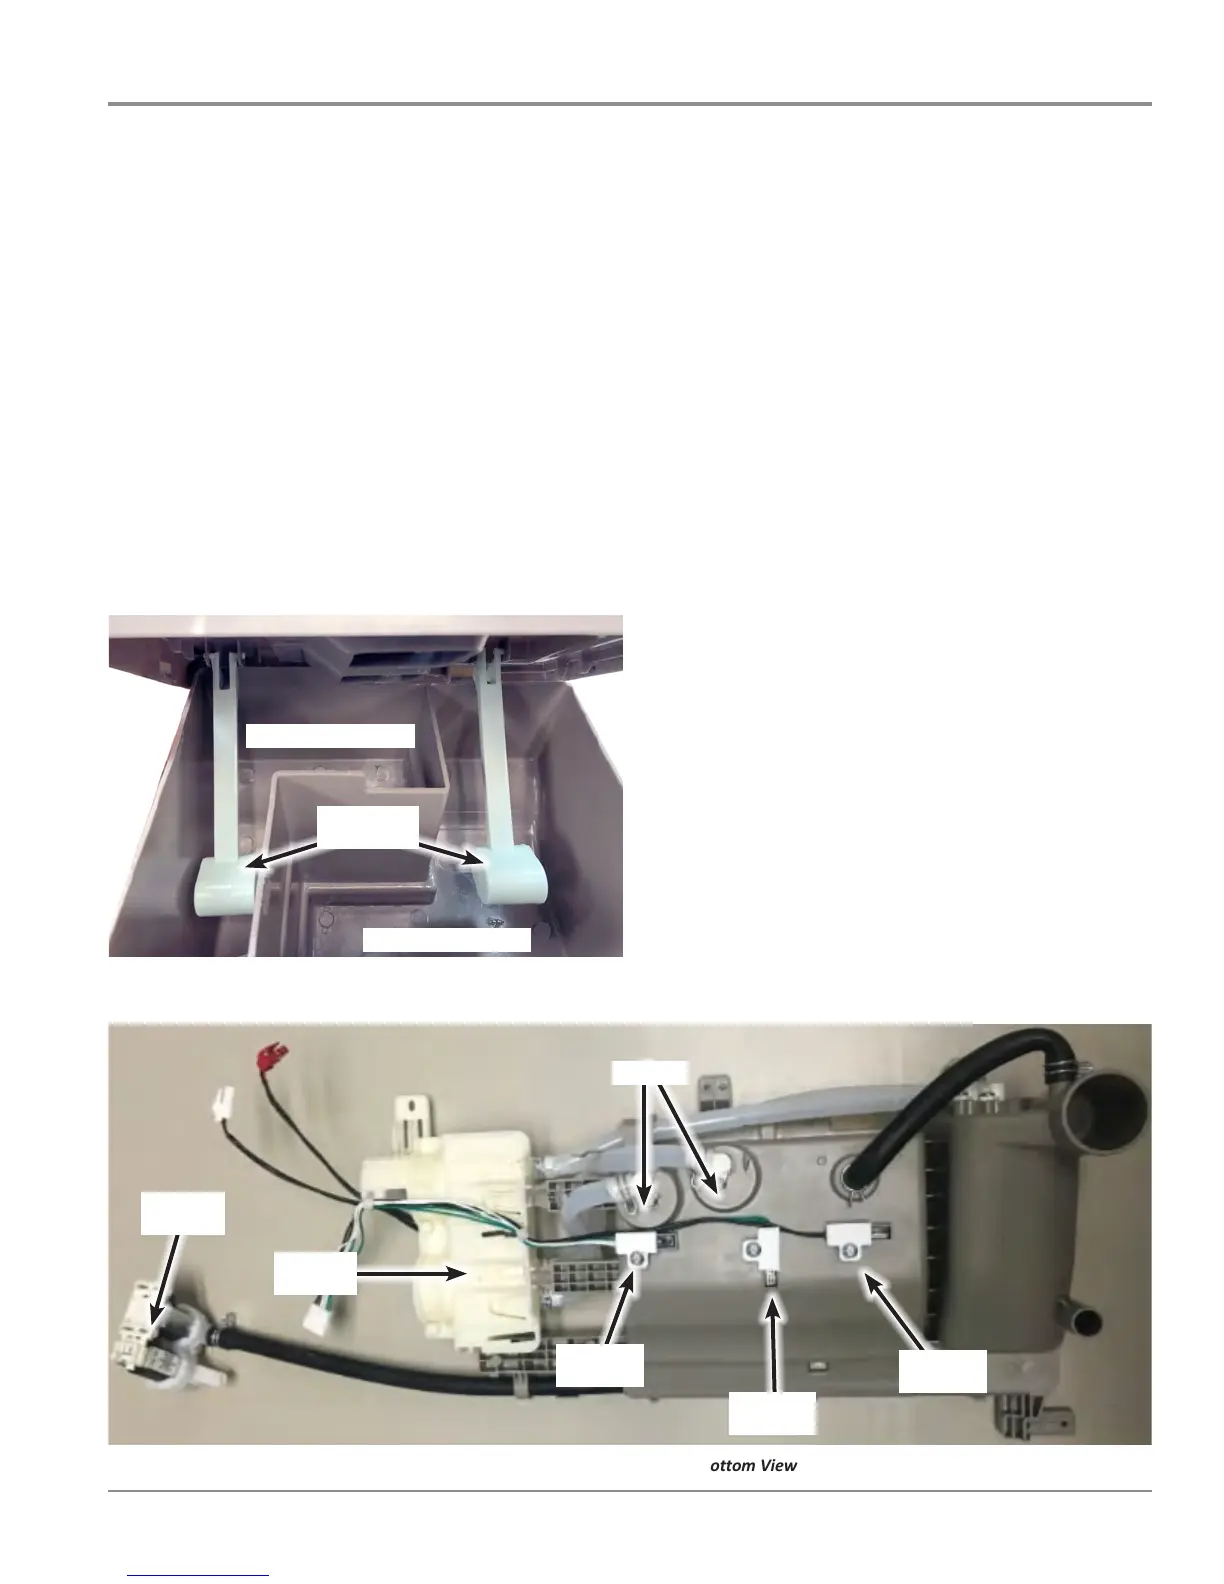
Soener Reservoir
Detergent Reservoir
Float
Magnets
Figure 3 - Dispenser Container Inside View
¾ If oats are damaged, replace the enre bulk dispenser
container. Container is not serviceable.
¾ If oats are working, but detergent/soener level is not
detected, go to step 4.
4. Unplug washer/dryer or disconnect power.
5. Gently lay washer/dryer on its right side to access the
ACU. Remove AC shield and ACU cover.
6. Visually check that the J12 connector is inserted all the
way into the ACU.
¾ If visual check passes, go to step 7.
¾ If connector is not inserted properly, reconnect J12 and
retest.
7. To test the detergent level switch, disconnect J12 from
ACU. Using an ohmmeter, connect leads across pins 1 and
2 of connector J12. With the bulk container removed, the
reed switch should read open.
8.
While watching the ohmmeter, move a magnet around the
oor of the bulk dispenser cavity (front for detergent). The
magnet should close the reed switch (less than 3 ohms).
¾ If the resistance sll reads open, replace the enre bulk
dispenser assembly.
9. To test the soener level switch, using an ohmmeter,
connect leads across pins 3 and 4 of connector J12. With
the bulk container removed, the reed switch should read
open.
10.
While watching the ohmmeter, move a magnet around the
oor of the bulk dispenser cavity (rear for soener). The
magnet should close the reed switch (less than 3 ohms).
¾ If the resistance sll reads open, replace the enre bulk
dispenser assembly.
¾ If the preceding steps did not correct the problem,
replace the ACU.
11. Unplug washer/dryer or disconnect power.
12. Reassemble all parts and panels.
13. Perform the Service Diagnosc Mode Tests on page 2-3 to
verify repairs.
Figure 4 - Detergent Assembly - Bottom View
Dosing
Pumps
Soener
Lvl Switch
Detergent
Lvl Switch
Container
Switch
Filters
Valve
Assembly