6400 Reference Manual
7
Batteries and Charging
The 6400 analyzer kit comes standard with two different sized batteries. The analyzer uses the large battery,
while the encoder / wireless transmitter & strobe (timing) light use the smaller battery.
Note: Both batteries utilize the same battery charger that is provided with the 6400 analyzer kit.
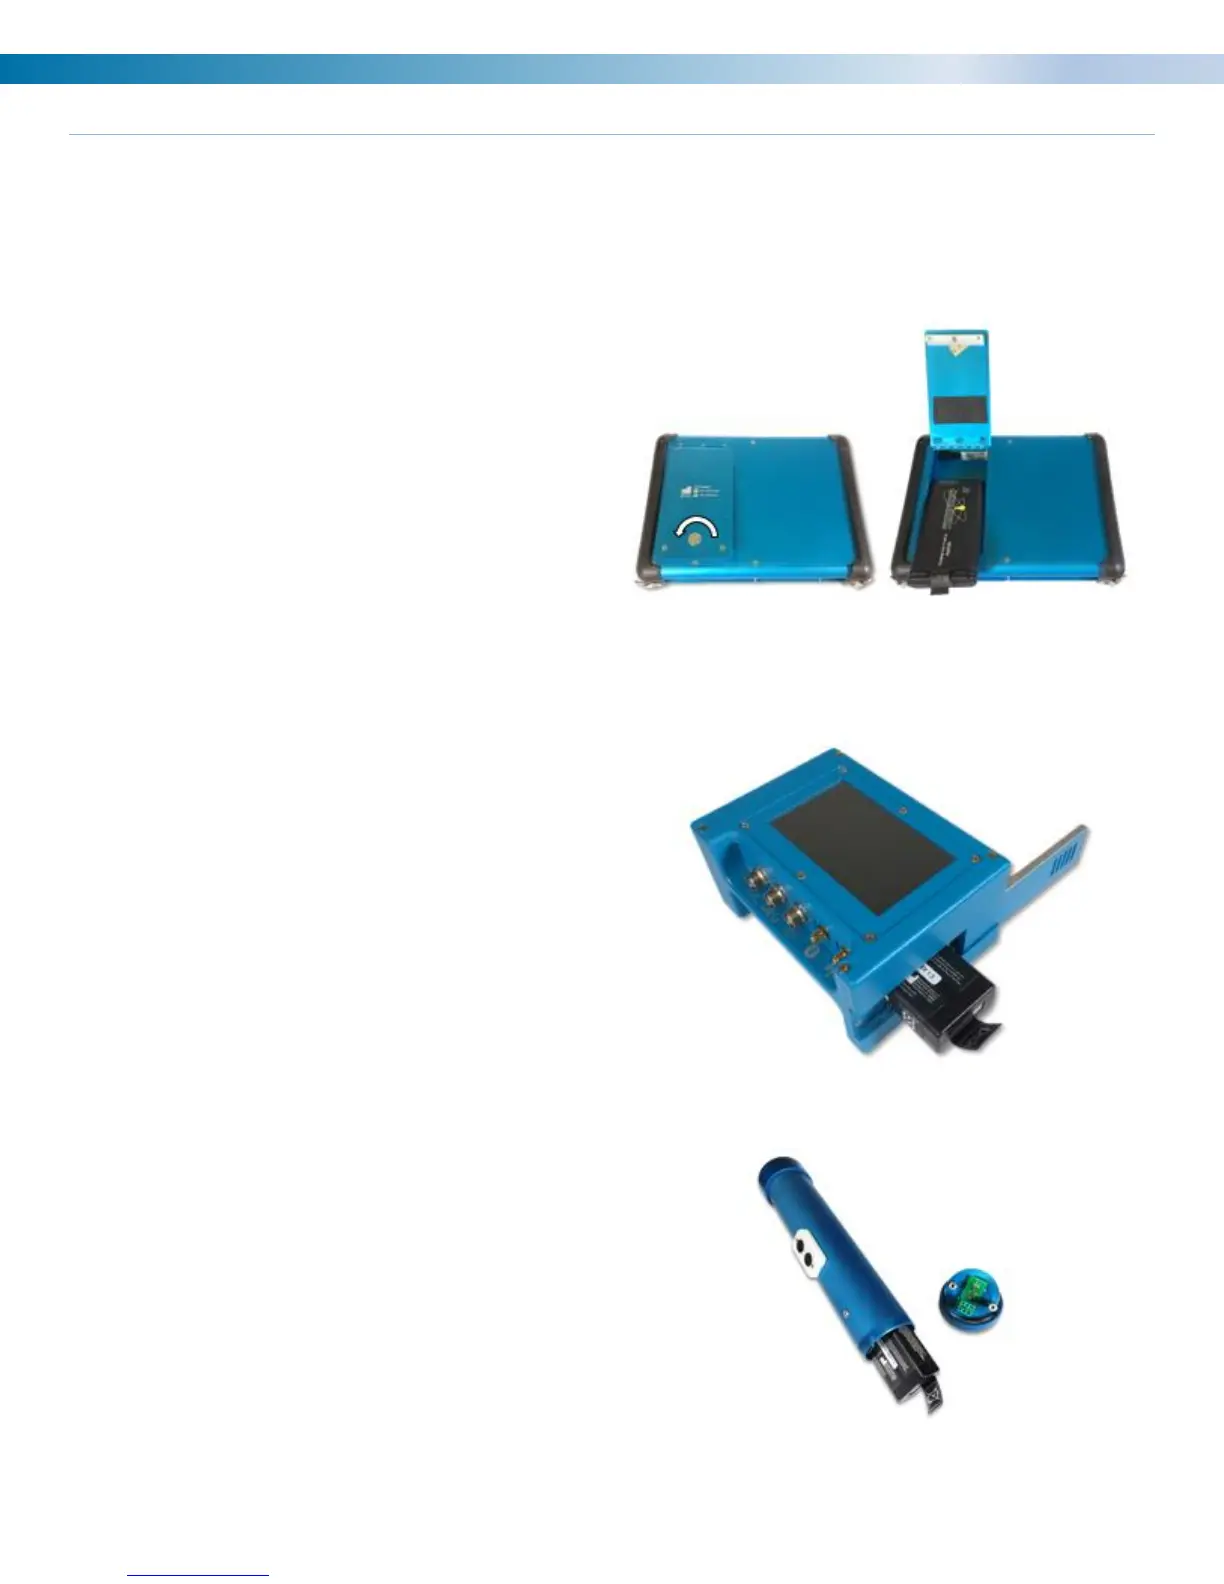
6400 Analyzer Battery Removal and Installation:
• On the back of the analyzer use a coin to turn
the locking mechanism counterclockwise to
unlock the battery door.
• Replace the battery with a charged battery.
• Close the door and relock.
Note: Using the lowest analyzer screen brightness
level without making the screen hard to see for the
user will extend battery life.
Encoder / Wireless Transmitter Battery Removal
and Installation:
• Slide the door open on the side of the
encoder.
• Pull the tag on the battery to remove it.
• Replace with a charged battery.
• Close the door.
• Once a new battery is installed the encoder
will automatically turn on.
Note: To save battery life remove this battery while
the encoder is not in use.
Strobe (timing) light Battery Removal and
Installation:
• Unthread the back cover and pull the
connector straight out of the timing light.
• Pull tag to remove the battery from the
housing.
• Install a new battery.
• Replace plug and connector.
• Rethread on back cover. The cover does not
need to be extremely tight.