Geotagging
If the WingtraOne you own has ID ≤ 1135, please refer to page 61 in this manual for the geotagging procedure.
For every flight mission, a folder with the project's name is created on the SD card in the "WingtraPilotProjects" folder. Both the collected images and GNSS data of the
corresponding flight are saved in this project folder. You can geotag the collected images on the field after completing each flight or in the office after completing multiple
flights throughout the day. To assign the geotags to the images, please go through the following description about the non-PPK and PPK geotagging process.
Non-PPK Geotagging
For non-PPK geotagging, you can do it on the tablet by using WingtraPilot or a Windows 10 computer using WingtraHub. Check out the PPK Chapter for information about
how to install and setup WingtraHub.
All you have to do is take out the SD card from the camera after the flight(s), put it into the tablet or computer, and start the geotagging procedure as follows.
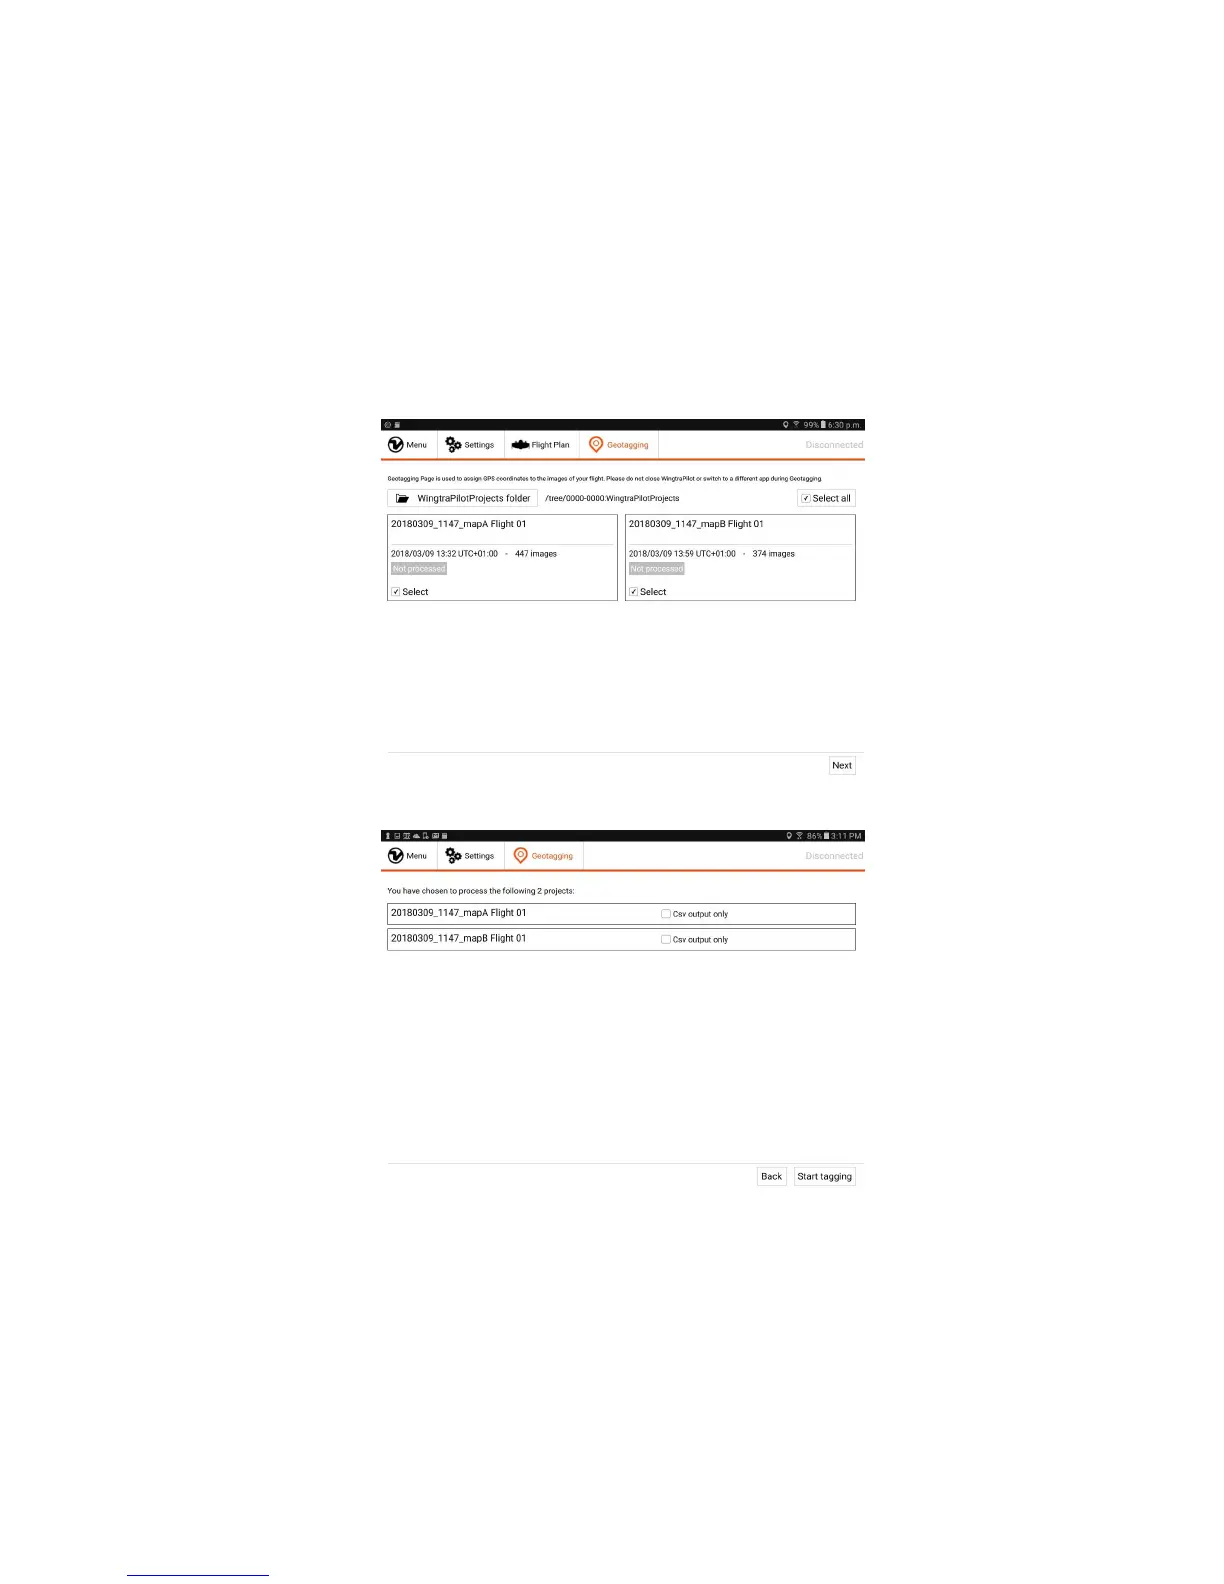
1. Go to the "Geotagging" tab in WingtraPilot/WingtraHub and select the "WingtraPilotProjects" folder on your SD card.
2. Select the project(s) which you would like to geotag, then click "Next".
3. If you want a faster tagging process and do not need the coordinates embedded into images, you can check the "Csv output only" box to get only the coordinates of
the images in a single csv file.
4. Click "Start tagging" to start the process.
5. Once the geotagging is done, WingtraPilot will inform you if the process was successful.