Create a New Flight Plan
To start planning a flight, you have to "Create a new Flight Plan" from the welcome menu of WingtraPilot. You can open the welcome menu by clicking on the Menu button
on the top left. Follow the wizard to setup the high-level settings of the Flight Plan — Do you want to start from scratch or based on an existing Flight Plan? What camera
do you use? Click on "Finish" and you will enter the flight planning display of WingtraPilot:
The flight planning procedure itself contains these steps:
1. Set Home
2. Add Area(s)
3. (Optional) Adjust Geofence
Step 1: Set Home for Takeoff and Landing
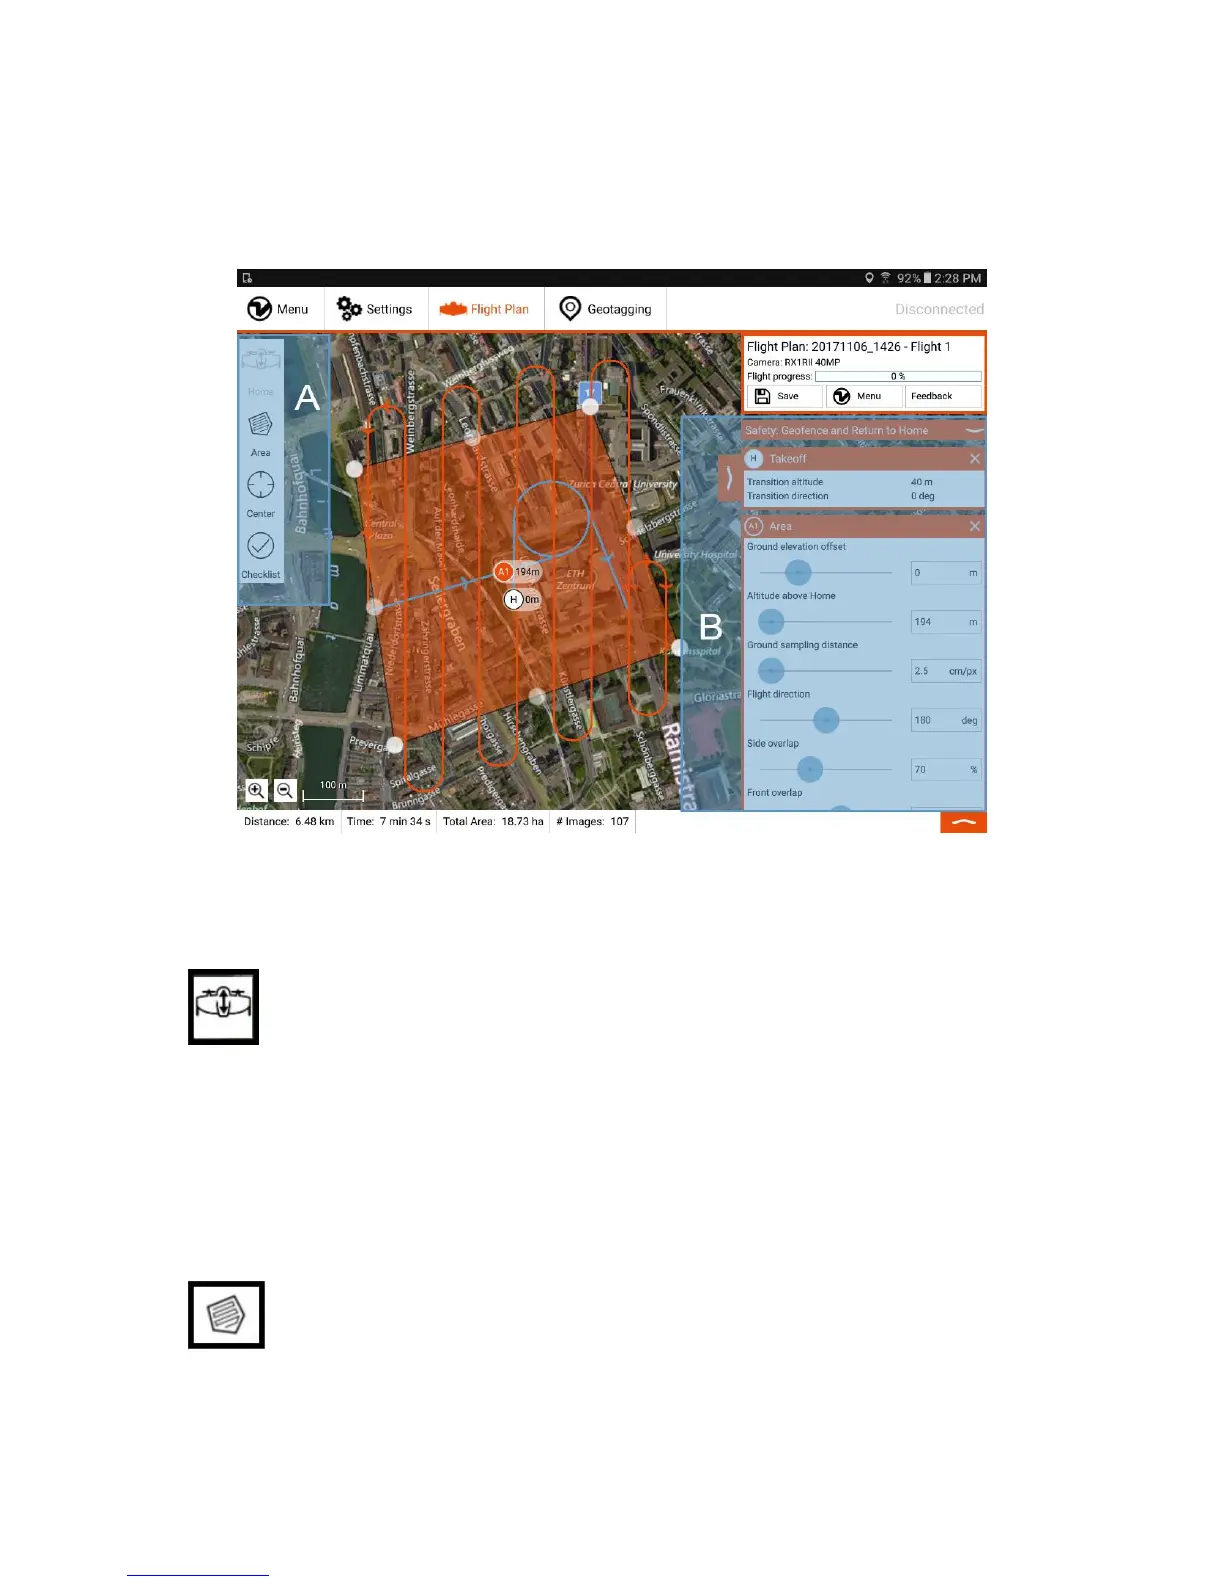
Add Home by clicking on the first button on the left (A). If you are on the field and the WingtraOne is powered on and connected to the tablet, Home is set
to WingtraOne's current position automatically. If you plan the flight beforehand in office, you can move it to the place where you intend to takeoff — it will be adjusted to
WingtraOne's location once you are on the field. Adjust "transition altitude" and "transition direction" on the right side (B) such that WingtraOne will not collide with any
obstacle.
WingtraOne will take off, rise to your "transition altitude" above Home, transition into forward flight, fly to the drawn loiter circle, loiter up to the area altitude and start data
collection. After finishing data collection, it will fly back to the loiter circle at the altitude of the last area, loiter down to "transition altitude", fly back to the Home point,
transition above Home, and land.
Note that if you are not connected to the WingtraOne or if there is no GPS lock, Home is added to the center of the screen — where the location in WingtraPilot is set to
the location of the last flight. To change the location, it is easiest to select the “Street Map” tiles in the settings, navigate to your position, and switch back to "Satellite
Map".
Step 2: Add Area(s)
You can add one or several area(s) for data collection to your Flight Plan by clicking on the area item (A). Move the corners until you draw the area(s) that
you want to map. Additional corners can be added by clicking on points in between any two corners. By clicking on a corner you will remove it. WingtraPilot will warn you if
you set up a mission that is too large. Areas can be removed by pressing the cross in the top right corner of the area dialog box.
When inserting more than one area, they are connected through a loiter waypoint. This is a circle on which the WingtraOne loiters from the altitude of the previous area to
the one of the next. Its location can be manually adjusted during Flight Plan setup to enable safe transition from one area to the next one.