The results of the geotagging process are described at the bottom of this article.
PPK Geotagging
For PPK geotagging, you can only do it on a Windows 10 computer by using WingtraHub. Check out the PPK Chapter for information about how to install and setup
WingtraHub.
The PPK geotagging process is similar to the non-PPK geotagging process, but with some extra data needed from the user's side. Just take out the SD card from the
camera after the flight(s), put it into the computer, and start the geotagging procedure as follows.
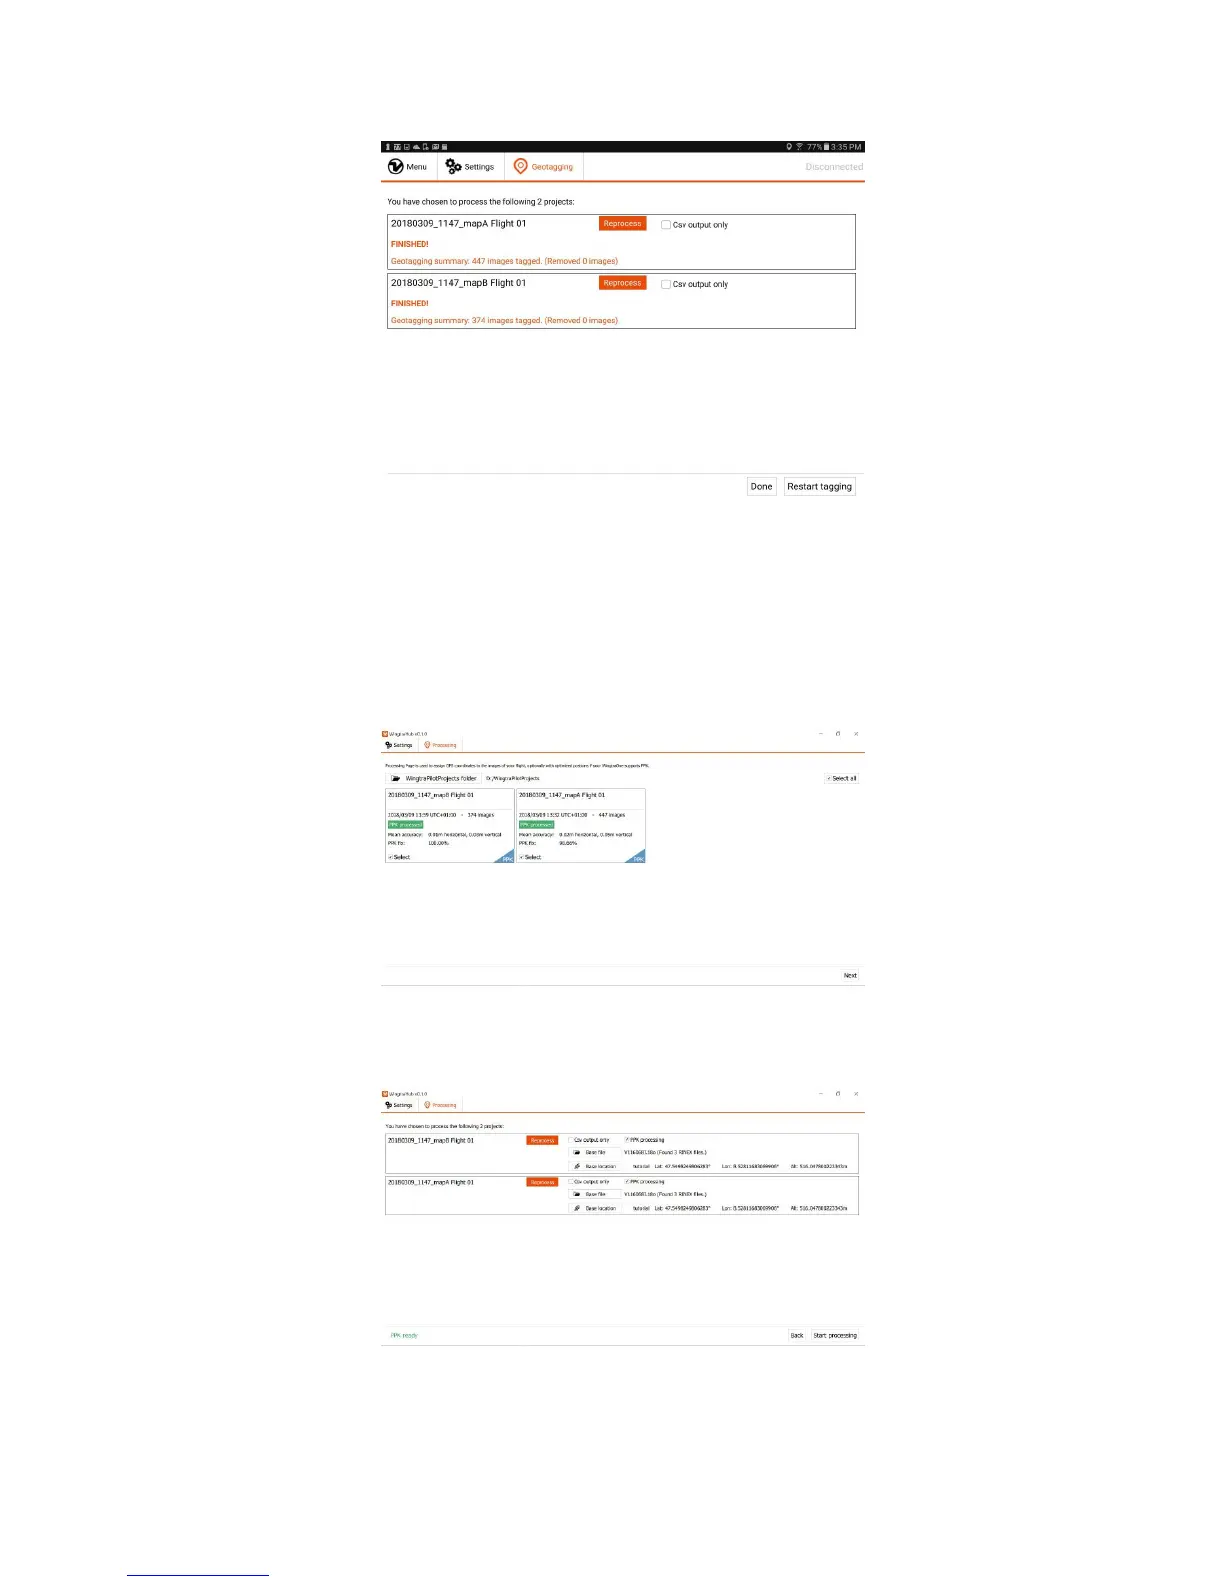
1. Go to the "Geotagging" tab in WingtraHub and select the "WingtraPilotProjects" folder on your SD card.
2. Projects with PPK enabled are labelled with "PPK" on the bottom right corner of the project boxes.
3. Select the project(s) which you would like to geotag, then click "Next".
4. Check the "PPK processing" checkbox to enable PPK geotagging.
5. If you want a faster tagging process and do not need the coordinates embedded into images, you can check the "Csv output only" box to get only the coordinates of
the images in a single csv file.
6. Select your base file and provide the base location of the base station for each project.
7. Click "Start tagging" to start the process.
8. Once the geotagging is done, WingtraPilot will inform you if the process was successful. A geotagging report which contains the information of the PPK geotagging
process will be produced as well.
We recommend you to go through the PPK tutorial to learn more about the details regarding PPK geotagging process.