3. After taking the printer out of the
protective bag, grasp it rmly by the sides
and lift it onto a table.
4. The Witbox is supported on four metal “feet” that are designed to allow one
printer to be stacked on top of another. These are packaged along with the
Witbox and can be attached immediately in order to protect it. To avoid
scratching the table, take care when moving the printer and try not to drag it.
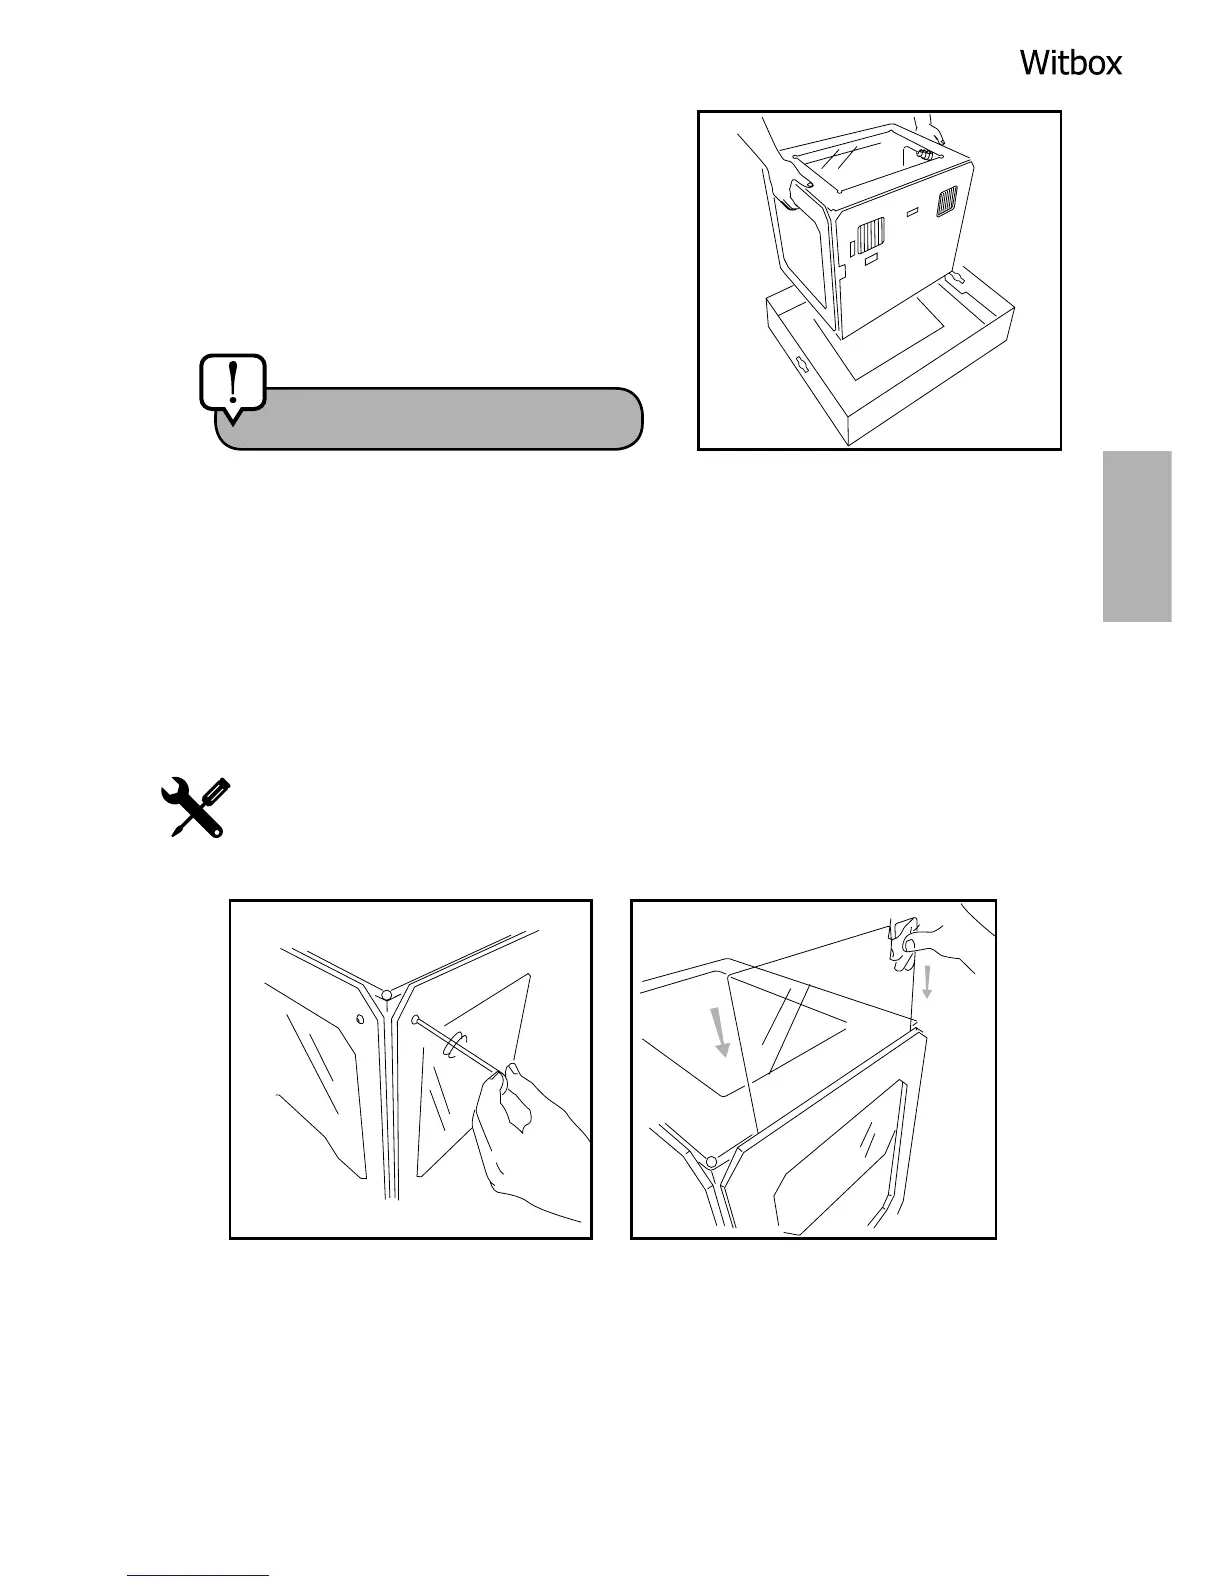
Attaching the side panels
Remove the plastic lm protectors from both sides of the side panels.
Gently loosen the eight screws (four on each side) located on either side
of the printer, using the Allen key included in the maintenance kit. Then
slide the panels in fully, and tighten the screws.
Caution! heavy object.