To help you with this process, step-by-step
instructions will be given via the LCD screen.
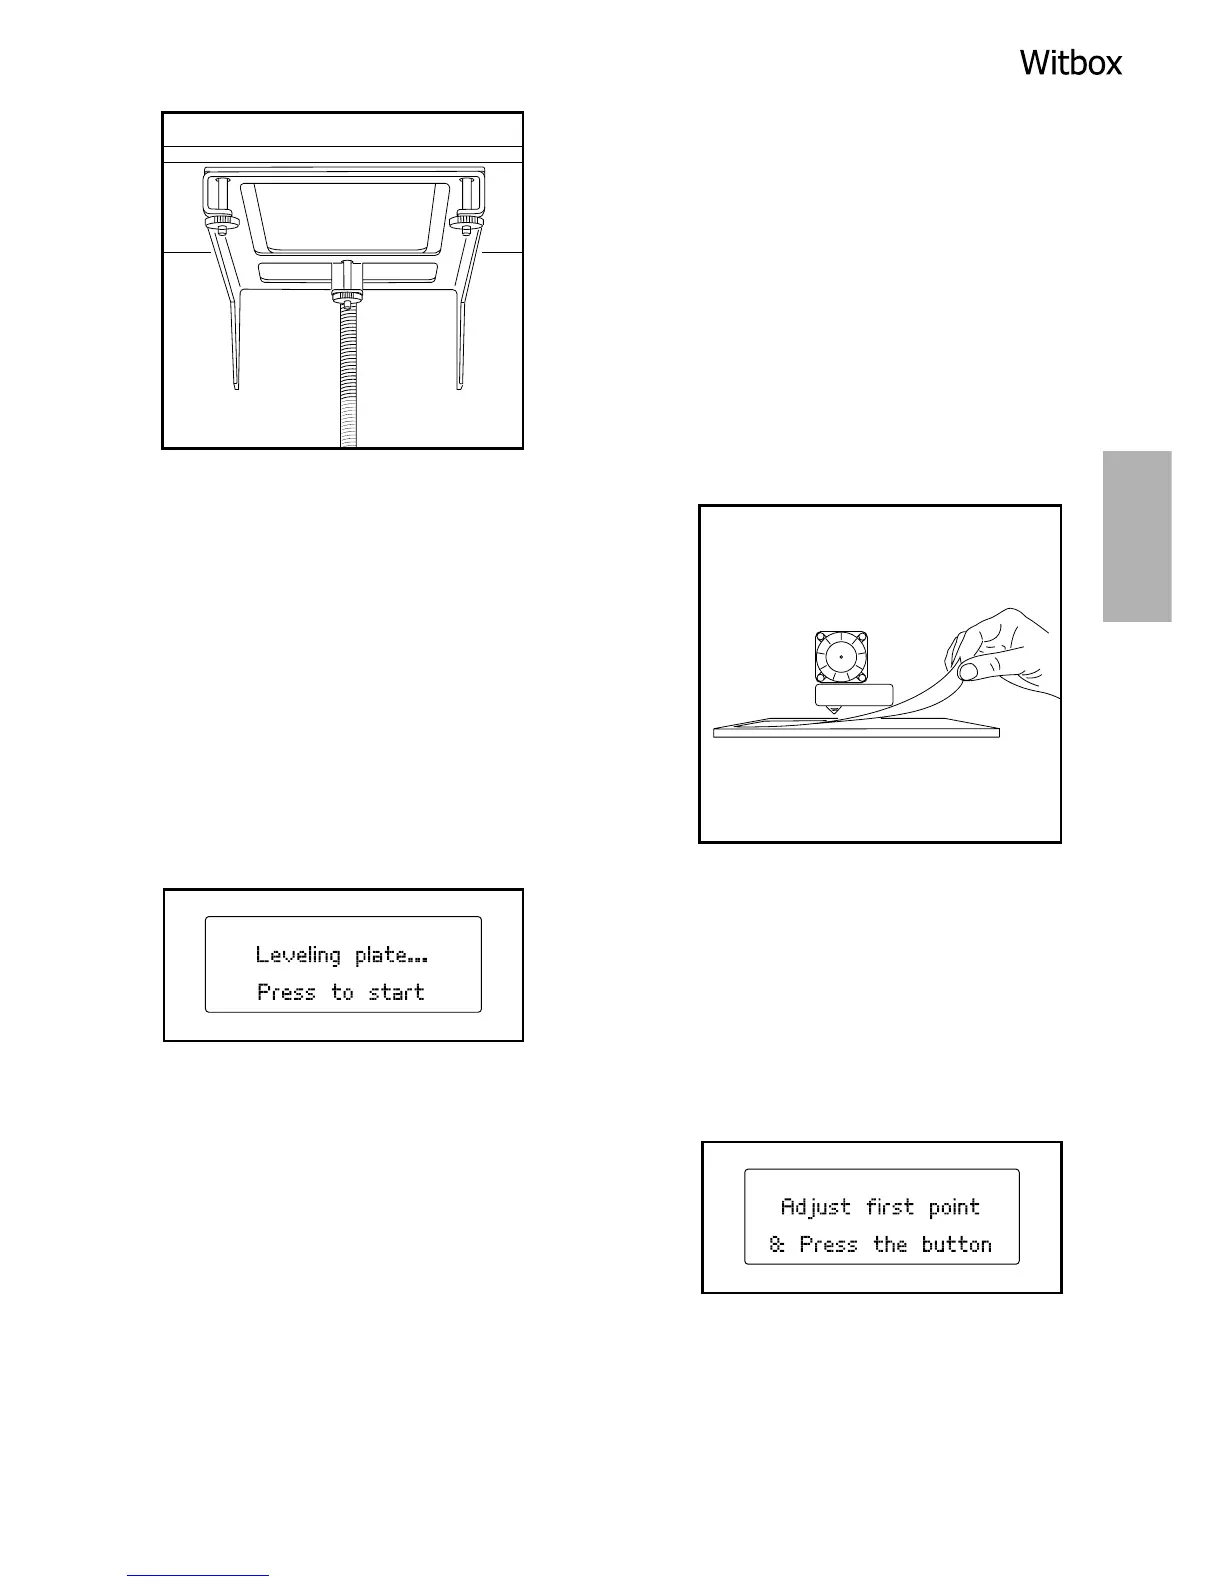
To level the print base you need to adjust the
three screws located underneath the base
support.
1. Place the sheet of calibration paper
(supplied) onto the print base. Press the
control wheel and go to Control > Level
Plate.
Press the wheel to begin levelling.
2. The extruder will position itself at the
reference point (the rear right-hand
corner), then move over to the first
levelling point. Check the space between
the base and the extruder using the
calibration sheet, and (if necessary) adjust
it by turning the screws located underneath the print base. Turn them to the
right to move the base away from the extruder, and to the left to move it
closer. The calibration sheet should just about be able to pass between the
base and the extruder nozzle.