Head Installation
Install the Head onto the Gantry
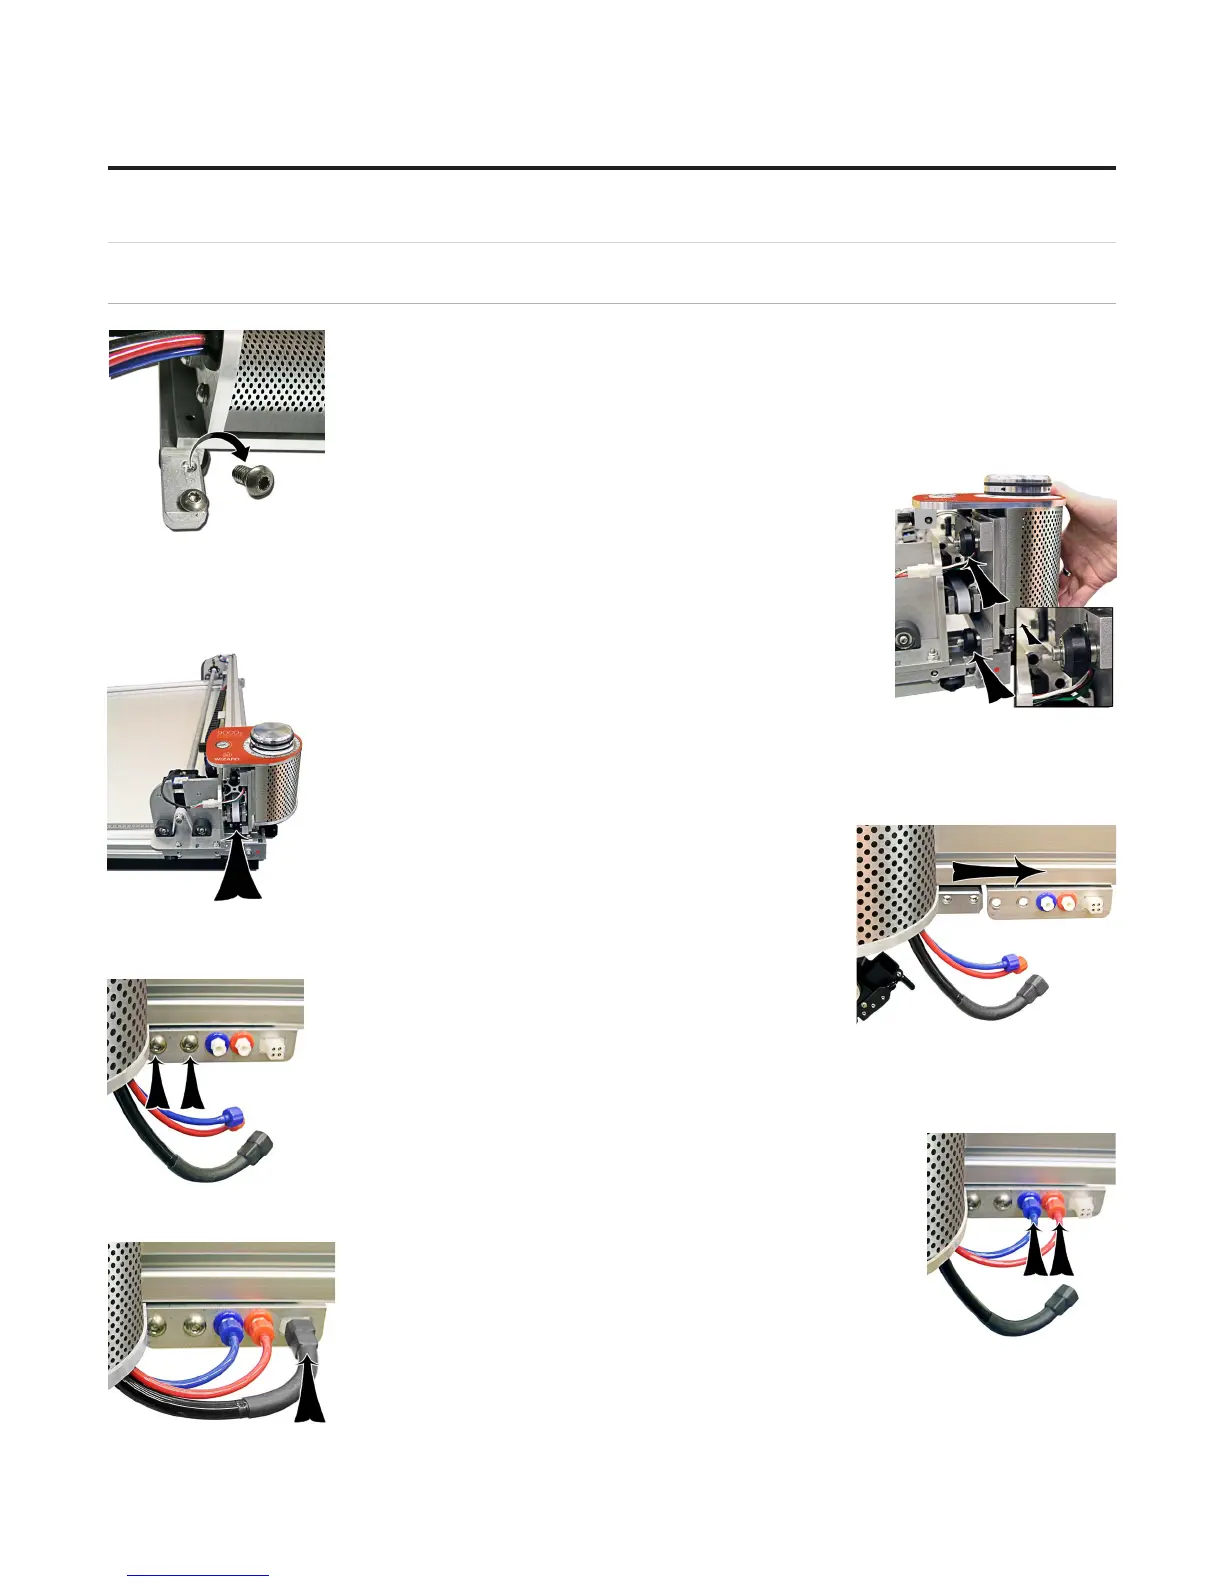
1. Remove the two 5/32” screws from the head and set aside.
2. Move the gantry to the right edge of the CMC.
3. Point the head so that the foot block faces toward the CMC and the wheels are
close to the bottom of the gantry.
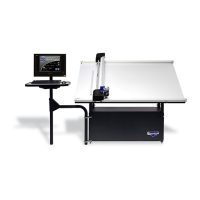
4. Line up the wheels on the head to the center channels of the gantry arm and ease
the head onto the gantry.
5. Roll the head up the gantry until it lines up to the head grabber arm on the
right side of the gantry.
6. Holding the head in position so that the head lines up neatly to the head grabber arm,
replace the two 5/32” screws, making sure they go into the head grabber arm and into the
head and tighten rmly.
7. Connect the air to the head by twisting the two air ttings together, matching the colors.
8. Connect the head power plug (square connection) to the head grabber arm.
10
Wizard™ International, Inc., 4600 116th St. SW, Mukilteo, WA 98275 888/855-3335 Fax: 425/551-4350 wizardint.com
20-34304-1A GettingStartedManual9000zFrameShop
04/05/19
Wizard™ CMC Model 9000z Hardware and Software Getting Started Guide