393062555_201804
B)CO
2
settingforlowerload(softstart)
- Remove the protective screw over the zero point adjusting
screw with a Torx screwdriver.
- Restart the condensing boiler by pressing the "Reset button".
- Check and correct (if required) the CO
2
content approx. 20 s
after the burner start with the CO
2
tester,byneadjusting
the zero point adjusting screw with Torx in accordance with
the table. Make this adjustment within 180 s of the burner
start. If necessary, repeat the start phase for the setting
procedure by pressing the reset button.
- Duringthisadjustment,theremustbenoDHWoperation!
- Retighten the protective screw.
23. CO
2
adjustments
- Clockwiserotation–higherCO
2
contentincreased!
- Anti-clockwiserotation–lowerCO
2
contentreduced!
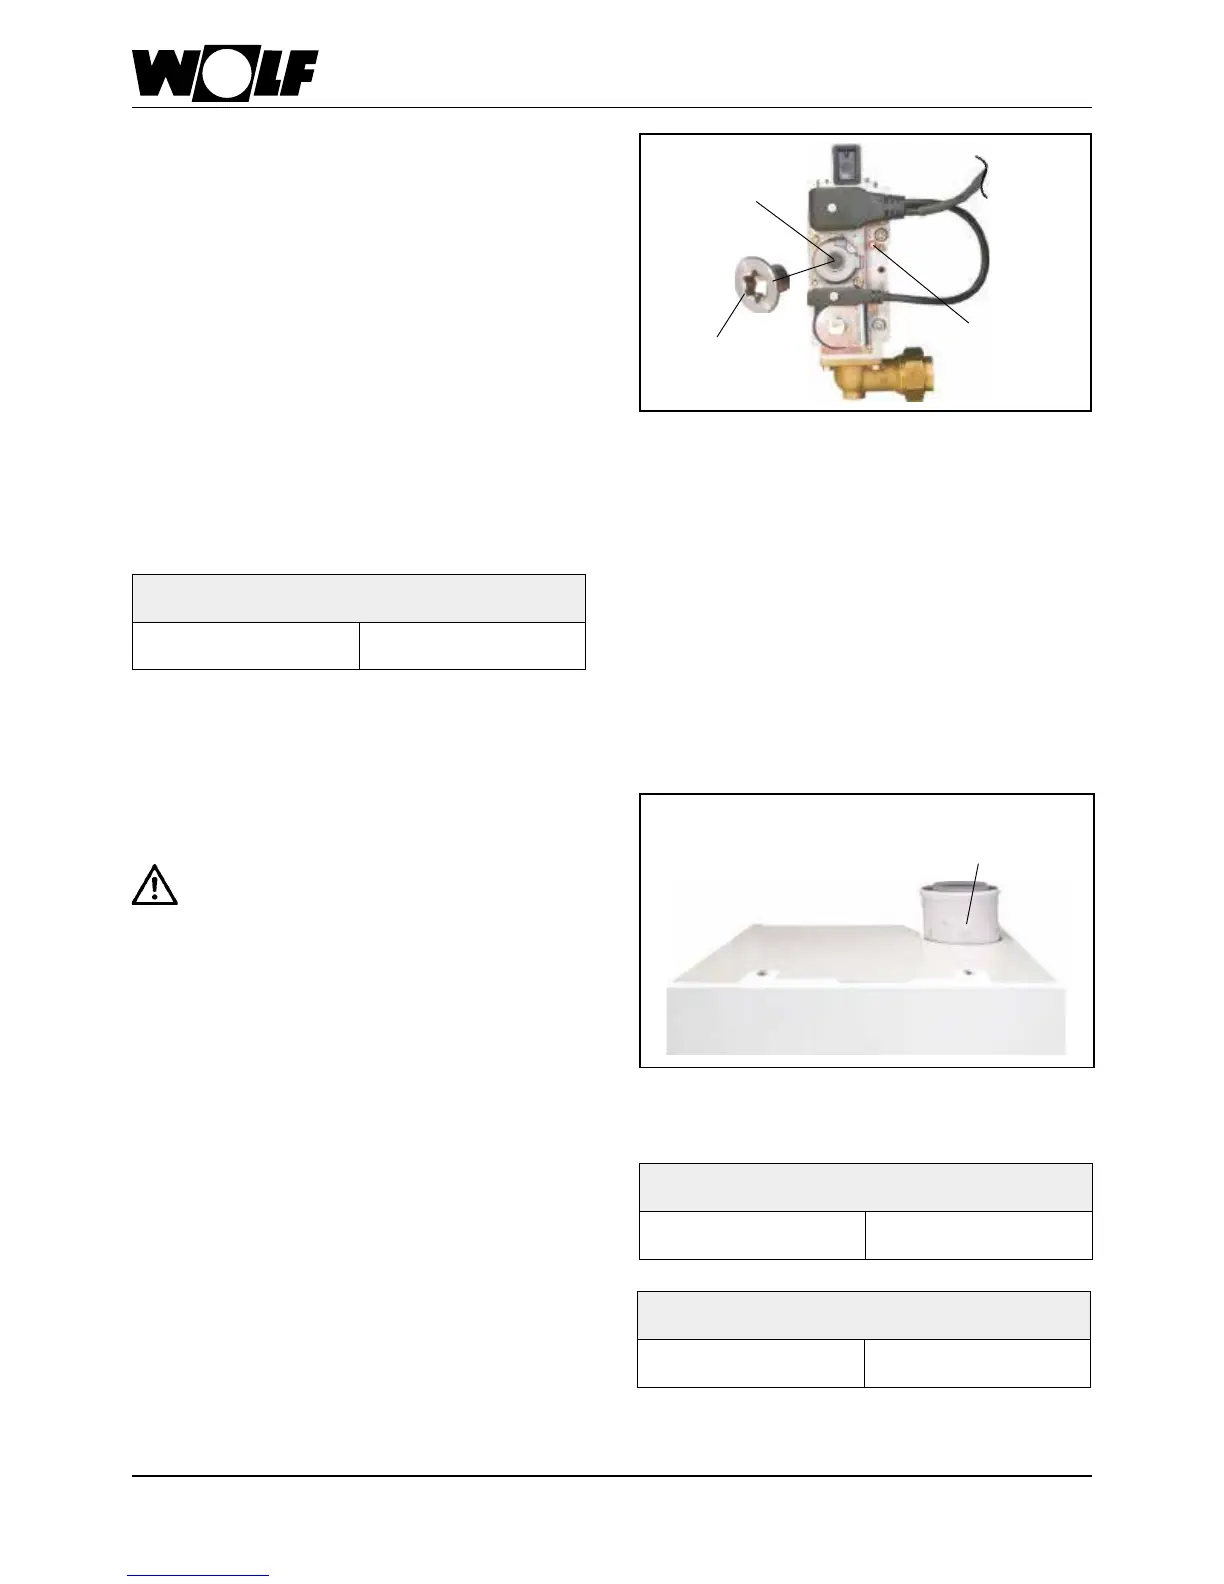
Zero point
screw
Fig.: Gas combination valve
Protective
screw
Gas throughput
adjusting screw
D)Completingtheadjustments
- Shut down the boiler and close the test ports and hose
connection nipples again. Check the gas supply line and
hydraulics for tightness.
C)CheckingtheCO
2
setting
- Aftercompletingthework,retthecasingcoverandcheck
the CO
2
values with the appliance closed.
Observe the CO emissions whilst making
CO
2
settings. The gas combination valve is
incorrectly adjusted if the CO value is > 300
ppmwhentheCO
2
valueiscorrect.Take the
followingsteps:
- Fully insert the zero point adjusting screw
- Open the zero point adjusting screw 1½ revolutions
- Repeat the adjusting process from section A)
- The condensing boiler is correctly adjusted if the CO
2
values
correspond to those in the adjacent table.
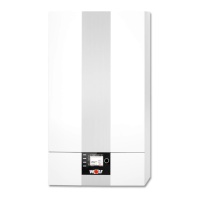
Fig.: Emission test with closed appliance
Test port
"Flue gas"
Applianceopen
at lower load
NaturalgasE/H/LL
8.5% ± 0.2%
LNG P
9.7% ± 0.2%
Applianceclosed
at upper load
NaturalgasE/H/LL
8.8% ± 0.5%
LNG P
10.3% ± 0.5%
Applianceclosed
at lower load
NaturalgasE/H/LL
8.7% ± 0.5%
LNG P
9.9% ± 0.5%