June 2014
4-23
Xerox® Phaser® 3052/3260 Service Manual
REP 1.14
Repairs
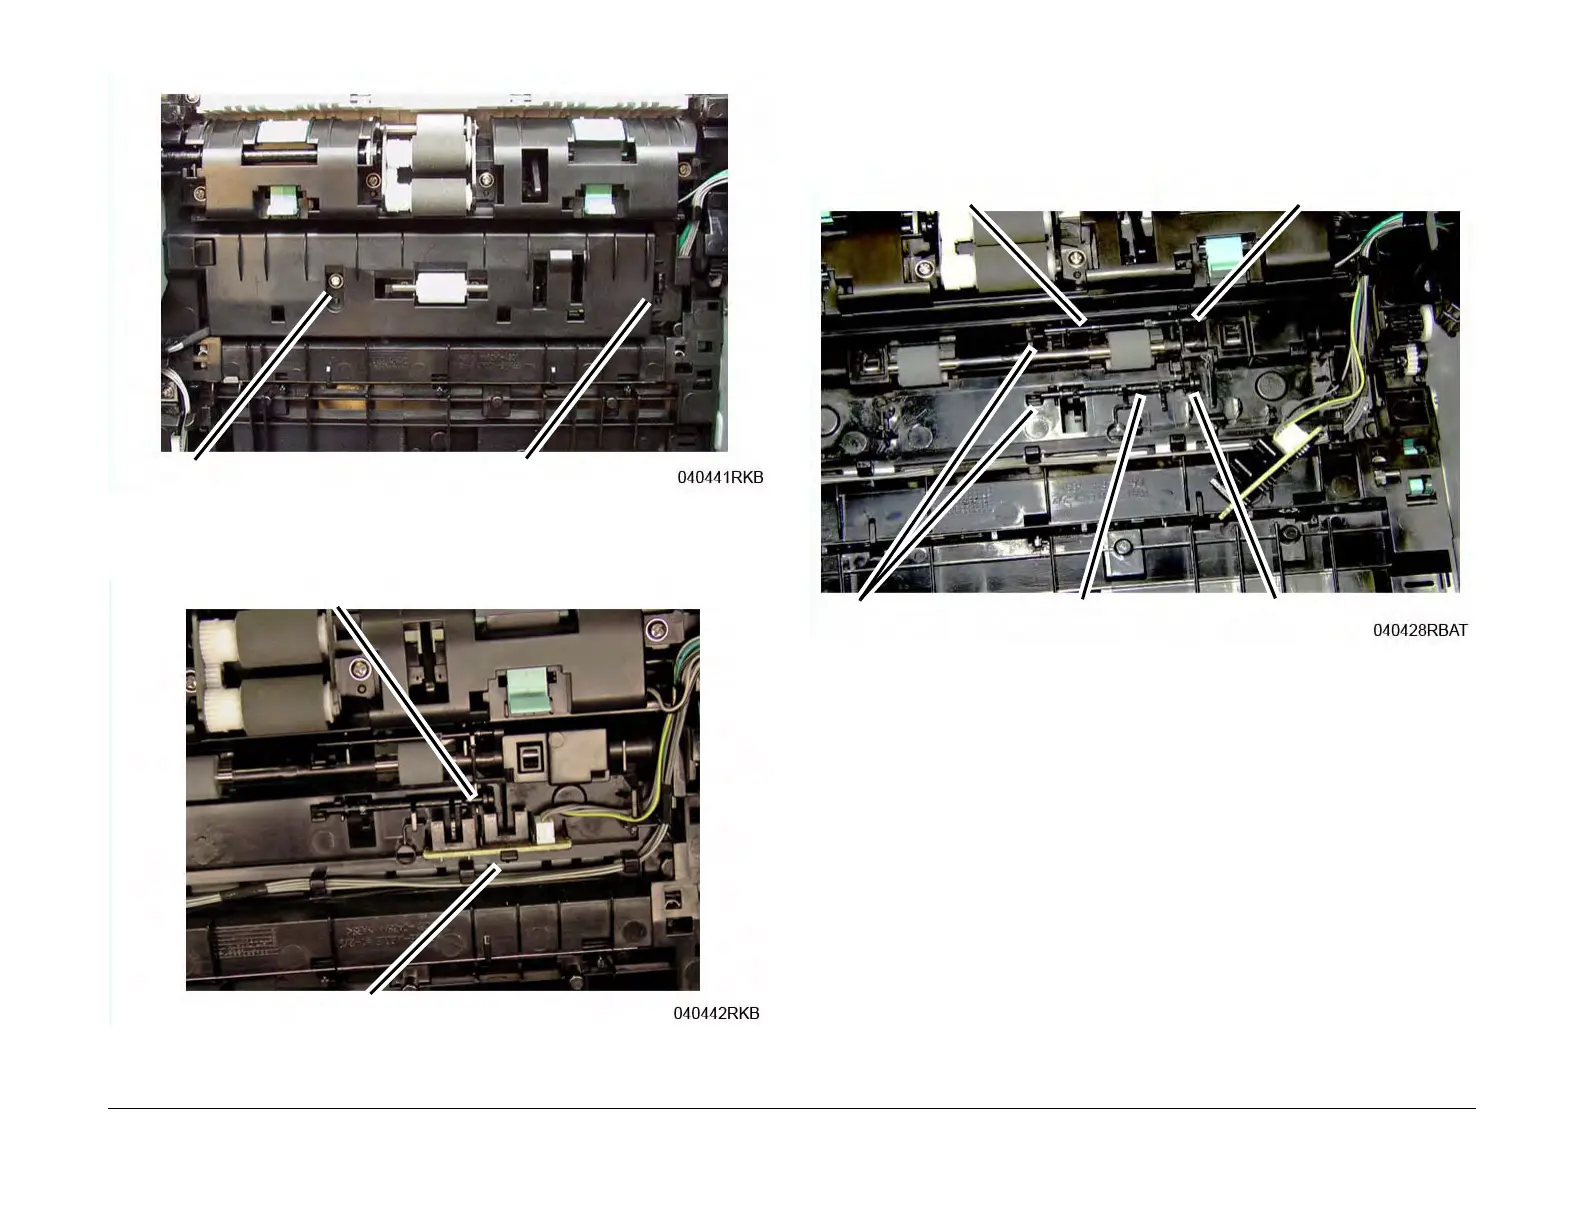
Figure 2 Feed and Reg Sensors PWB Cover (Bottom View)
6. Release the Latch and remove the Feed and Registration Sensor PWB (Figure 3).
Figure 3 Feed and Registration Sensors PWB (Bottom View)
7. Removing the Feed and Registration Sensor Actuators (Figure 4):
Note the location of the Spring in the frame cutout for reinstallation (Figure 5).
a. Release the Actuator from the latch.
b. Remove the Actuator.
Figure 4 Feed and Registration Sensors Actuators (Bottom View)
Replacement
NOTE: Tapered Plastic Screws and Round Machine Screws are used to hold the cover to the
frame. Make sure that the Plastic Screws go into plastic components and Machine Screws go
into the metal frame.
Install the components in the reverse of removal.
Screw
Latch
Latch
Sensors PWB
Feed Sensor Actuator
Latch
Spring
Reg Sensor Actuator
Spring