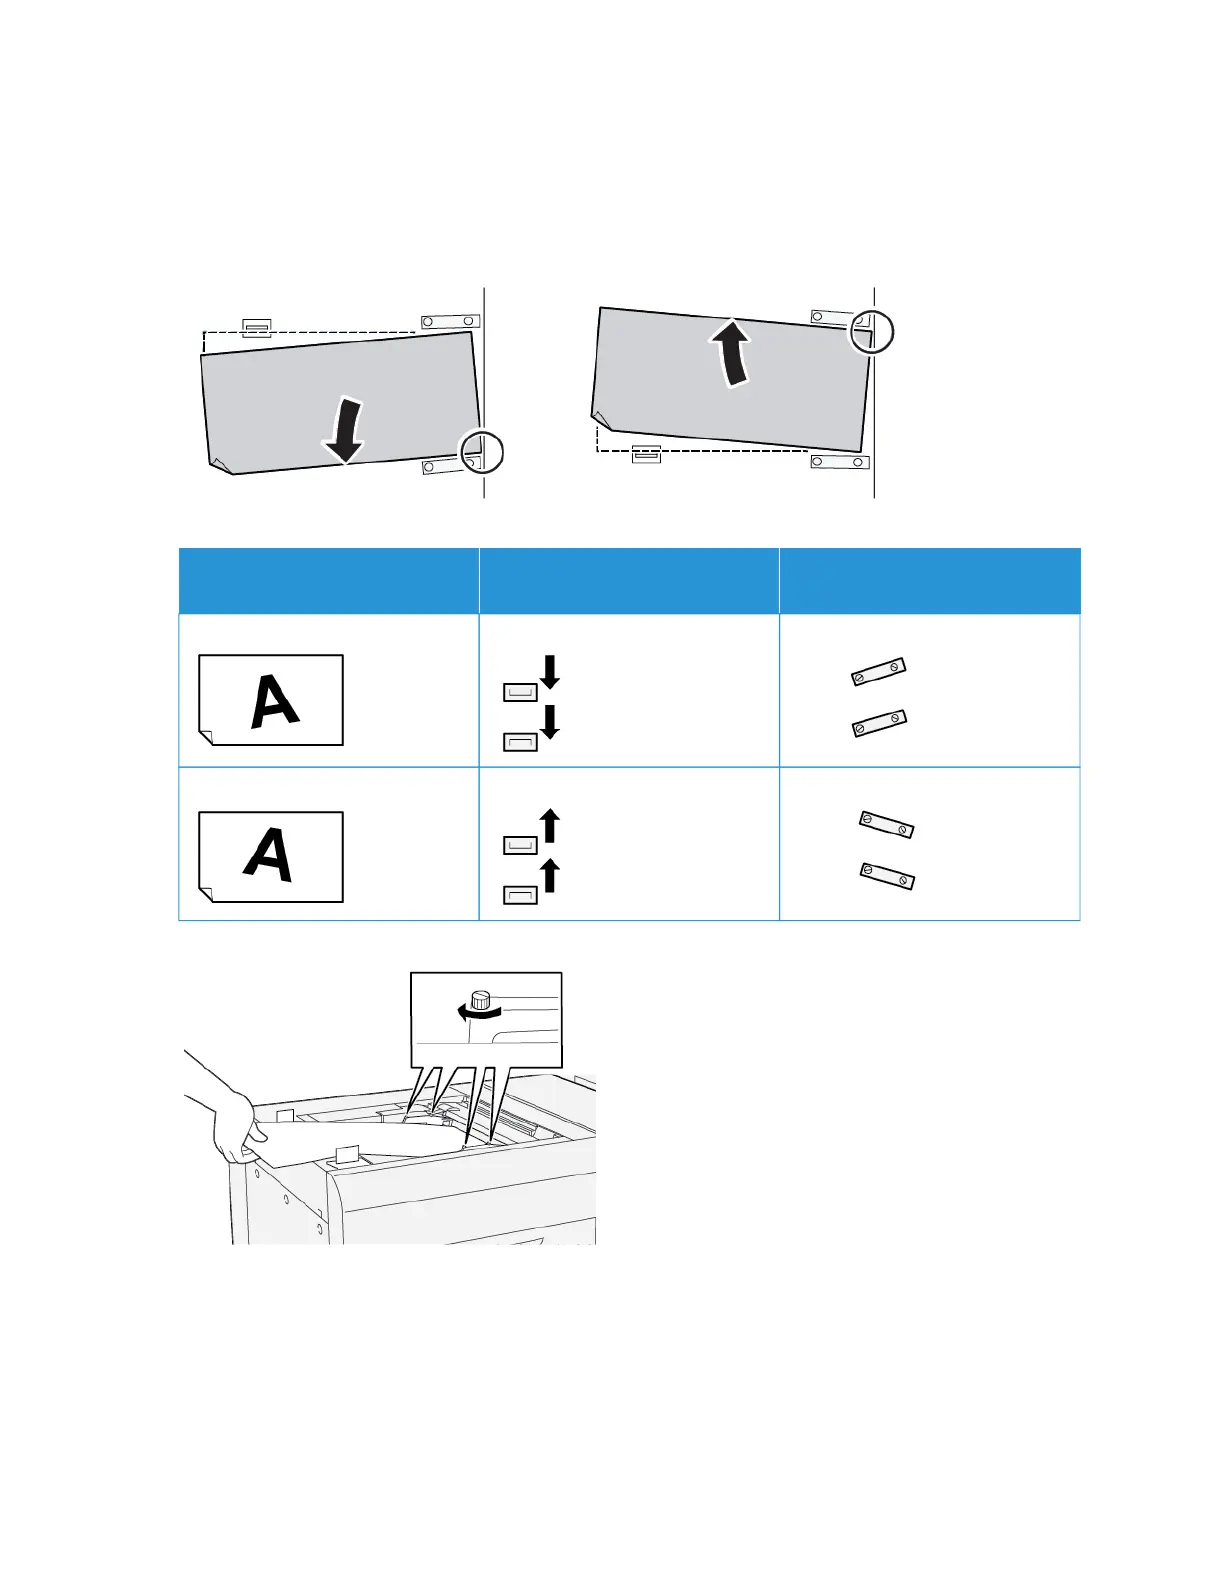
6. Move the rear edge of the paper to the position that corresponds to the skew amount.
• If the skew is oriented to the left, use the right-front edge of the paper as the pivot point.
• If the skew is oriented to the right, use the left-front edge of the paper as the pivot point.
IIMMAAGGEE
RREEAARR--EEDDGGEE GGUUIIDDEE
AADDJJUUSSTTMMEENNTT
FFRROONNTT--EEDDGGEE GGUUIIDDEE
AADDJJUUSSTTMMEENNTT
Skew is oriented to the left.
Move the guides downward. Right side is higher. Left side is
lower.
Skew is oriented to the right. Move the guides upward. Right side is lower. Left side is
higher.
7. Tighten the four screws on the front-edge guide. To match the paper size, adjust the rear-edge guide.
8. Rerun the Auto Alignment Adjustment procedure. Refer to the Xerox
®
PrimeLink
®
B9100/B9110/B9125/B9136
Copier/Printer System Administrator Guide.
Xerox
®
PrimeLink
®
B9100/B9110/B9125/B9136 Copier/Printer User Guide 287
Tray 5 (Bypass)
 Loading...


