4. Install the new Pressure Roll Assembly. Use the Pressure Roll Handles to help position
the Pressure Roll in the Fuser Assembly.
5. Align the bearings to the cradle as you gently lower the Pressure Roll into place, and
then remove the handles.
6. Rotate the roll to ensure that the gears mesh properly.
7. Replace the Bearing Holder Springs to secure the Pressure Roll in place.
8. Ask the administrator to reset the HFSI count for this newly-replaced CRU component
at the press Control Panel.
Replacing the Pressure Roll Cleaning Pad Assembly
Caution
Make sure the press is powered off. Do not perform this replacement procedure with
the power on or electrical power supplied to the press. Allow the fuser to cool down for
50 minutes before performing any maintenance.
1. Perform the steps for Removing the Fuser Module.
2. Perform the steps for Replacing the Stripper Finger Assembly.
3. Perform the steps for Replacing the Pressure Roll Assembly.
4. To remove the Pressure Roll Cleaning Pad, use a T15 Torx driver and loosen the one
screw in the front of the press. It is not necessary to remove the screw.
5. Push the pad to the rear of the press and remove it.
6. Install the new cleaning pad. Make sure to align the locking tabs with the holes in
the frame and once the Cleaning Pad Assembly is seated, push the assembly towards
the front of the press against the screw.
7. Tighten the screw to secure the pad in place.
8. Ask the administrator to reset the HFSI count for this newly-replaced CRU component
at the press Control Panel.
Installing the Fuser Module
After removing the Fuser Belt Module and removing/replacing the other fuser
components, you are ready to reinstall the existing or new Fuser Belt Module.
Note
If a different width fuser is going to be installed, remove the new fuser from its packaging.
Otherwise, you will be retrieving the fuser you removed and placed on the Holding Rack.
5-27Xerox
®
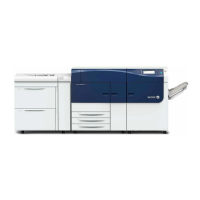
Versant™ 2100 Press
Quick Start Guide
Maintenance
 Loading...


