1-4-2 Installation and using environment
Install requirements:
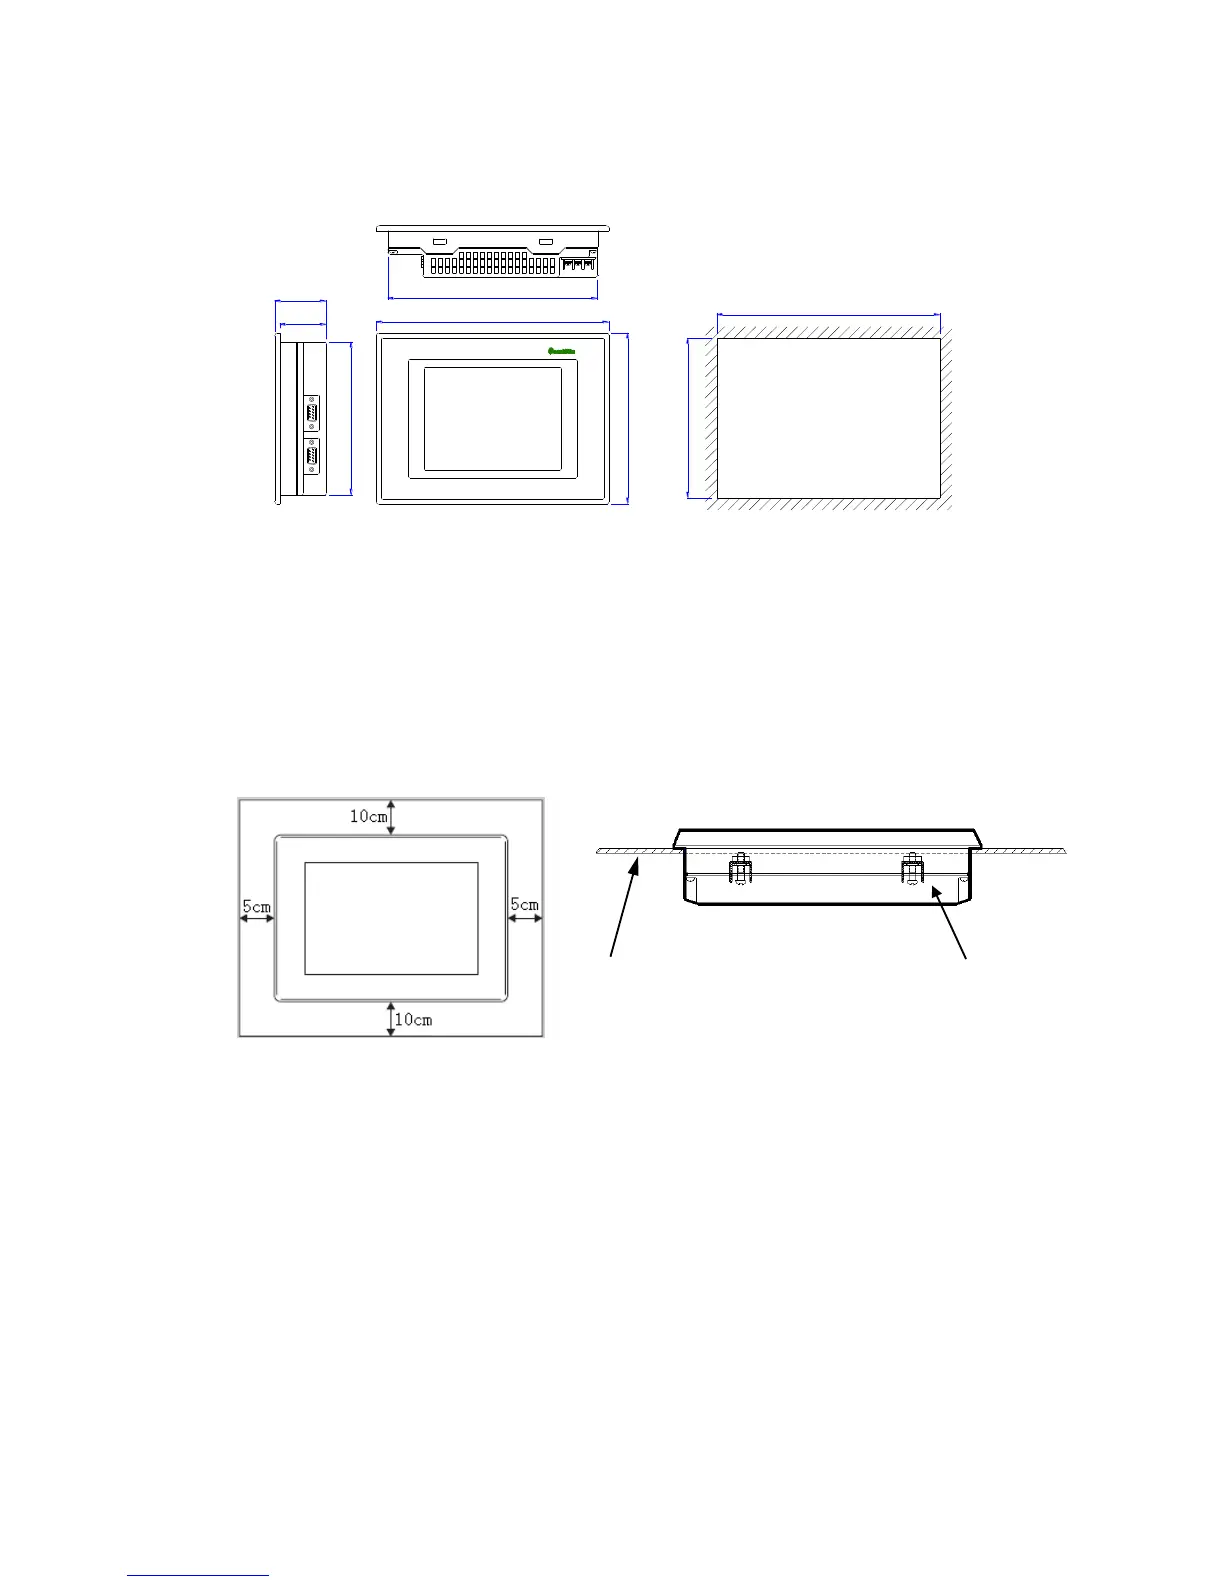
TP has four ferric mounting racks when out of factory, there are two square holes on the
top, bottom side of TP, use mounting rack to fix the TP with control cabinet.
In order to avoid TP temperature too high after long time working, please keep 10cm
space on the up/down and 5cm on the left/right side of the TP when installing.
Install steps:
1. Refer to the dimension in the former chapter to open a rectangle mounting hole in
the control cabinet
2. Add airproof circles in the airproof slot when installing
3. Insert the bottom of TP into the mounting hole of control cabinet
4. Insert the install rack into the fix hole of TP then tighten the screw
5. Connect TP and PLC with communication cable
Notice: The communication cable can be offered by the supplier or made by user
according to the connection diagram, input +24V DC power to start working.
Environment:
Please use TP series touch screen indoor.
 Loading...