Installation Guide ADPROPROE by Xtralis
28 27386_05
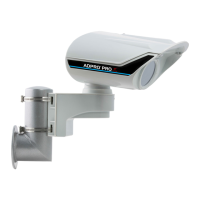
2. Loosen the three fastening screws (1) of the detector somewhat if required.
3. Loosen the locking screw (2)
4. Move the detector in the vertical direction over the spindle screw (3)
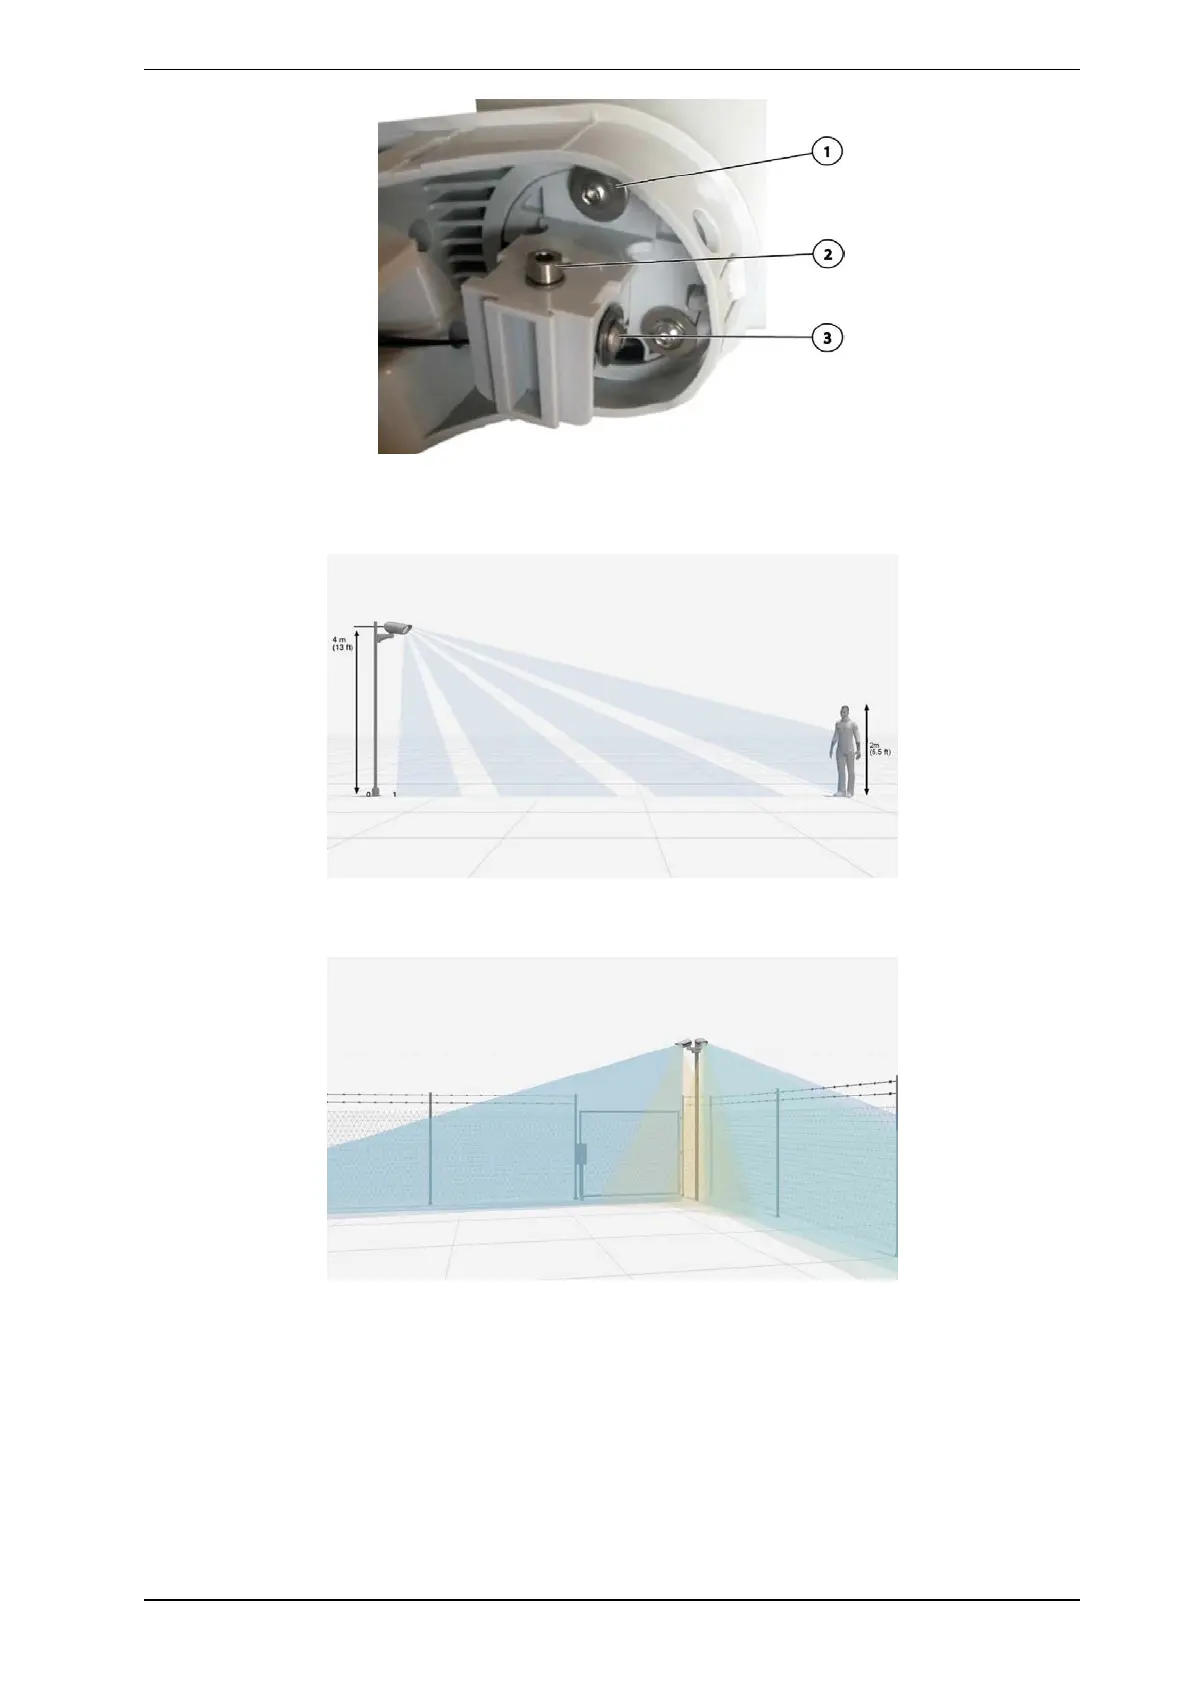
5. Sight a person or fixed point in the field of view of the detector at a height of 2 m. Use a 2-m visual warning
sign or a three-legged tripod with a rod bearing 2 m marks.
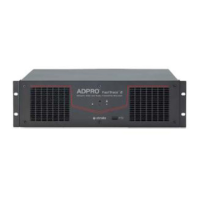
6. One side of a detector edge runs along a fence or the external horizontal perimeter boundary.
7. The other edge for a curtain detector or the inner edge for a volumetric detector moves into the interior of
an area through the aperture angle.
8. The visual marker or the object should be approximately in the center of the monitored area, namely, the
center of the nominal maximum width.
9. Correct horizontal adjustment (namely, along the fence) is what is important during this phase.
10. The vertical dip angle can be adjusted later either manually or more conveniently with iCommission. See
the ADPRO PRO E PIR System Setup Guide, document no. (26571), iCommission section.
11. Use iCommission or CT PRO 2 to check whether the detector is detecting.