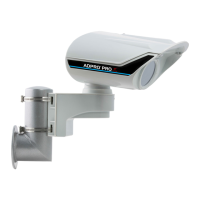
ADPROPROE by Xtralis Installation Guide
27386_05 25
The detector now starts operating and you will notice the following:
l Alarms in the main and creep zone zones will be transmitted as Alarm1
l Fault/low batteries will be transmitted as Alarm 2
l All tamper and vandal alarms (cover, bracket, alignment, anti-masking) are transmitted as Tamper
l A "heart beat" signal is transmitted to show that the unit is still operational. For (RFn) models the signal is
transmitted every 3 minutes and for RFe models every 12 minutes.
Inovonics Receivers
The included Inovonics Receivers can send alarms to all compatible panels, see
http://www.inovonics.com/products/add-on-receivers/
and
http://www.inovonics.com/products/serial-receivers/
Please register the detector PRO E-RF transmitters at the receiving panels according to the respective
Inovonics manual (section “setup point”) with the following details:
l Set supervision time (SPV) to 60 minutes
l Register the transmitter as “Security” device (not “repeater”)
l Make sure, that the transmitter is registered as 2-alarm-inputs device
l Set the alarm output type to “follower”
l Outputs are matched with the following events:
o
Alarm 1: Intruder in main zone or creep zone (360PROtect)
o
Alarm 2: low battery
o
Tamper: any tamper alarm
o
Low power: unused inovonics feature, do not assign any outputs to this function
o
Inactivity: triggered when panel receives no alarm or heart beat signal for the set SPV (60 minutes)
2.10 Final check
Check the functioning of the detector after installation. This will ensure that all interface connections have
been correctly installed. The goal is not to fine-tune the detector conclusively at this point, but to test its basic
functioning so that nothing stands in the way of a smooth commissioning of the detection system
subsequently.
Note: Do not align the detector directly with a wire fence. There should be no objects that are likely to be
moved in the wind (such as branches, shrubs, fences) or water bodies in the field of view if
possible.
The detection range of a PIR detector is not limited but a function of size, speed and temperature contrast of a
target against its background.
The detector should be aligned so that a natural or artificial background at the end of the range terminates the
field of view.
Vertical alignment is optimal when the upper edge of the field of view is at 2 m above ground at the end of the
nominal detection range.
Nominal detection ranges are listed in the document "ADPRO PRO E PIR System Design and Planning
Guide, document no. (27387)".