21
RX-V861/HTR-6080/DSP-AX861SE/DSP-AX861
RX-V861/HTR-6080/DSP-AX861SE/
DSP-AX861
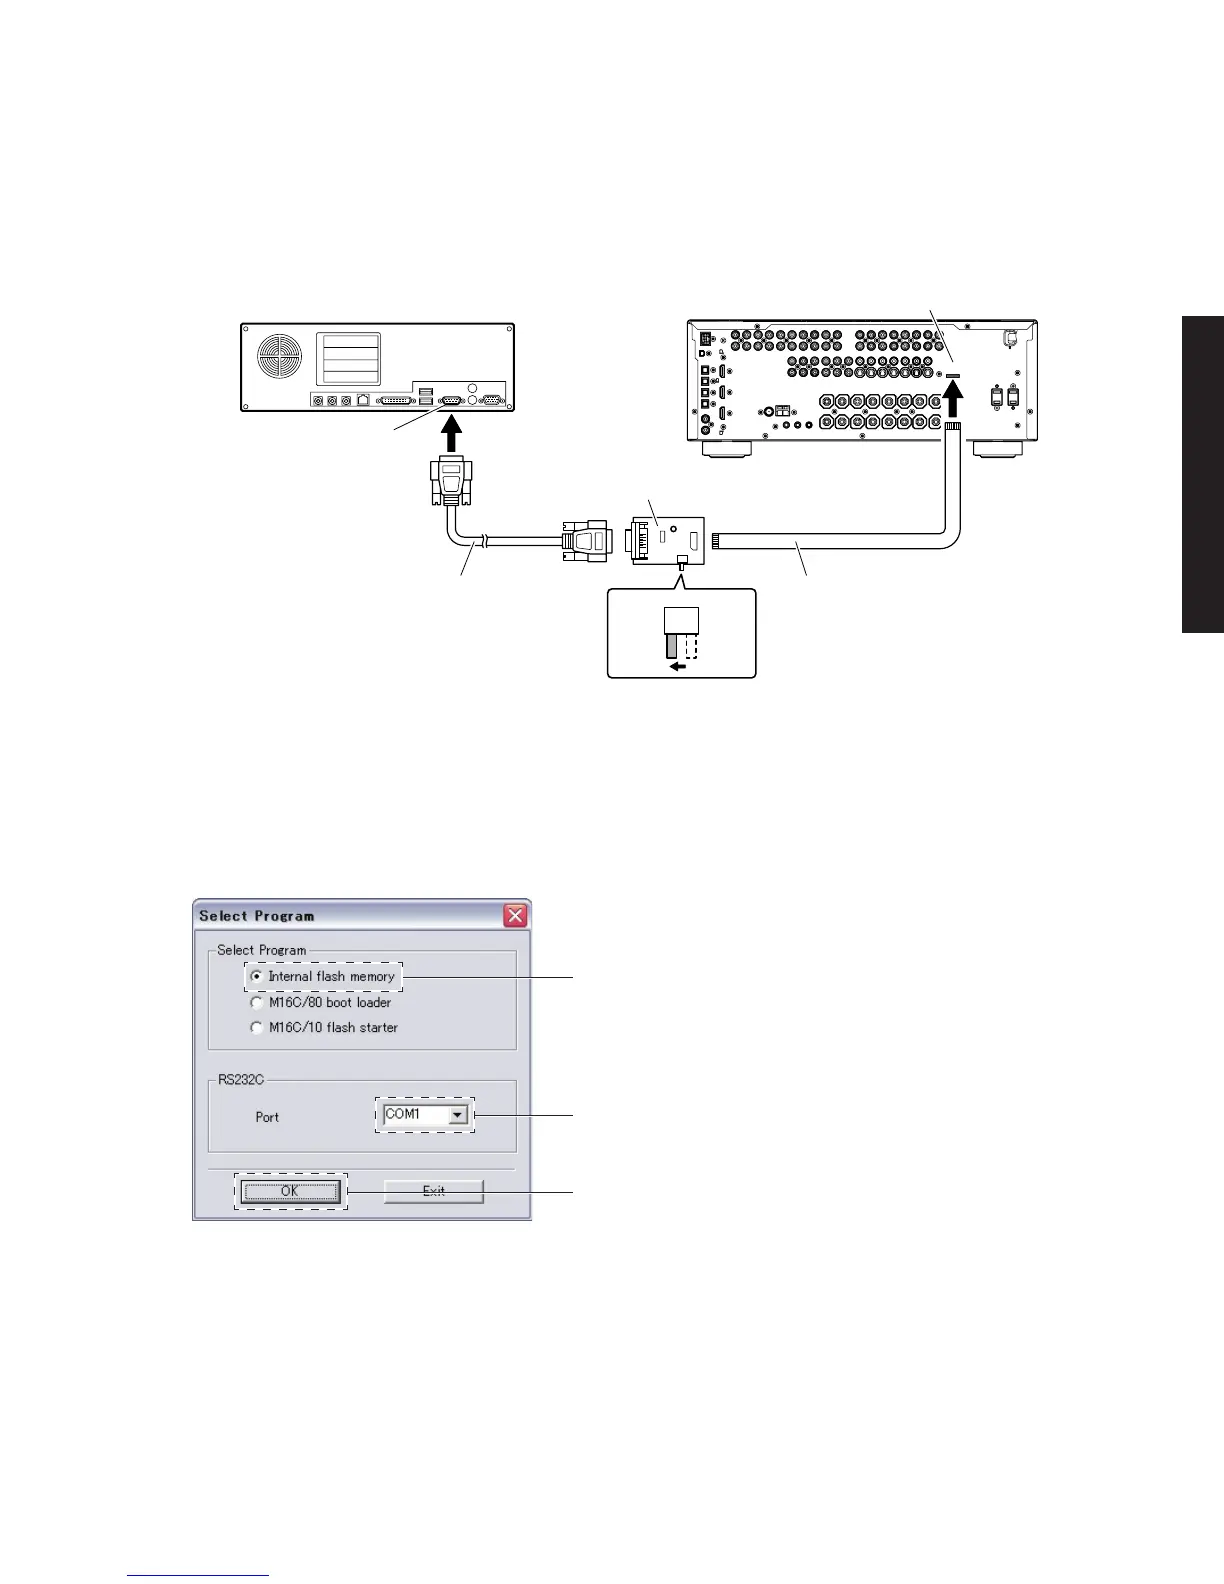
3. 本機の書き込み用ポートとPCのシリアルポート
(RS232C)を下記のように接続します。(Fig.1)
3. Connect the writing port of the main unit to the se-
rial port (RS232C) of the PC with RS232C cross
cable, RS232C conversion adapter and flexible flat
cable as shown below. (Fig. 1)
RS232C cross cable /
RS232Cクロスケーブル
RS232C conversion adapter /
RS232C変換アダプター
Flexible flat cable (9P) / カード電線(9P)
SW301
FLASH
UCOM
OTHER
Serial port (RS232C) /
シリアルポート(RS232C)
Writing port / 書き込み用ポート
PC
Rear panel
Fig. 1
4. 本機の電源コードをACコンセントに接続します。
5. FlashSta.exeを起動します。
SelectProgramが表示されます。(Fig.2)
4. Reconnect the power cable of main unit to the AC
outlet.
5. Start up “FlashSta.exe”.
“Select Program” is displayed. (Fig. 2)
Fig. 2
6. SelectProgram:Interflashmemory、RS232C
Port:COMx(本機と接続されているPCのシリアル
ポート)を選択します。(Fig.2)
7. 設定確認後、[OK]ボタンを押します。(Fig.2)
IDCheckが表示されます。(Fig.3)
6. Select Program: “Inter flash memory”, RS232C
Port: “COM x (serial port of the PC connected to the
main unit)”. (Fig. 2)
7. After confirming settings, press the [OK] button.
(Fig. 2)
“ID Check” is displayed. (Fig. 3)
When the [OK] button is pressed, “ID Check” is displayed.
[OK]ボタンを押すと、IDCheckが表示されます。
Select “Inter flash memory”.
Interflashmemoryを選択します。
Select the serial port of the PC connected to the main unit.
本機と接続されているPCのシリアルポートを選択します。
 Loading...