26
RX-V861/HTR-6080/DSP-AX861SE/DSP-AX861
RX-V861/HTR-6080/DSP-AX861SE/
DSP-AX861
24.TI BOOT ?
24.TI BOOT...
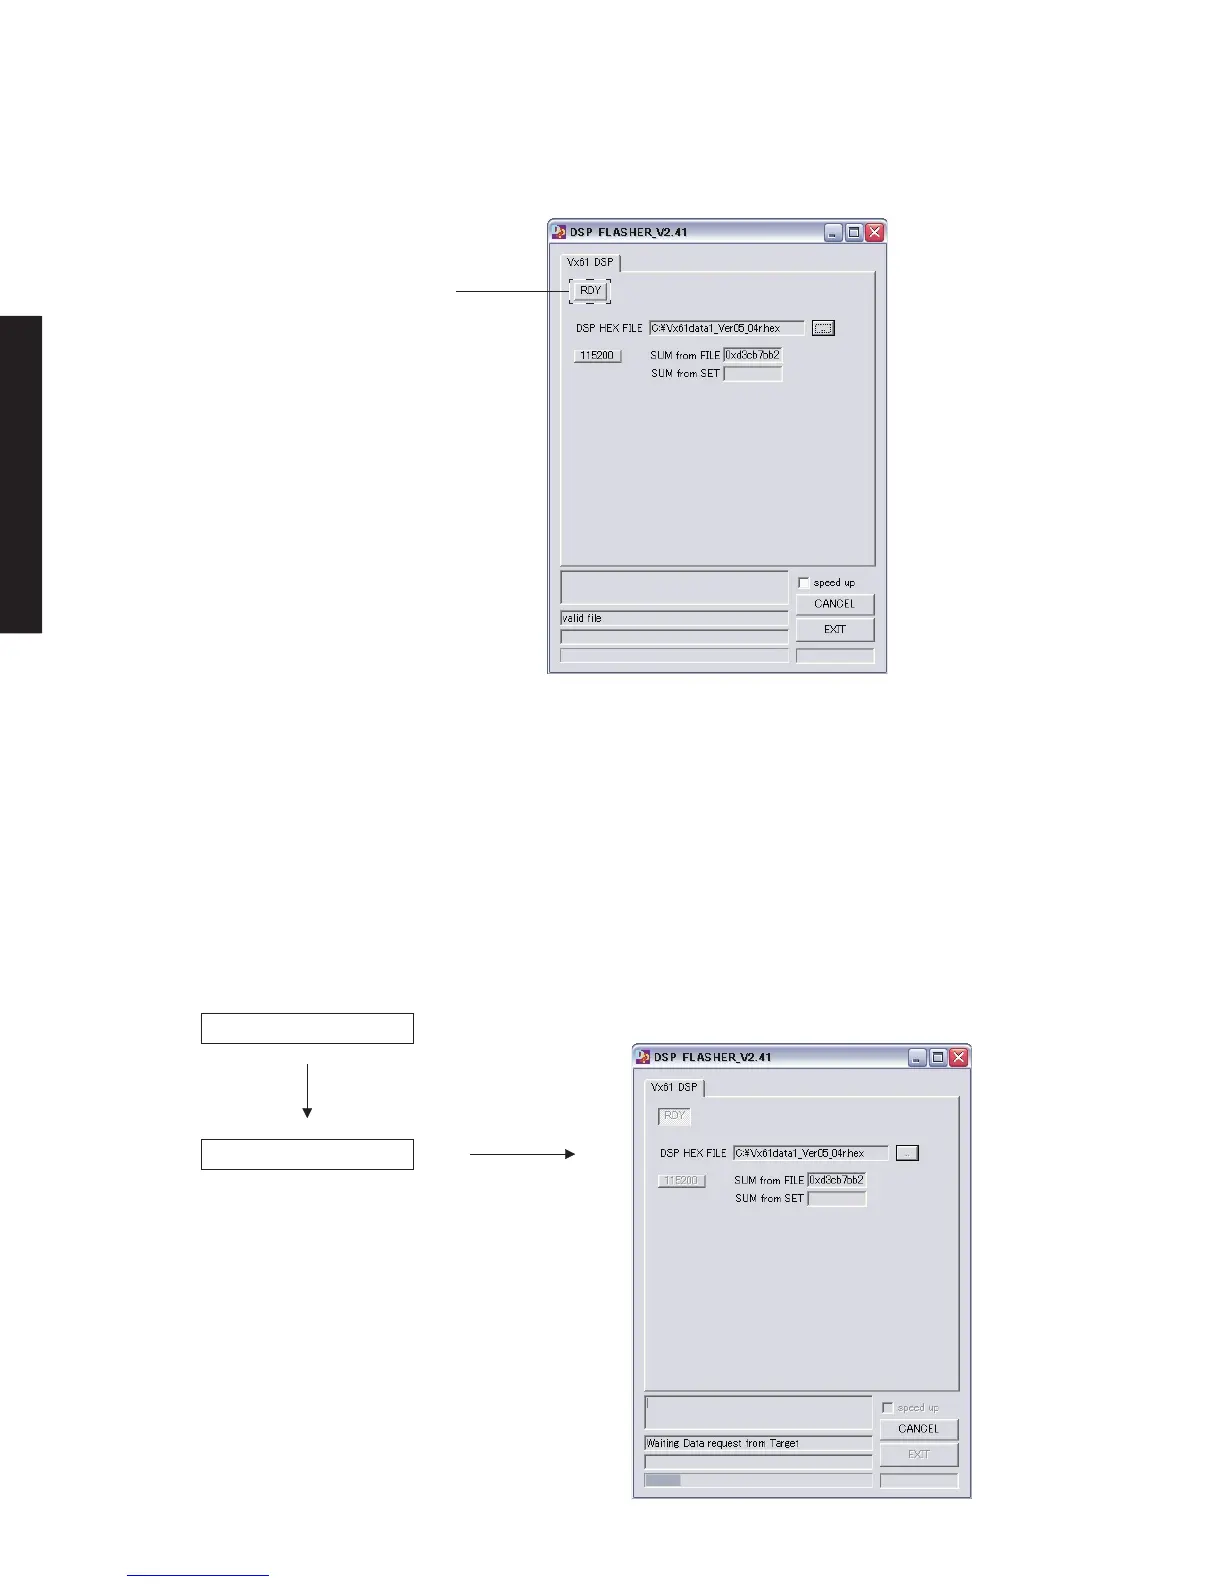
Fig. 8
6. [RDY]ボタンを押し、書き込みの予約をします。(Fig.8)
7. 本機の電源コードをACコンセントに接続します。
8. 本機のSTRAIGHTキーとAUDIOSELECTキーを押
しながら、STANDBY/ONキーを押し、ダイアグを起
動します。(Fig.5)
9. DIAG24.TIBOOT?を選択します。
10. 本機のSTRAIGHTキーを押し、書き込みを開始しま
す。
[RDY] button
[RDY]ボタン
Press the “STRAIGHT” key.
STRAIGHTキーを押します。
Writing / 書き込み中
Fig. 9
6. Press the [RDY] button to reserve writing. (Fig. 8)
7. Reconnect the power cable of main unit to the AC outlet.
8. Press the “MASTER ON/OFF” (RX-V861 / HTR-6080:
G model) / “STANDBY/ON” (HTR-6080: U, C models /
DSP-AX861SE / DSP-AX861) key while simulta-
neously pressing “STRAIGHT” and “AUDIO SELECT”
keys of the main unit. Then the DIAG function is acti-
vated. (Fig. 5)
9. Select the DIAG menu “24. TI BOOT ?”.
10. Press the “STRAIGHT” key of the main unit and start
writing.
 Loading...