7-38
Timing belt
0
1
2
3
4
5
6
7
8
9
10
A
Removing the timing belt
When the timing belt is not installed, do
not turn the crankshaft or driven sprock-
ets. Otherwise, the pistons and valves or
intake and exhaust valves could collide
with each other and be damaged.
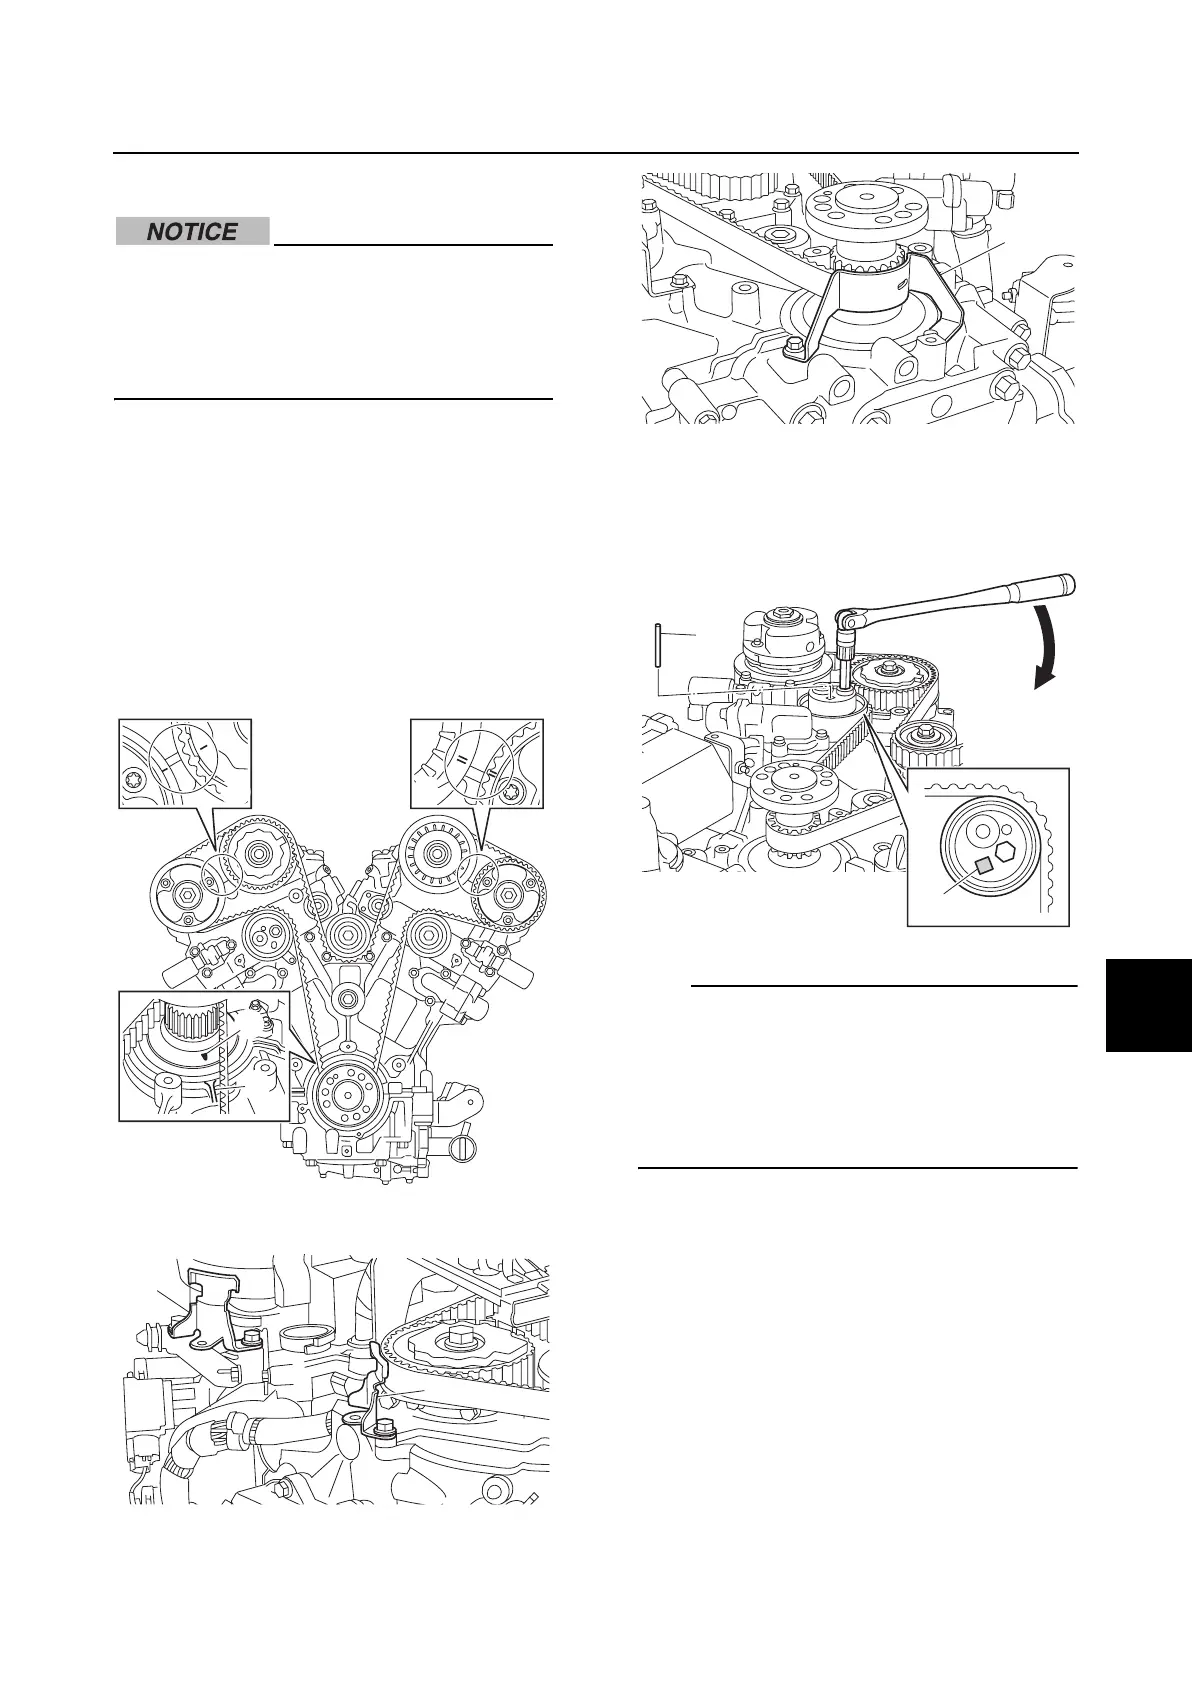
1. Align that the large “L” mark a on the
crankshaft with the rib b on the cylinder
block.
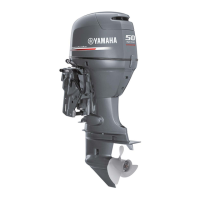
2. Check that the “II” marks c on the VCT
assembly (PORT) and driven sprocket
(PORT) are aligned, and check that the
“I” marks d on the VCT assembly
(STBD) and driven sprocket (STBD) are
aligned.
3. Remove the timing belt guides a and b.
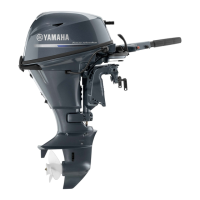
4. Turn the timing belt tensioner gradually
clockwise using a hexagon wrench, and
then insert a 5.0 mm (0.2 in) diameter pin
c into the hole e.
TIP:
• When turning the timing belt tensioner,
apply a force of 15 N·m (1.5 kgf·m, 11.1
ft·lb) or less.
• Leave the pin c inserted into the hole e of
the timing belt tensioner until the timing belt
is installed again.
5. Remove the timing belt d from the VCT
assembly (PORT) or driven sprocket
(STBD), and then remove it from the
crankshaft.
b
a
d
c
a
a
b
c
e