Do you have a question about the Yamaha F150B and is the answer not in the manual?
Particularly important information is distinguished in this manual by the following notations.
To prevent an accident or injury and to ensure quality service, follow the safety procedures provided.
The format of this manual has been designed to make service procedures clear and easy to understand.
Symbols in an exploded diagram or illustration indicate the grade of lubricant and the lubrication point.
Use the recommended special service tools to work safely, and to protect parts from damage.
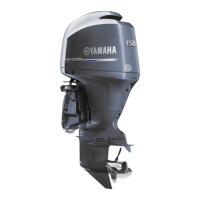
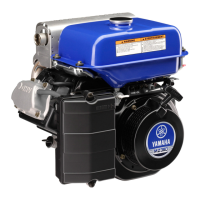
F150B and FL150B Overall Features; Light weight and compact, 4-stroke, L4, DOHC, 16-valve, 2670 cm3 engine.
Dimension and Weight, Performance, Power unit, Lower unit, Bracket unit, Fuel and oil requirement, Battery requirement, PTT requirement.
Ignition timing control system, Fuel injection control system, Engine speed control system, PTT system, Charging system, Starting system, Gauge / sensor.
Fuel system.
Power unit, Cylinder head assembly, Crankcase assembly.
Lower unit assembly (regular rotation model), Lower unit assembly (counter rotation model).
PTT system.
Fuel system, Power unit, Lower unit (regular rotation model), Lower unit (counter rotation model), Bracket unit, PTT unit.
This chart specifies tightening torques for standard fasteners with a standard ISO thread pitch.
Engine ECM component, Sensor, switch and actuator, Electronic fuel injection control system, Ignition timing control system, Engine speed control system, Idle speed control, Fail-safe control.
Outline of system.
The lubrication oil flow diagram is as follows.
The fresh cooling water is taken into the front of the trim tab and supplied to the exhaust passage.
The intake and exhaust air flow diagram.
Trim-up and tilt-up function, Trim ram retraction function, Trim-down and tilt-down function, Stationary condition, When the outboard hits something in the water.
Proper mounting of the outboard motor will mean better performance, maximum reliability, and maximum customer satisfaction.
Exterior, Clamp bracket.
The following pictographs are important signs to handle the crate.
Check for any shipping damage. Remove the top cover. Remove all bolts from the bottom plate.
Proper mounting of the outboard motor will mean better performance, maximum reliability, and maximum customer satisfaction.
Rigging grommet description, Installing the shift cable, Installing the throttle cable, Installing the isolator lead, Installing the gauge harness, Installing the water temperature sensor, Installing the 6Y8 Multifunction Meter harness, Install the speed sensor, Installing the water pressure sensor, Installing the main wiring harness, Installing the rigging grommet.
Install the fuel joints to the fuel flow sensor.
See 'Remote control box operation manual' or 'Rigging guide'.
Battery wiring without house (accessory) battery, Battery wiring with house (accessory) battery.
Single outboard motor application, Twin outboard motor application.
Extension length recommendation of battery cable.
Propeller size, Selection.
This manual contains the model-specific information. See 'YDIS Instruction Manual' for detailed information.
Troubleshooting procedure, Troubleshooting the power unit using the YDIS, Trouble code and checking step, Troubleshooting the power unit using the diagnostic flash indicator, Troubleshooting the power unit (trouble code not detected).
Troubleshooting the PTT unit.
Troubleshooting the lower unit.
Port view, Junction box assembly, Aft view, Bow view, Top view, Bottom cowling.
Port view, Junction box assembly, Aft view, Top view, Bottom cowling.
Circuit diagram.
ECM coupler layout.
Checking by use of YDIS, Measuring the peak voltage, Checking by use of the digital tester.
Checking the main relay, Checking the engine ECM circuit, Checking the TPS, Checking the ISC, Checking the oil pressure sensor, Checking the hour meter, Checking the water pressure sensor, Checking the speed sensor.
Checking the water detection switch, Checking the fuel injector, Checking the high-pressure fuel pump.
Checking the lighting coil (stator assembly).
Checking the Rectifier Regulator.
Checking the ignition spark, Checking the spark plug wire, Checking the ignition coil, Checking the pulser coil, Checking the air temperature sensor, Checking the air pressure sensor, Checking the engine temperature sensor, Checking the thermoswitch, Checking the shift cut switch, Checking the neutral switch, Checking the engine shut-off switch.
Checking the starter relay, Checking the engine start switch, Checking the neutral switch (remote control).
Removing the starter motor, Checking the starter motor operation, Checking the magnet switch, Checking the starter motor pinion, Disassembling the starter motor, Checking the starter motor, Checking the brush, Assembling the starter motor, Installing the starter motor.
Checking the PTT relay, Checking the PTT switch (on bottom cowling), Checking the trim sensor.
Fuel hose and blowby hose, Vapor gas hose, Cooling water hose.
Reducing the fuel pressure, Measuring the fuel pressure, Checking the pressure regulator.
Checking the canister, Installing the canister.
Checking the fuel pump, Disassembling the fuel pump, Checking the diaphragm and valve, Assembling the fuel pump, Checking the primer pump.
Checking the fuel filter assembly.
Intake silencer.
Checking the throttle link, Installing the throttle link, Adjusting the throttle link.
Checking the TPS, Adjusting the TPS, Installing the throttle body assembly, Adjusting the TPS (when disassembling or replacing the throttle body), Synchronizing the throttle valve.
Checking the compression pressure, Checking the oil pressure, Checking the valve clearance, Adjusting the valve clearance.
Removing the flywheel magnet, Installing the flywheel magnet.
Removing the wiring harness, Installing the wiring harness.
Starter motor.
Fuse box.
Junction box.
Replacing the timing belt.
Removing the power unit, Installing the power unit.
Removing the timing belt, driven sprocket, and camshaft, Checking the timing belt and sprocket, Checking the camshaft, Installing the timing belt, driven sprocket, and camshaft.
Removing the exhaust cover, Checking the exhaust cover anode, Checking the PCV, Installing the PCV, Installing the exhaust cover.
Removing the lower unit.
Removing the water pump and shift rod, Disassembling the water pump housing, Checking the water pump and shift rod, Assembling the water pump housing.
Removing the propeller shaft housing assembly, Disassembling the propeller shaft assembly, Disassembling the propeller shaft housing assembly, Checking the propeller shaft housing, Checking the propeller shaft, Assembling the propeller shaft assembly, Assembling the propeller shaft housing assembly.
Removing the drive shaft, Disassembling the drive shaft housing, Disassembling the forward gear, Disassembling the lower case, Checking the pinion and forward gear, Checking the drive shaft, Checking the lower case, Assembling the lower case, Assembling the forward gear, Assembling the drive shaft housing, Installing the drive shaft, Installing the propeller shaft housing assembly, Installing the shift rod, Installing the water pump, Checking the lower unit for air leakage, Installing the lower unit.
Shimming workflow, Shimming check sheet, Measuring the forward and reverse gear backlash before disassembly, Shimming, Shim location, Selecting the pinion shim (T3), Pinion shim (T3) selection table, Selecting the propeller shaft shim (T4), Propeller shaft shim (T4) selection table, Measuring the forward gear backlash, Adjusting the forward gear shim thickness (T1), Forward gear shim (T1) selection chart, Measuring the reverse gear backlash, Adjusting the reverse gear shim thickness (T2), Reverse gear shim (T2) selection chart.
Shimming workflow, Shimming check sheet, Measuring the forward and reverse gear backlash before disassembly, Shimming, Shim location, Selecting the pinion shim (T3), Pinion shim (T3) selection table, Selecting the propeller shaft shim (T4), Propeller shaft shim (T4) selection table, Measuring the forward gear backlash, Adjusting the forward gear shim thickness (T2), Forward gear shim (T2) selection chart, Measuring the reverse gear backlash, Adjusting the reverse gear shim thickness (T1), Reverse gear shim (T1) selection chart.
Removing the shift rod and shift bracket, Disassembling the shift bracket, Assembling the shift bracket, Installing the shift rod and shift bracket.
Removing the PTT switch, Removing the cowling lock lever, Removing the flushing hose, Installing the flushing hose, Installing the cowling lock lever, Installing the PTT switch.
Bottom cowling.
Removing the upper case, Installing the upper case.
Disassembling the upper case, Checking the drive shaft bushing, Assembling the upper case.
Disassembling the oil pan and exhaust manifold, Checking the oil pan and exhaust manifold, Checking the oil strainer, Assembling the oil pan and exhaust manifold.
Removing the steering arm, Installing the steering arm.
Removing the clamp bracket, Installing the clamp bracket, Adjusting the trim sensor cam.
Removing the PTT unit, Checking the hydraulic pressure, Bleeding the PTT unit, Installing the PTT unit.
Removing the reservoir, Removing the PTT motor, Disassembling the PTT motor, Checking the PTT motor, Checking the brush, Assembling the PTT motor, Installing the reservoir, Installing the PTT motor.
Disassembling the gear pump assembly, Checking the gear pump, Assembling the gear pump assembly.
Removing the tilt ram and trim ram, Disassembling the tilt ram, Checking the tilt cylinder and trim cylinder, Checking the valve, Assembling the tilt ram, Assembling the trim ram, Installing the trim ram, Installing the tilt ram.
To ensure long product life, Yamaha strongly recommends the specified periodic check and maintenance.
Checking the battery, Checking the cooling water pilot hole, Checking the engine oil level, Checking the engine start switch and engine shut-off switch, Checking the fuel system, Checking the gear oil level, Checking the gear shift and throttle operation, Checking the outboard motor mounting height, Checking the PTT system, Checking the remote control cables, Checking the steering system, Test run, Break-in, After test run.
Checking the anode, Checking the battery, Checking the cooling water passage, Checking the engine idle speed, Checking the engine oil level, Changing the engine oil, Replacing the oil filter, Checking the engine start switch and engine shut-off switch, Checking the fuel joint and fuel hoses, Checking the fuel filter, Checking the gear oil level, Changing the gear oil, Checking the gear shift operation, Lubricating the outboard motor, Checking the PCV, Checking the PTT fluid level, Checking the PTT operation, Checking the propeller, Checking the spark plug, Checking the timing belt.
Replacing the timing belt.
Checking the thermostat.
Adjusting the throttle link and throttle cable.
Checking the top cowling.
Checking the valve clearance.
Checking the water pump.
Wiring diagram.
Composition of the wiring diagrams.
Fuel unit.
Ignition unit.
Charging unit and starting unit.
| Compression Ratio | 10.3:1 |
|---|---|
| Operating Range | 5000 - 6000 RPM |
| Lubrication System | Wet Sump |
| Starting System | Electric |
| Exhaust | Through Propeller |
| Engine Type | 4-stroke, DOHC, 16-valve |
| Fuel Induction System | Electronic Fuel Injection |
| Max. Power Output | 150 hp |
| Ignition System | TCI |
| Shaft Length | L: 508 mm (20") |
| Emissions Compliance | EPA and CARB |