7-18
Timing belt
0
1
2
3
4
5
6
7
8
9
10
A
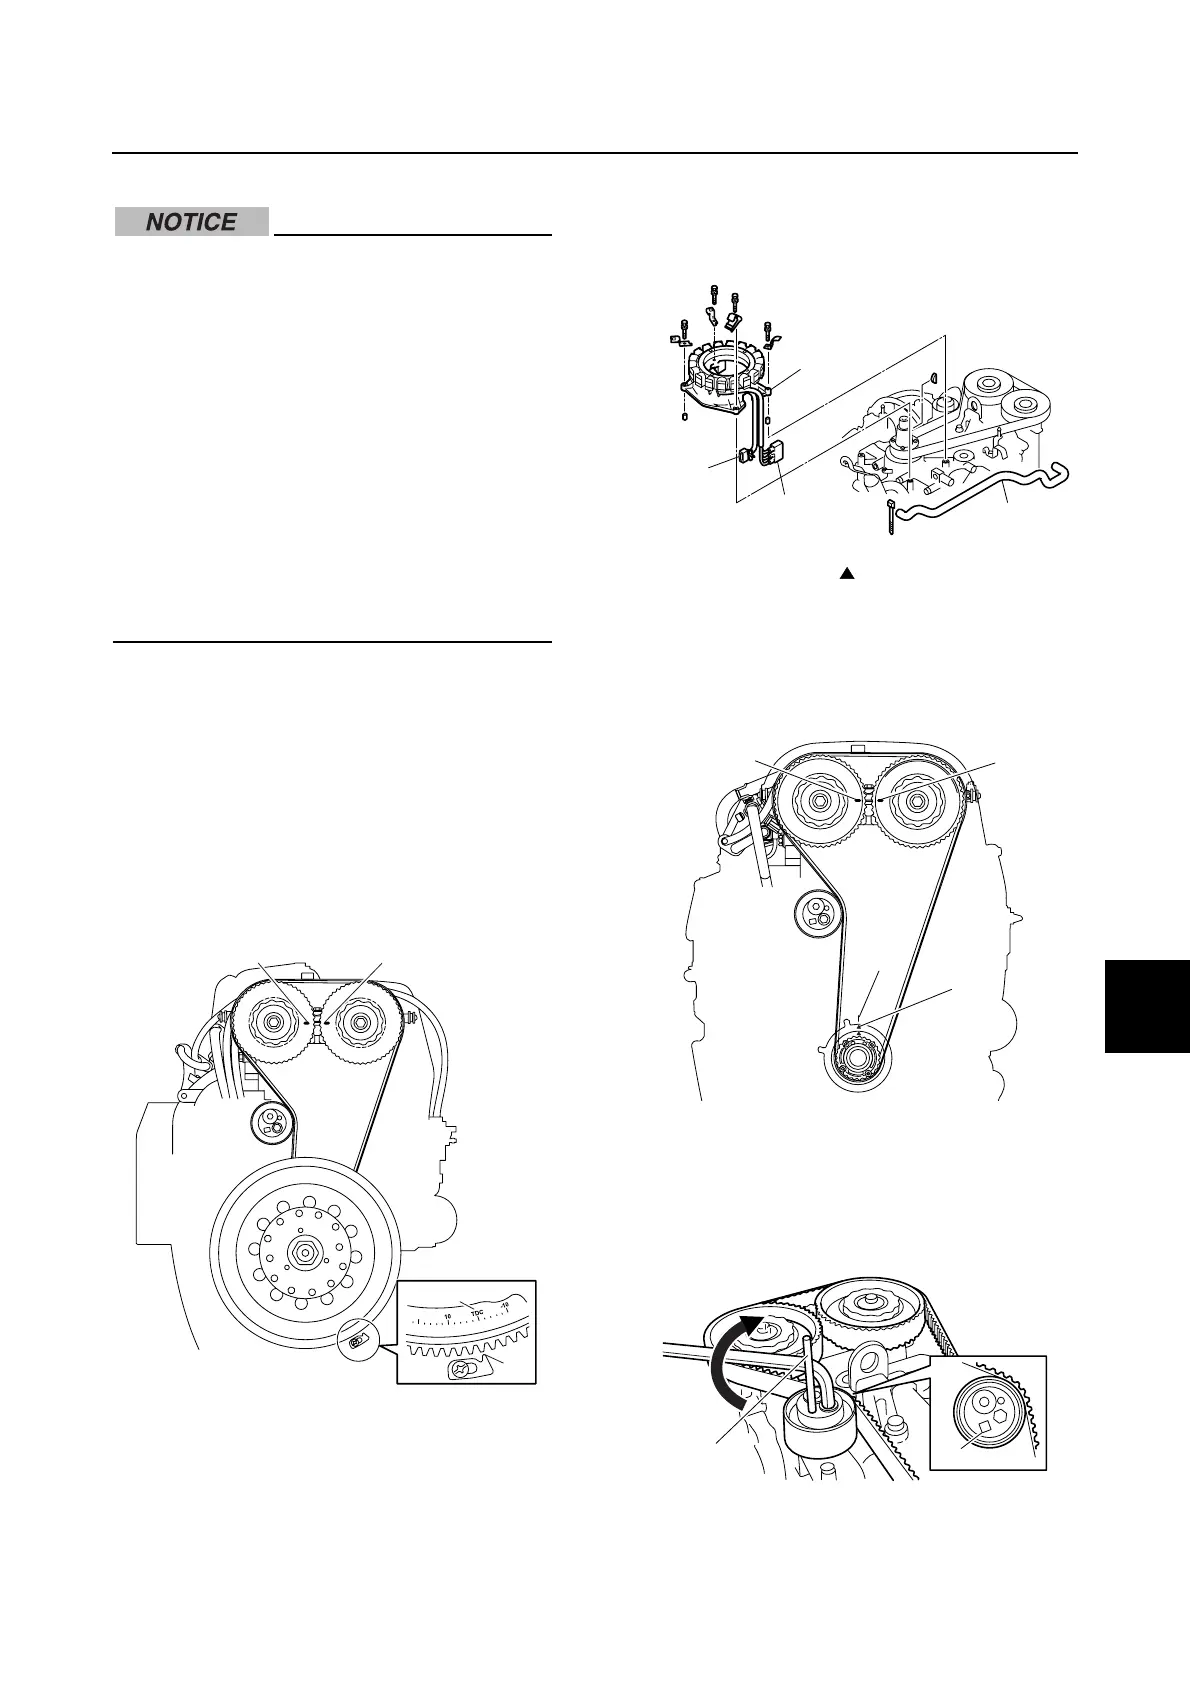
Replacing the timing belt
• Do not turn the flywheel magnet coun-
terclockwise, otherwise the water pump
impeller may be damaged.
• Do not turn the flywheel magnet or the
driven sprockets when the timing belt is
not installed. Otherwise the pistons and
valves or intake and exhaust valves will
collide with each other and be damaged.
• Do not twist, turn inside out, or bend the
timing belt beyond the maximum limit of
25.0 mm (1.0 in) otherwise it can be
damaged.
• Do not get oil or grease on the timing
belt.
1. Reduce the fuel pressure. See “Reducing
the fuel pressure” (6-4).
2. Remove the flywheel magnet cover.
3. Turn the flywheel magnet clockwise and
align the “TDC” mark a on the flywheel
magnet with the pointer b, and check
that “I” marks c and d on the driven
sprockets are aligned.
4. Remove the flywheel magnet and
Woodruff key. See “Removing the
flywheel magnet” (7-6).
5. Disconnect the stator assembly coupler
e and pulser coil coupler f, and then
remove the blowby hose a and stator
assembly (lighting coil) b.
6. Check that the “ ” mark g on the drive
sprocket and the “I” mark h on the
cylinder block are aligned.
7. Check that the “I” marks c and d on the
driven sprockets are aligned.
8. Turn the timing belt tensioner gradually
clockwise using a hexagon wrench, and
then insert a ø5.0 mm (0.2 in) pin c into
the hole k.
a
b
c
d
e
f
a
b
c
d
g
h
c
k