7-19
Power unit
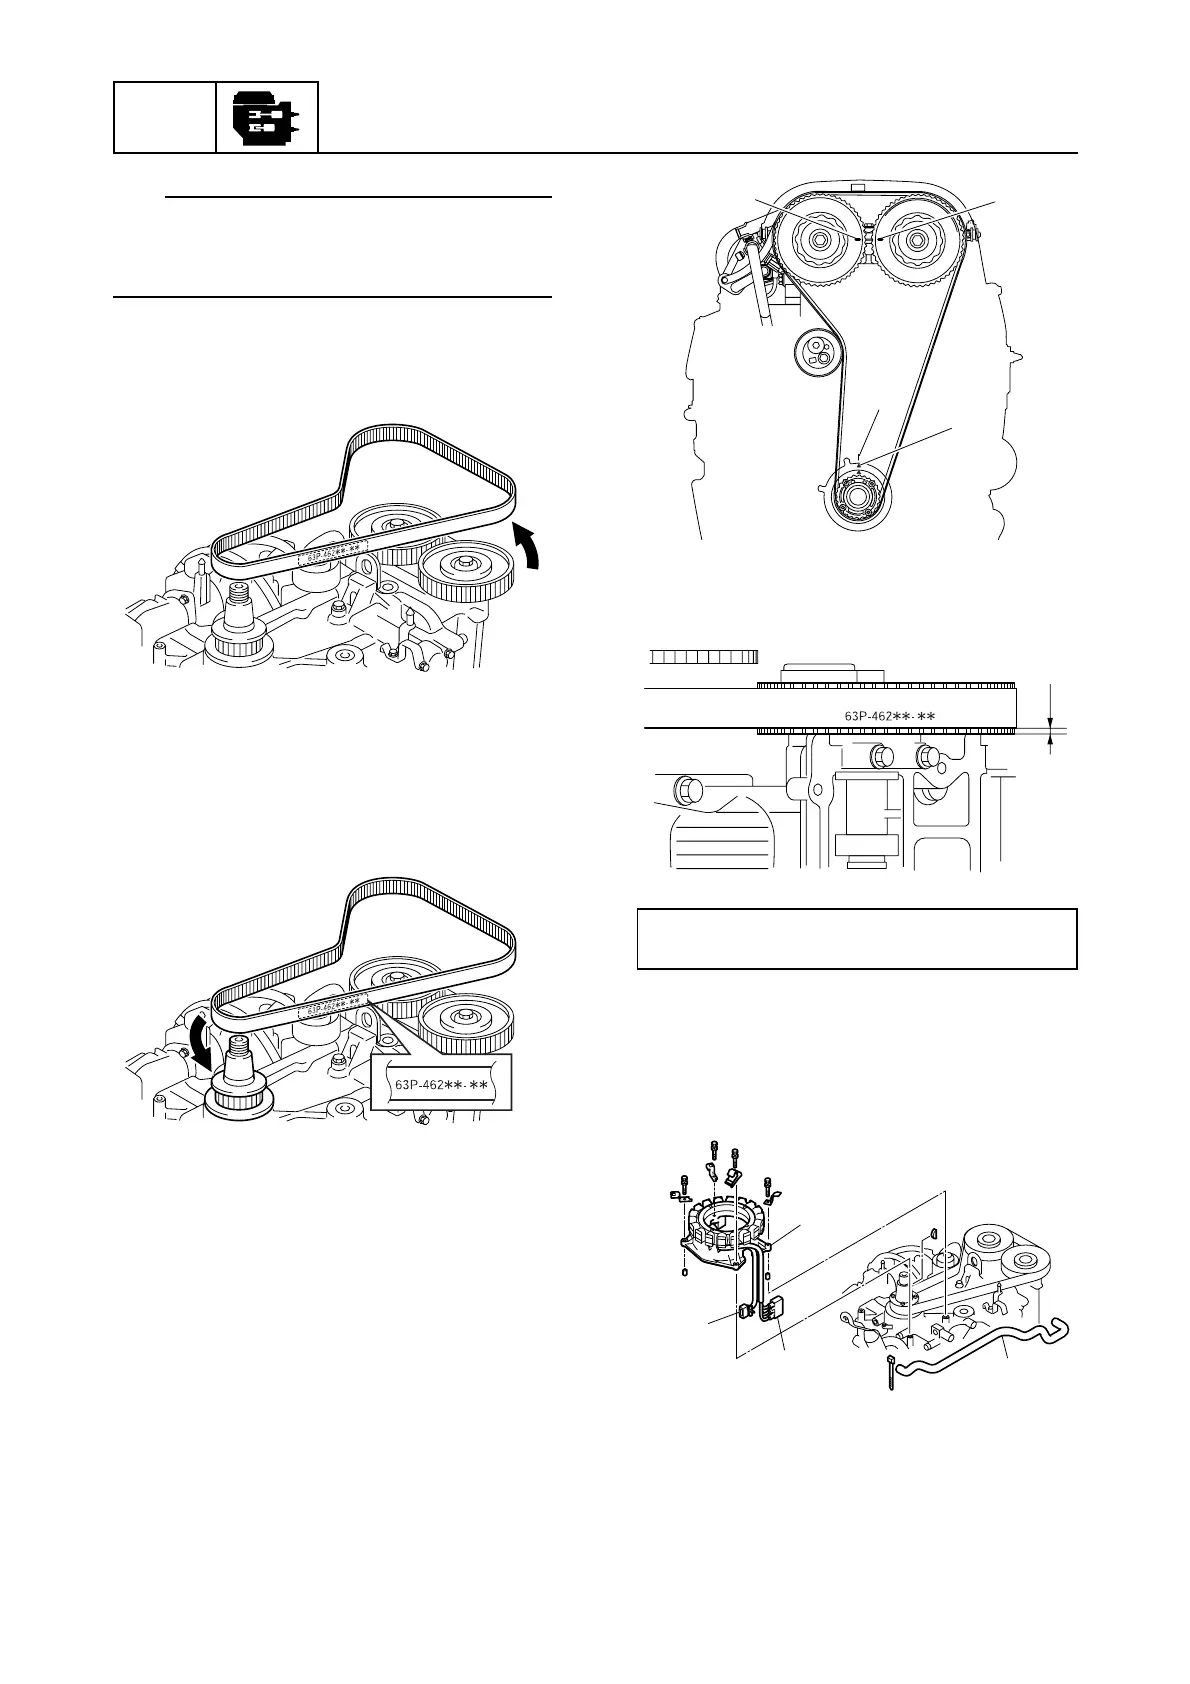
POWR
TIP:
Leave the pin inserted into the hole k of the
timing belt tensioner until the timing belt is
installed again.
9. Remove the timing belt from the driven
sprockets, and then from the drive
sprocket.
10. Install the new timing belt with its part
number in the upright position, from the
drive sprocket side to the port side driven
sprocket and the starboard driven
sprocket, in the counterclockwise
direction.
11. Turn the drive sprocket clockwise 2 full
turns, and then check that alignment
marks c and d, g and h are aligned.
12. Adjust the timing belt to the specified
installation height m.
13. Install the stator assembly (lighting coil)
b and blowby hose a, and then connect
the pulser coil coupler f and stator
assembly coupler e. See exploded
diagram (7-5).
14. Install the Woodruff key and flywheel
magnet. See “Installing the flywheel
magnet” (7-6).
15. Install the flywheel magnet cover.
Timing belt installation height m:
2.0mm (0.08in)
c
d
g
h
m
e
f
a
b