7-34
Exhaust cover
0
1
2
3
4
5
6
7
8
9
10
A
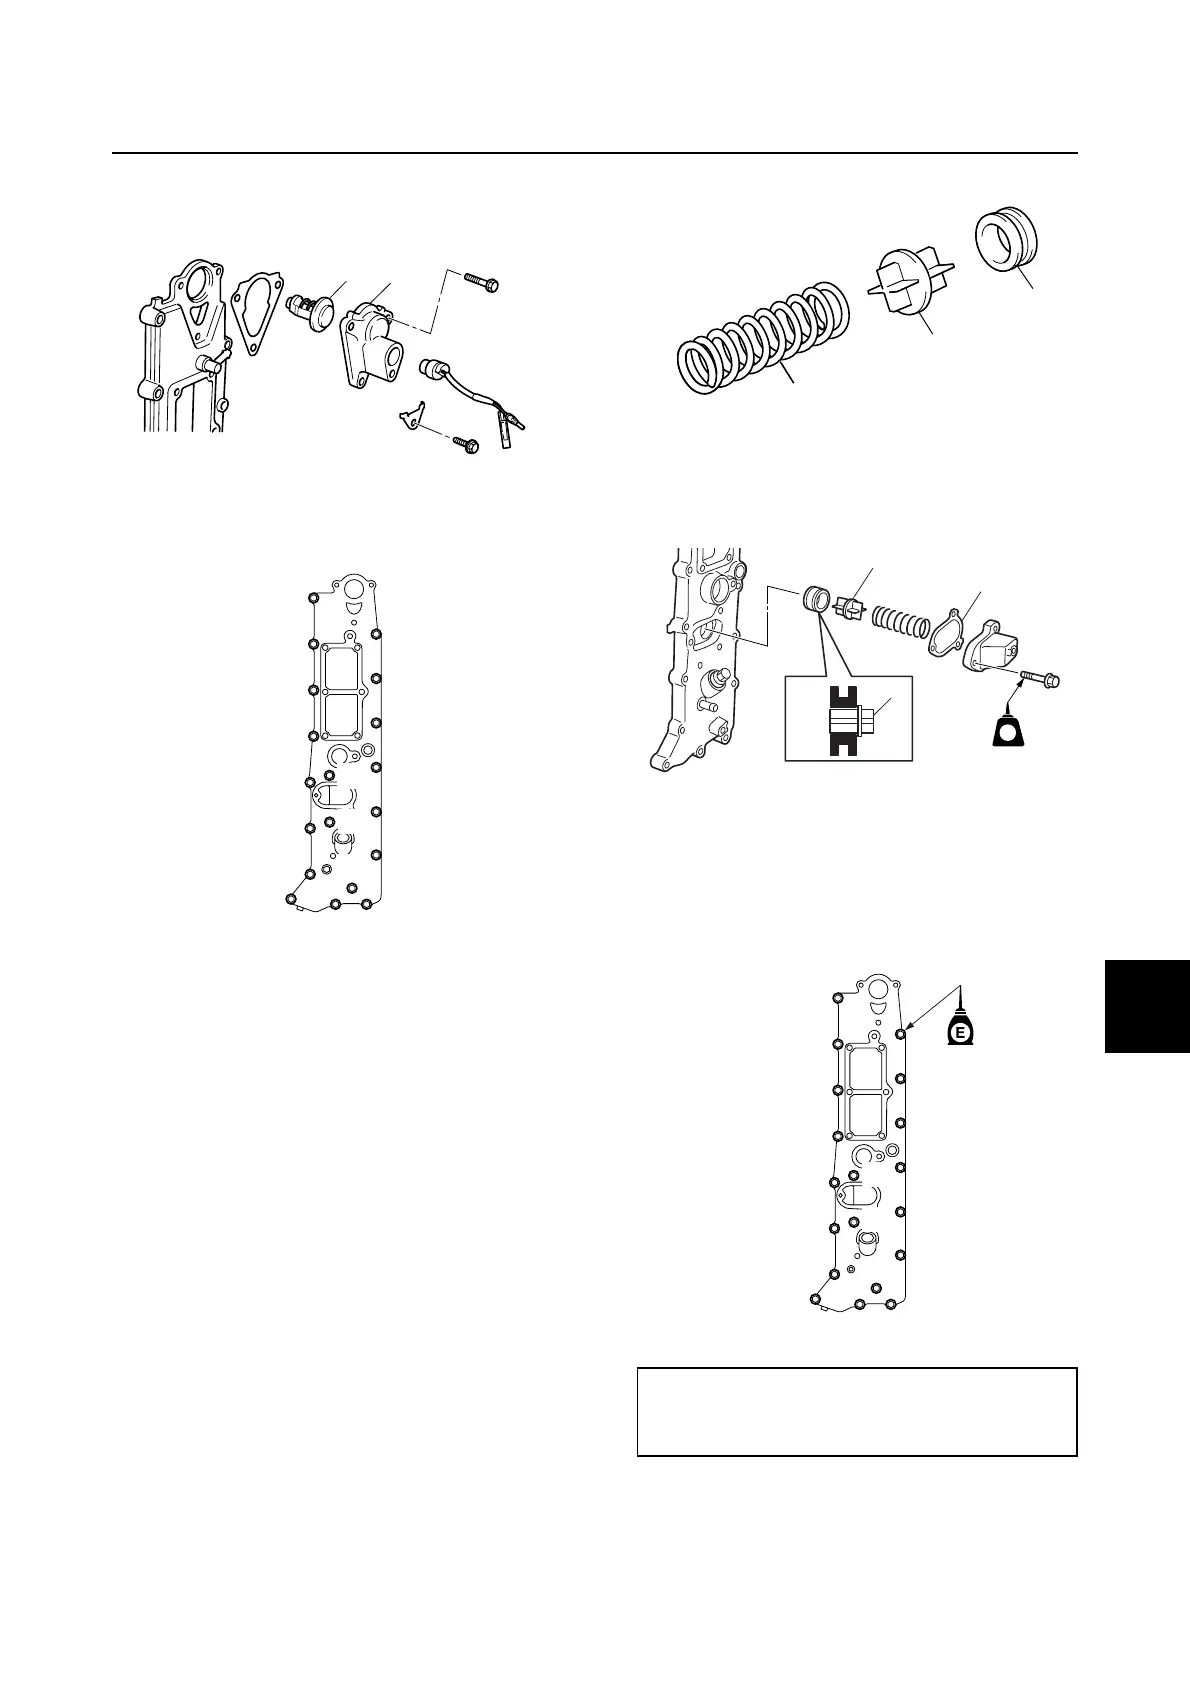
Removing the exhaust cover
1. Remove the cover a and thermostat b.
2. Remove the exhaust cover bolts in the
sequence numbers (a, b, ···).
Checking the exhaust cover anode
1. Check the anodes. Clean if there are
scales, grease, or oil. NOTICE: Do not
oil, grease, or paint the anodes, other-
wise they will be ineffective.
2. Replace the anodes if excessively
eroded.
Checking the PCV
1. Remove the PCV a.
2. Check the PCV a for wear or damage.
Replace if necessary.
3. Check the grommet b for deformation.
Replace if necessary.
4. Check the spring c for fatigue or
deformation. Replace if necessary.
Installing the PCV
Install a new gasket a and the PCV b, and
then tighten the bolts.
Installing the exhaust cover
1. Install a new gasket and the exhaust
cover, and then tighten the bolts to the
specified torques in 2 stages and in the
sequence numbers (a, b, ···).
2. Install a new gasket a, thermostat b,
cover c, and then tighten the bolts d to
the specified torques in 2 stages.
a
b
a
b
cd
e
f
g
h
i
j
k
l
m
n
o
p
q
r
s
Exhaust cover bolt:
1st: 6 N·m (0.6 kgf·m, 4.4 ft·lb)
2nd: 12 N·m (1.2 kgf·m, 8.9 ft·lb)
a
b
c
LT
572
LT
a
b
b
a
b
c
d
e
f
g
h
i
j
k
l
m
n
o
pq
r
s
 Loading...